Stable Diffusion tutorial: Creating an animated avatar of yourself with Stable Diffusion
Have you ever wondered how an animated version of yourself might look? With Stable Diffusion, you don’t need to wonder anymore, instead you can create a Disney Pixar style avatar of yourself using some simple text input. If you are new to Stable Diffusion have a look at this tutorial and explanation here
In this tutorial we are going to walk you through the steps to create a Pixar style animated avatar of yourself.
Getting started with Stable Diffusion
Before we start there are a few basic requirements; which we will list below:
- Nvidia GPU with at least 4GB of VRAM
- Stable Diffusion Web UI – Download from Github
- Stable Diffusion 1.5 checkpoint file
- A portrait of yourself or any other image to use
Setting up the environment
Below are the steps to setup your local environment for the project:
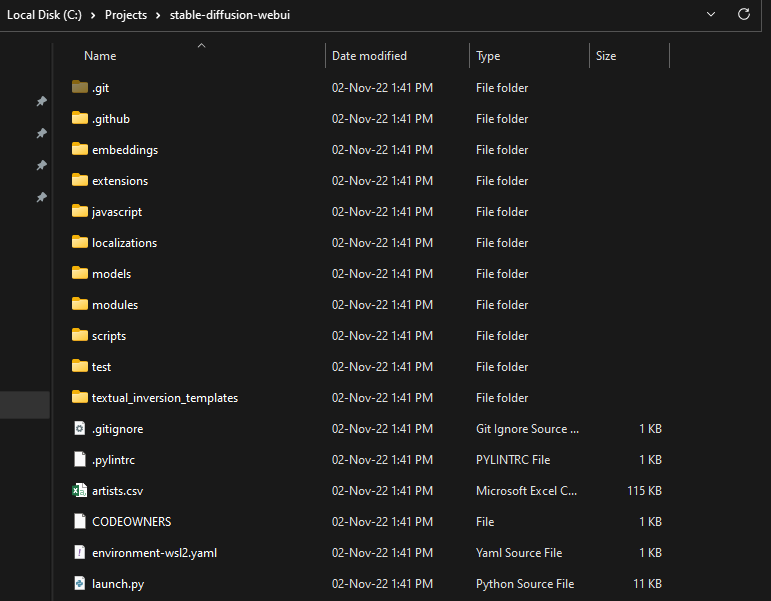
Step 1: Extract Stable Diffusion Project
The Stable Diffusion Web UI project should be downloaded to your local disk. You can either clone the Github repository, or download the project as a ZIP file and unzip that into a folder on your local disk. Your file and folder list should like the image below:
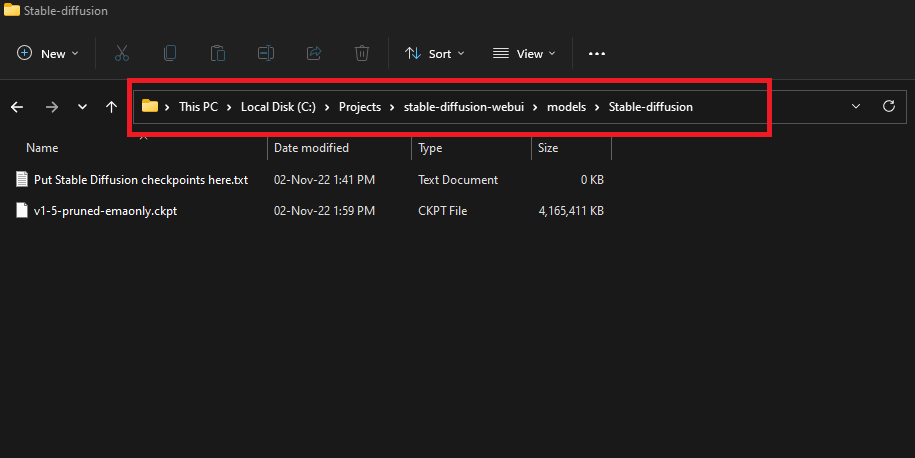
Step 2: Stable Diffusion Checkpoint file
Next, we have to move the stable diffusion checkpioint file, which we downloaded from Hugging face into the models\stable-diffusion folder:
Once the file is copied into the models\stable-diffusion folder you must rename it to model.chkpt, as shown in the screenshots below:

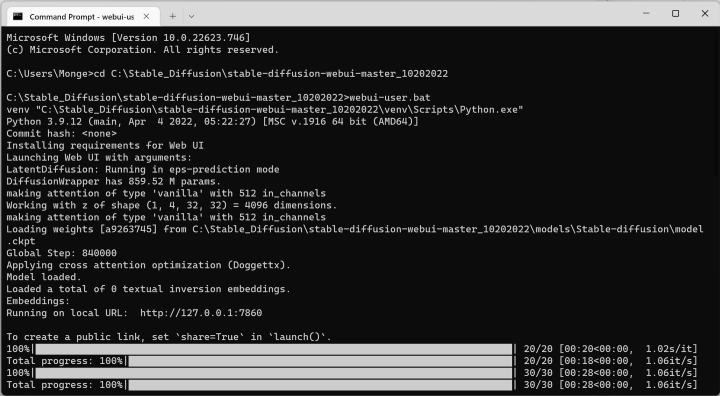
Step 3: Running the WebUI
Now that we’ve completed the steps above, we are ready to launch the stable diffusion Web UI. We can do this by running the “webui-user.bat” in the stable diffusion project folder, as shown in the image below:

But, before we can do that we have to modify the “webui-user.bat” file to reference our local Python installation. You can edit the “webui-user.bat” file with an editor of your choice, Notepad will also work. The contents of the “webui-user.bat” will look similar to the lines below;
@echo off

set PYTHON="C:\Users\LENOVO\AppData\Local\Programs\Python\Python311\python.exe"
set GIT=
set VENV_DIR=
set COMMANDLINE_ARGS=

call webui.bat
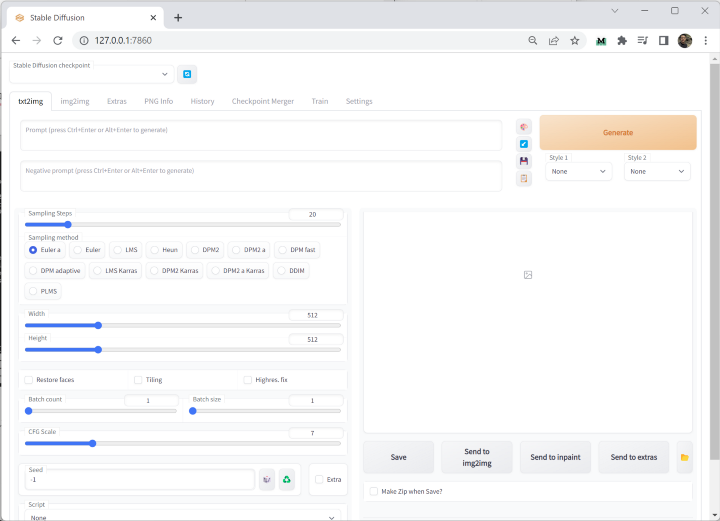
Now that we are all set up with the “webui-user.bat” file we can double-click the file to run it!
Open your Chrome browser and navigate to the following URL http://127.0.0.1:7860 which will launch the Gradio UI. The screen will look something like the image below;
Next we can start playing around with the image-to-image generations.
Step 4: Generating the image
Under the “img2img” tab, drag and drop a photo of your choice, and adjust the settings that will suit your PC hardware. If you have a good graphics card, like an NVidia RTX3060 with sufficient VRAM, you can push the resolution higher, up to at least 1024x1024.
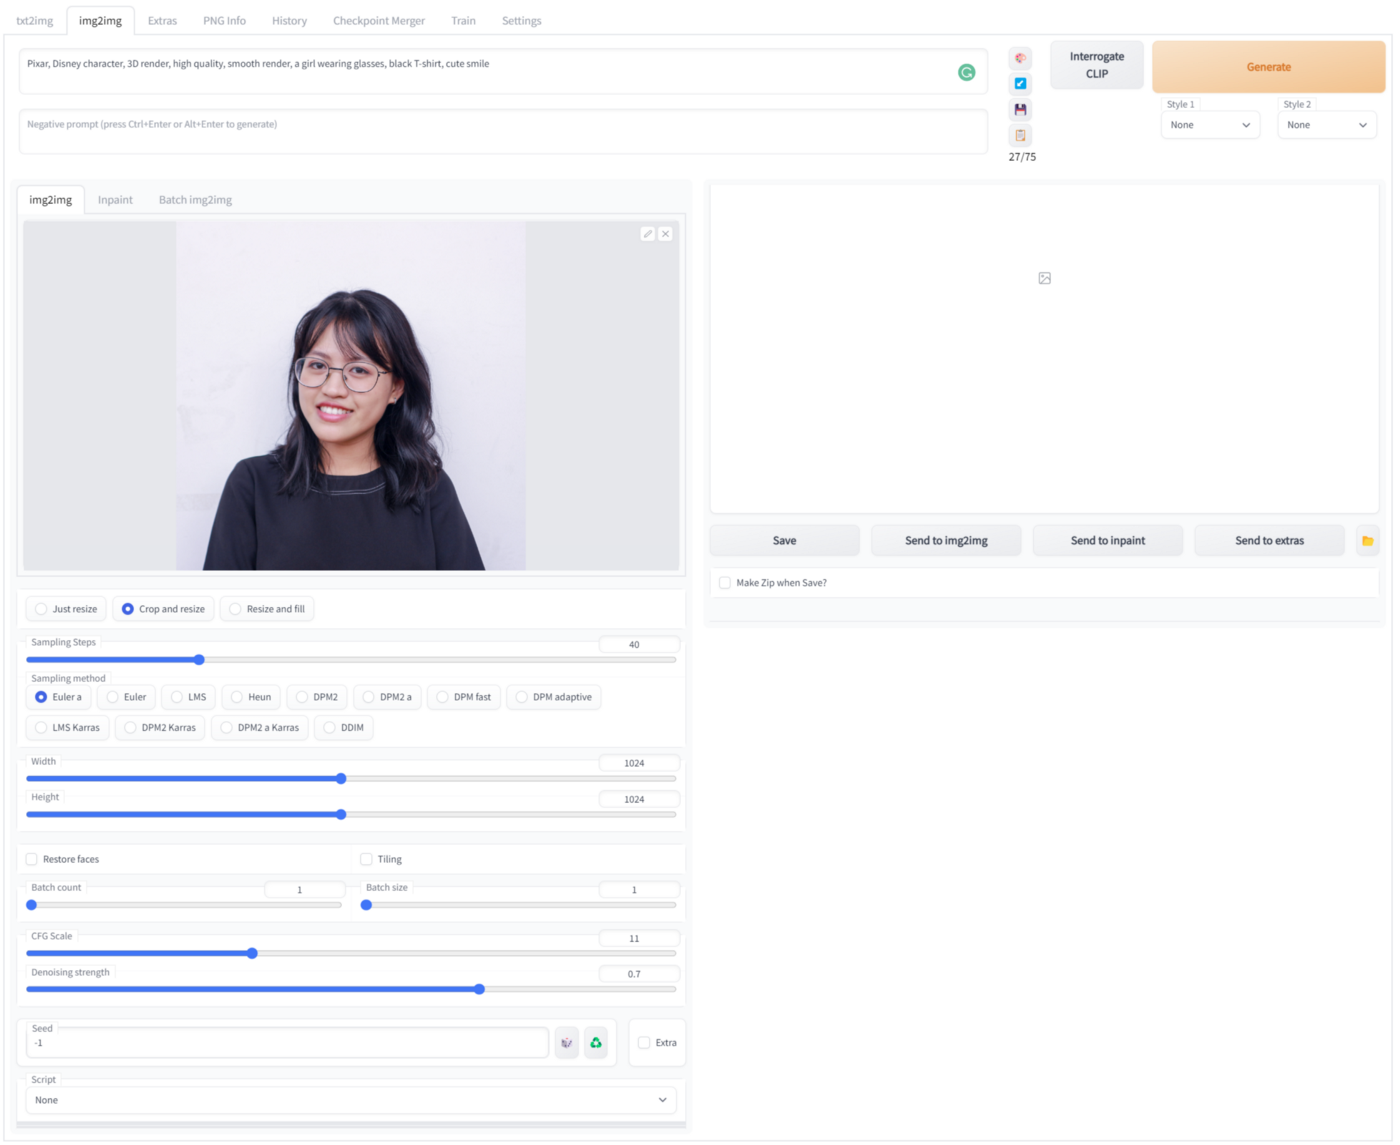
If you are using a picture of yourself, you can try the following text input prompt;
Pixar, Disney character, 3D render, high quality, smooth render, a girl wearing glasses, black T-shirt, cute smile
Also, remember that the CFG (Classifier Free Guidance) scale and Denoising strength have a significant effect on the final results. Here are a few tips for adjusting the settings to improve the results:
- Increasing the Denoising value creates a result that looks less like your original image
- The higher the CFG scale, the stricter the Stable Diffusion is instructed to follow the instructions of your prompt, although it does lead to a few anomalies.
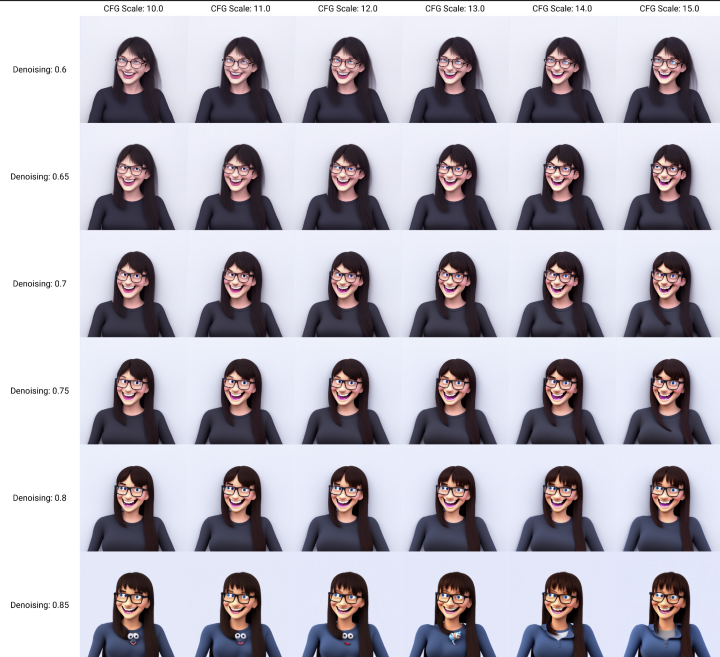
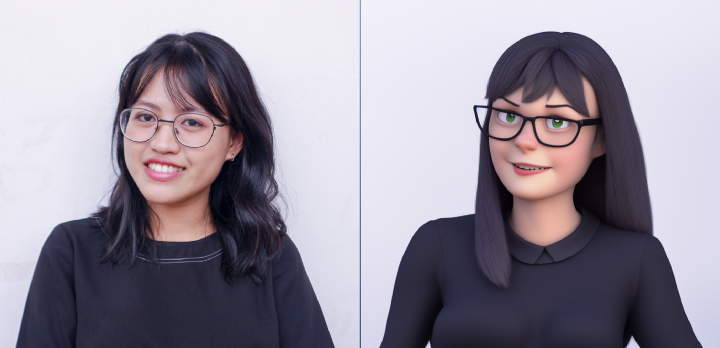
For this example, I discovered that the most appropriate value for Denoise strength parameter to be 0.7 and the CFG scale of 11.0. The image below is the final result compared to the original photo.
And that all there is to creating a Disney Pixar styled avatar of yourself, using Stable Diffusion! I encourage you to play around with the settings and use different reference images to see what results you end up with.
I hope you have as much fun creating new and creative images as I did! To learn more about Stable Diffusion and other advanced AI models, take a look at the other great tutorials on offer at Lablab.ai. You can also reach out to the growing Lablab.ai community on the Discord channel to meet and interact with likeminded individuals https://discord.gg/lablab-ai-877056448956346408.
Subscribe to the Nextgrid YouTube channel, where you will find helpful information about upcoming and past AI Hackathons and some interviews with some of the industry leading experts in AI. I hope that you have enjoyed reading and working through this tutorial!
I used the following references for making this tutorial:
- https://medium.com/mlearning-ai/how-to-turn-yourself-into-pixar-character-using-stable-diffusion-ai-e0c010c2a631
- https://medium.com/codex/stable-diffusion-finally-released-to-the-public-db1aa417d85b
- https://huggingface.co/runwayml/stable-diffusion-v1-5
Full stack Developer and Chief Technology Officer at tutti.Ai. Also Co-founder and CEO at DeFi Ai www.defiai.app