Stable Diffusion tutorial: Prototyping with the Stable Diffusion Web UI
What is Stable Diffusion?
Welcome to this Stable Diffusion how to use the tool tutorial. Stable Diffusion is a deep learning, text-to-image diffusion model released in 2022.
It is primarily used to generate images with text descriptions, though it can also be applied to other tasks such as inpainting, outpainting, and generating image-to-image translations guided by a text prompt.
How to use Stable Diffusion Web UI locally?
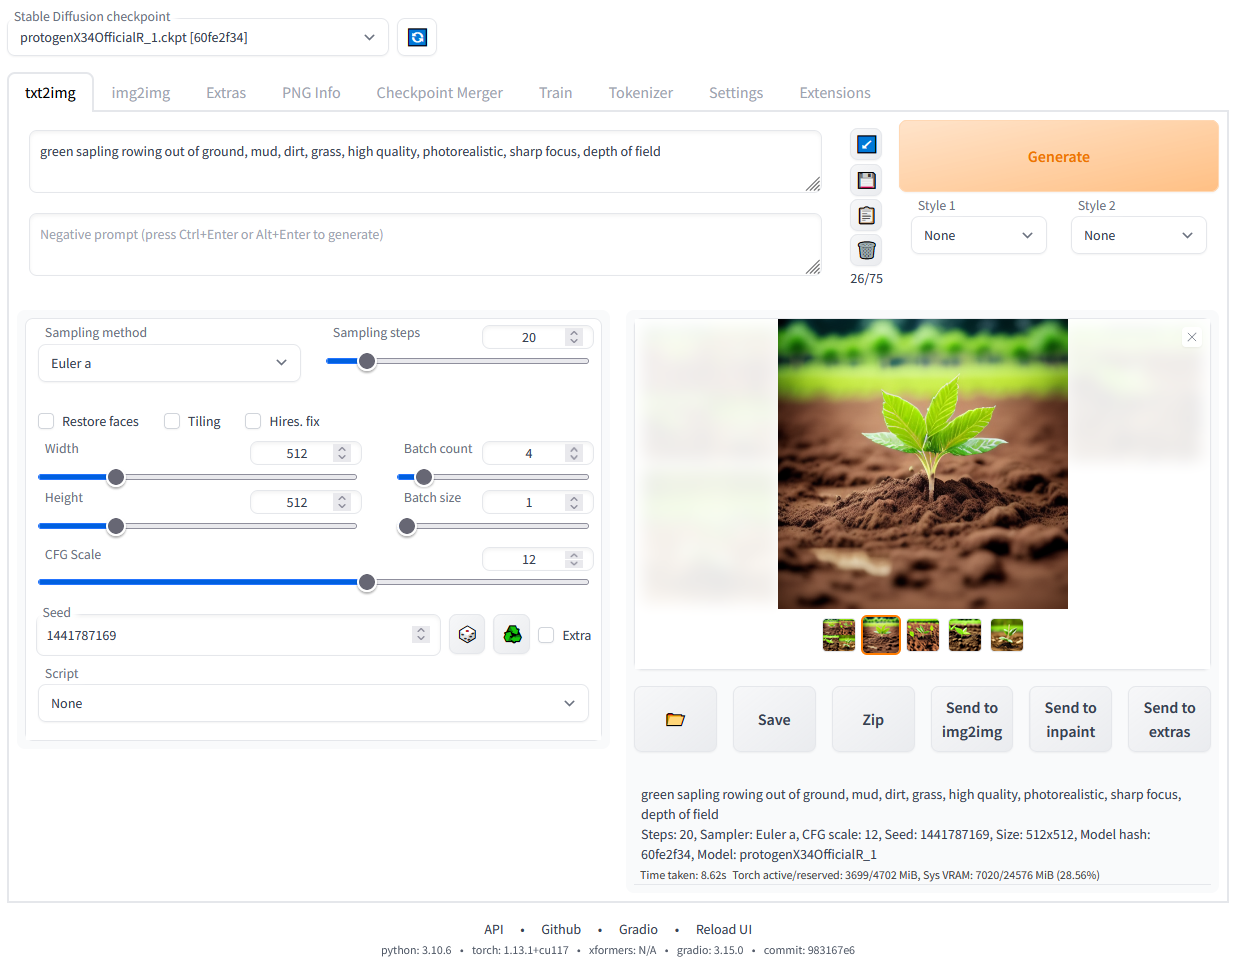
The GitHub user AUTOMATIC1111 has created a Stable Diffusion Web Interface you can use to test the model locally. This will help you with testing and validating ideas. It is based on Gradio, a Python library for building UI components.
Features of the Web Interface
- Original txt2img and img2img modes
- One click install and run script (but you still must install python and git)
- Outpainting
- Inpainting
- Color Sketch
- Prompt Matrix
- Stable Diffusion Upscale
- Attention, specify parts of text that the model should pay more attention to
- Extras tab with:
- GFPGAN, neural network that fixes faces
- CodeFormer, face restoration tool as an alternative to GFPGAN
- RealESRGAN, neural network upscaler
- ESRGAN, neural network upscaler with a lot of third party models
- SwinIR and Swin2SR(see here), neural network upscalers
- LDSR, Latent diffusion super resolution upscaling
- Resizing aspect ratio options
- Random artist button
- Styles, a way to save part of prompt and easily apply them via dropdown later
- Variations, a way to generate same image but with tiny differences
and much much more...
How to use the Web Interface?
Windows
- Install Python 3.10.6, checking "Add Python to PATH"
- Install git.
- Download the stable-diffusion-webui repository, for example by running
git clone https://github.com/AUTOMATIC1111/stable-diffusion-webui.git. - Place
model.ckptin themodelsdirectory (see dependencies for where to get it). - (Optional) Place
GFPGANv1.4.pthin the base directory, alongsidewebui.py(see dependencies for where to get it). - Run
webui-user.batfrom Windows Explorer as normal, non-administrator, user.
Linux
- Install the dependencies:
# Debian-based:
sudo apt install wget git python3 python3-venv
# Red Hat-based:
sudo dnf install wget git python3
# Arch-based:
sudo pacman -S wget git python3
- To install in
/home/$(whoami)/stable-diffusion-webui/, run:
bash <(wget -qO- https://raw.githubusercontent.com/AUTOMATIC1111/stable-diffusion-webui/master/webui.sh)
Apple Silicon
Find the instructions here.
If you want to check out the GitHub repository, you can find it here
To get the best result with Stable Diffusion prompts, you should read our stable diffusion prompt guide here. And maybe you want to create a Stable Diffusion based tool of your own? Then, join our Stable Diffusion AI Hackathon!
Thank you! If you enjoyed this tutorial you can find more and continue reading on our tutorial page - Fabian Stehle, Data Science Intern at New Native

Dev from Germany 🚀