Stable Diffusion tutorial: How to build a Generation Gallery App with Chroma's Semantic Search Capabilities
What is Stable Diffusion?
In recent years, a significant breakthrough in the realm of Artificial Intelligence has reshaped the landscape of digital art: AI-generated images. Since this development, various image generation technologies have emerged, captivating audiences and making headlines globally. Among these pioneering technologies, one open-source image generation model stands out - "Stable Diffusion."
Stable Diffusion quickly gained traction due to its impressive capabilities and openness, inspiring a new generation of models. With its ability to generate a wide variety of styles from short, human-readable prompts, Stable Diffusion has significantly lowered the barriers to creating AI art.
But what sets Stable Diffusion apart? It offers unique features like "inpainting" and "outpainting." Inpainting allows users to edit within the image, enabling precise alterations and adjustments. Outpainting, on the other hand, empowers users to extend the image beyond its original boundaries, perfect for creating panoramic views or expansive scenes. Stable Diffusion also supports "image-to-image prompting," a feature that lets users create a new image based on a sourced image. It’s like having a conversation with your AI, where the source image is your prompt, and the AI responds with a completely new image.
What is Chroma and Embeddings?
Let's start with an exciting piece of technology called Chroma. Chroma is an open-source database designed specifically for handling embeddings - a type of data representation widely used in the realm of AI, and especially in the context of Large Language Models (LLMs). An LLM is an AI model that understands and generates human-like text based on the input it receives.
Chroma is like a playground for these AI models. It facilitates the development of AI applications by providing a platform for storing, querying, and analyzing media embeddings. Media could range from text to images, and in future releases, audio and video.
In Chroma, each piece of media (a text document, an image, etc.) is transformed into a mathematical representation known as an embedding. Chroma can store these embeddings along with their associated metadata, essentially turning media into a format that AI models can readily understand and interact with. By storing the embeddings, Chroma lets you easily find similar media items, analyze your media collection, and much more.
So, what are embeddings? In the simplest terms, embeddings are a way of converting words or images into numbers, specifically vectors in a multi-dimensional space. The beauty of this technique is that "similar" items are placed close together in this space. For example, in word embeddings, words with similar meanings have similar embeddings. And yes, it's not limited to just words! You can have embeddings for sentences, paragraphs, documents, or even images.
For instance, in the context of image embeddings, similar images (like pictures of cats) would have similar embeddings and therefore be close together in the multi-dimensional embedding space. This characteristic makes embeddings a powerful tool for tasks like image recognition or recommendation systems. Now, imagine coupling this power with the image generation capabilities of Stable Diffusion - the possibilities are endless!
What is Flask HTTP framework?
In the rapidly evolving landscape of web development, one framework that consistently stands out is Flask. This Python-based web framework is known far and wide for its simplicity and lightness, yet its power and flexibility make it a top choice for seasoned developers as well as beginners.
Flask is celebrated for its minimalist, pragmatic approach. It doesn't dictate which libraries or patterns you should use, instead providing a lean framework that allows you to freely choose what fits your project best. This openness doesn't mean it's lacking in functionality, though. In fact, Flask comes with a rich set of features right out of the box.
For example, Flask supports routing to elegantly handle URLs, empowering you to guide your users through your site. It also offers templates that make it easy to create dynamic HTML pages, breathing life into your web application. Plus, with its support for cookies and sessions, Flask has got you covered when it comes to storing user data.
What's truly amazing is how Flask combines all these powerful features with such a straightforward and clean design. It's not an overstatement to say that with just a basic understanding of Python, you can quickly have a Flask web server up and running. It's this combination of power, flexibility, and ease-of-use that makes Flask a standout choice in the world of web development frameworks.
Prerequisites
- Basic knowledge of Python and Flask
- Access to Stability.ai API
- A Chroma database set up
Outline
- Initializing the Project
- Setting Up the Required Libraries
- Write the main File
- Testing the Basic Chatbot
- Setting Up Chroma Database
- Testing the Enhanced Chatbot
Discussion
Initializing the Project
Let's dive into the code! Our first step is to set up our project directory, which we'll name chroma-sd. Open your favorite terminal and navigate to your projects directory. Then, create and move into the project directory with the following commands:
# Create the project directory
mkdir chroma-sd

# Navigate into the project directory
cd chroma-sd
As responsible Python developers, we'll create a new virtual environment for this project. This practice keeps our project's dependencies separate from our global Python environment, which is essential when working on multiple projects with different dependencies. Furthermore, a virtual environment allows us to "freeze" our dependencies into a requirements.txt file, effectively documenting them for future reference.
Let's go ahead and create our virtual environment:
# Create a new virtual environment named `env`
python3 -m venv env
With our virtual environment created, the next step is to activate it. The command for this varies depending on your operating system:
- For Windows users, enter the following command:
.\env\Scripts\activate
- For Linux or MacOS users, use this command instead:
source env/bin/activate
After running the appropriate command, the name of your environment (env) should appear in parentheses at the start of your terminal prompt. This indicates that the environment is active and you're ready to start developing!
Here's an example of what an activated virtual environment looks like in the terminal:
Congratulations, you've successfully set up and activated your virtual environment! Let's proceed to the next step.
Setting Up the Required Libraries
Before we dive into the coding part, let's ensure we have all the necessary libraries installed. Our application will primarily use Flask and ChromaDB:
-
Flask: A lightweight and flexible Python web framework. We'll use Flask to create a user interface for our application, handling user inputs and displaying the results.
-
ChromaDB: A powerful database for storing and querying embeddings. In our application, we'll use ChromaDB to store the embeddings of images generated by Stable Diffusion, which will enable us to perform similarity searches.
Make sure you're working with Python 3, as Python 2 has officially reached its end-of-life. You can check your Python version by typing python --version in your terminal.
Now, let's install these libraries. We'll use Python's built-in package manager, pip, for this task. If you've set up and activated your virtual environment as discussed in the previous section, the libraries will be installed within the environment, keeping your global Python setup clean and organized. Here's how to install Flask and ChromaDB:
# Install ChromaDB for storing and querying embeddings
pip install chromadb

# Install Flask HTTP framework for building the user interface
pip install flask

# Install the OpenAI library to use the embedding function
pip install openai
Great! Now that we have our required libraries, we're ready to start building our application.
Writing the Project Files
Now it's time to dive back into coding! Before we start, ensure you're in the correct directory - the root of our project.
Next, open your preferred IDE or code editor and create a new file. Since we're working with Flask, it's conventional to name the main file as app.py. This is because, by default, the flask run command looks for an application in a file called app.py in the current directory.
However, remember that if your main application file is named differently or located elsewhere, you can specify its location using the FLASK_APP environment variable.
In the next sections, we'll be populating our app.py with the necessary code to set up our Flask server and define the routes for our web application.
app.py 🐍
- Importing necessary modules:
import logging
import os
from flask import Flask, jsonify, render_template, request, url_for
import requests
from dotenv import load_dotenv
We start by importing all the necessary modules that our script will require. This includes:
loggingfor error logging and debugging.osfor interacting with the operating system, particularly for accessing environment variables and file paths.flaskfor creating and managing our web application.requestsfor making HTTP requests to the image generation API.dotenvfor loading environment variables from our.envfile.
- Setting up the logging and Flask app:
# set up logging to catch and log errors
logging.basicConfig(level=logging.DEBUG)

app = Flask(__name__)
In these lines, we're setting up logging with a level of DEBUG, which means it will capture and print all logging messages, helping us debug any issues. Next, we initialize our Flask application with Flask(__name__).
- Loading environment variables:
# load environment variables from .env file
load_dotenv()
Here, we're using the load_dotenv() function to load environment variables from a .env file. This file usually stores sensitive data like API keys, which should be kept out of your script to avoid unintentional exposure.
- Defining API endpoints:
Next, we define several API endpoints that handle different tasks:
@app.route('/api/search_images')
def images():
...
@app.route('/api/generate')
def generate():
...
@app.route("/")
def home():
...
Each function decorated with @app.route is associated with a specific URL path. The search_images function handles search requests from the client as well as returning a list of all image generation requests, generate handles image generation requests, and home renders the home page.
- Running the Flask app:
if __name__ == '__main__':
    app.run(debug=True)
Finally, we ensure the Flask app runs if the script is executed directly (not imported as a module) with if __name__ == '__main__'. When running in development mode with debug=True, the server will automatically reload if it detects changes, and it will provide detailed error messages in case of failures.
In the next steps, we will delve deeper into the individual endpoint functions and explain how they handle their respective tasks.
index.html 🏠
Next, we create the user interface (UI) for our application. This involves writing a basic HTML file complemented by some JavaScript functionality. For styling, I decided to use Tailwind CSS, a utility-first CSS framework that provides highly customizable, low-level utility classes.
<!DOCTYPE html>
<html>
<head>
    <!-- The title of the web page -->
    <title>My Flask App</title>

    <!-- Linking the external JavaScript file (script.js) -->
    <script src="{{ url_for('static', filename='script.js') }}"></script>

    <!-- Linking the Tailwind CSS library for styling -->
    <script src="https://cdn.tailwindcss.com"></script>
</head>
<body class="bg-slate-200 p-8 gap-4 flex flex-col items-center">
    <!-- The main heading of the page -->
    <h1 class="text-lg">My Image Generation Gallery</h1>

    <!-- The section for input field and buttons -->
    <div class="flex flex-col w-full gap-2">
        <!-- The input field where users can type their prompts -->
        <input type="text" id="userInput" class="text-sm py-2 px-3 rounded-md border border-slate-400"
            placeholder="Type something...">

        <!-- A loading indicator that is displayed while images are being generated -->
        <div id="loadingIndicator" class="hidden w-full flex flex-col z-30 items-center justify-center">
            <!-- A loading GIF -->
            <img src="{{ url_for('static', filename='loading.gif') }}" class="w-20 h-20" alt=" ">
            <!-- The text displayed below the loading GIF -->
            <p class="text-sm text-white">Now generating...</p>
        </div>

        <!-- The buttons for initiating a search and generating images -->
        <div class="flex gap-2 w-full items-center justify-center">
            <button id="searchBtn" class="rounded-md py-2 w-20 text-sm bg-slate-400 drop-shadow-md">Search</button>
            <button id="generateBtn" class="rounded-md py-2 w-20 text-sm bg-amber-400 drop-shadow-md">Generate</button>
        </div>
    </div>

    <!-- A container for displaying the server's response -->
    <div id="serverResponse" class="flex gap-2"></div>
</body>
</html>
In this HTML file, I use the Flask url_for() function to generate URLs for static files like our JavaScript file and the loading indicator image. Notice that I assigned unique IDs to certain elements - this is so we can easily reference them later in our JavaScript file to facilitate user interactions.
Finally, please note that this example uses the CDN version of Tailwind CSS, loaded with a <script> tag. In a more complex production application, you might consider setting up Tailwind CSS as part of your build process to enable additional features and optimizations.
script.js 🤖
This JavaScript file adds interactivity to our Flask app and allows us to dynamically load generated images without refreshing the page. Save this script as script.js in the static/ directory.
window.onload = function() {
    document.getElementById('searchBtn').addEventListener('click', sendInput);
    document.getElementById('generateBtn').addEventListener('click', generateImages);
}

function sendInput() {
    let userInput = document.getElementById('userInput').value;

    let loadingIndicator = document.getElementById('loadingIndicator');
    loadingIndicator.classList.remove('hidden');
    fetch('/api/search_images?input=' + userInput)
    .then(response => response.json())
    .then(json => {
        let serverResponse = document.getElementById('serverResponse');
        // Clear the serverResponse div
        serverResponse.innerHTML = '';

        // Create a new img element for each image and append it to the serverResponse div
        for (let image of json) {
            let newImg = document.createElement('img');
            newImg.src = image.image_path;
            newImg.alt = image.user_input;
            newImg.title = image.user_input;
            newImg.className = 'w-32 h-32';

            serverResponse.appendChild(newImg);
        }

        // Hide the loading indicator again
        loadingIndicator.classList.add('hidden');
    })
    .catch(error => {
        loadingIndicator.classList.add('hidden');
        console.error('Error:', error);
    });
}

function generateImages() {
    console.log("generating image")
    let userInput = document.getElementById('userInput').value;

    // Get the loading indicator and show it
    let loadingIndicator = document.getElementById('loadingIndicator');
    loadingIndicator.classList.remove('hidden');

    fetch('/api/generate', {
        method: 'POST',
        headers: {
            'Content-Type': 'application/json',
        },
        body: JSON.stringify({
            input: userInput
        })
    })
    .then(response => response.json())
    .then(json => {
        if (json.error) {
            throw new Error(json.error);
        } else {
            // Fetch the list of images after a new one is generated
            return fetch('/api/search_images?input=any');
        }
    })
    .then(response => response.json())
    .then(json => {
        let serverResponse = document.getElementById('serverResponse');
        // reset the input again
        document.getElementById('userInput').value = "";

        // Clear the serverResponse div
        serverResponse.innerHTML = '';

        // Create a new img element for each image and append it to the serverResponse div
        for (let image of json) {
            let newImg = document.createElement('img');
            newImg.src = image.image_path;
            newImg.alt = image.user_input;
            newImg.title = image.user_input;
            newImg.className = 'w-32 h-32';

            serverResponse.appendChild(newImg);
        }

        // Hide the loading indicator again
        loadingIndicator.classList.add('hidden');
    })
    .catch(error => {
        console.error('Error:', error);
    });
}
This script begins by setting the onload event handler, which triggers once all assets for the web page are fully loaded and rendered. In this event handler, we add click listeners to the search (searchBtn) and generate (generateBtn) buttons. These listeners trigger the sendInput and generateImages functions, respectively.
The sendInput function uses the Fetch API to send a GET request to the /api/search endpoint, appending the user's input as a parameter. The returned promise is then converted into a JSON object, and the data is handled as required. If there's an error, it is caught and logged to the console.
The generateImages function does a similar job but sends the request to the /api/generate endpoint. The function fetches the list of images after a new one is generated and then iterates over the list, creating a new img element for each image and appending it to the serverResponse div.
In both functions, if an error occurs, it is caught and logged to the console.
.env 🌍
Our .env file serves to store various API keys and other settings as environment variables. This approach allows us to keep sensitive information, like API keys, out of our source code, which is a best practice for security and allows us to manage and change this information easily and safely.
# STABILITY_AI_KEY is the API key for the Stability AI image generation service
STABILITY_AI_KEY=sk-xxxxxxxxxxxx

# ENGINE_ID is the ID of the engine you're using in Stability AI
ENGINE_ID=stable-diffusion-xl-beta-v2-2-2

# OPENAI_KEY is the API key for using OpenAI's embedding function
OPENAI_KEY=sk-xxxxxxxxxxxxxxx

# EMBEDDING_MODEL is the name of the OpenAI model used for text embeddings
EMBEDDING_MODEL=text-embedding-ada-002
This file contains four environment variables that hold the API keys for the Stability AI service and OpenAI's embedding function, the ID of the Stability AI engine being used, and the name of the OpenAI model used for text embeddings.
Keep in mind that .env files should never be committed to public repositories because they often contain sensitive data. If you're using version control like git, make sure to add .env to your .gitignore file to prevent it from being tracked. Always remember that keeping your sensitive data secure is crucial when developing any software application.
requirements.txt 📄
One important aspect of software development, especially in Python, is managing dependencies. Dependencies are external Python libraries your project relies on. One popular way to manage these dependencies is by creating a requirements.txt file.
This requirements.txt file, while optional, is considered best practice as it provides an organized list of dependencies. This allows other developers to easily install the required libraries with a single command.
To create the requirements.txt file, ensure you have activated your Python virtual environment and your current working directory is your project's directory. Once you're all set, run the following command:
# "freeze" the dependencies, storing the list into a file
pip3 freeze > requirements.txt
This command lists all the libraries (and their specific versions) your virtual environment is using and redirects (">") this list to a file called requirements.txt.
Following this, anyone who wants to run your project will be able to install all the required dependencies using the following command:
pip3 install -r requirements.txt
This command reads the requirements.txt file and installs each library listed using pip, Python's package installer. This step is typically done by someone who wants to run your project after cloning it from a repository.
Including instructions for using the requirements.txt file in your project's README.md file, typically under a section titled "Installation" or "Getting Started", is a good practice. It helps new users or contributors get your project up and running more quickly and with less potential for confusion or errors.
The Project's Structure
After following the steps above, our project structure should look like this:
project_root/
│
├── app.py               # Our main Flask application file.
├── .env                 # Contains our environment variables.
├── requirements.txt     # Lists all Python dependencies for this project.
│
├── static/              # Directory for static files like CSS, JS, and images.
│   ├── script.js        # JavaScript file for front-end logic.
│   └── loading.gif      # Loading image to be displayed during image generation.
│
├── templates/           # Directory for HTML templates.
│   └── index.html       # The main (and only) HTML file for our Flask app.
│
└── .gitignore           # Tells git which files (or patterns) it should ignore.
Each file and directory has its specific purpose in the project:
app.py: This is where our Flask application is located..env: Stores our environment variables, such as API keys.requirements.txt: Lists all the Python dependencies our project needs to run.static/: A directory where static files (such as CSS, JavaScript, and images) are stored.templates/: Holds all HTML templates that our Flask application will render..gitignore: This file is used to tell git which files or patterns it should ignore.
The project structure gives us a clear understanding of the project at a glance. It shows us what files and folders exist and where our main application is located. Understanding how to structure a project is an essential skill in software development, making it easier for others (and for future you) to navigate and understand your project.
In the next steps, we will revisit our app.py file to complete the backend part of our image generation app.
Here's how the revised version of the "Completing the Endpoint Functions" section might look like with the improvements:
Completing the Endpoints Functions
We will revisit our app.py file to finalize the endpoint functions. We wrote four functions to handle requests to four different endpoints. In this section, we will complete the images() and generate() functions. The home() function will render our index.html template.
Images Endpoint
Next, the images() function returns the list of all image generation requests in JSON format.
# API Endpoint to return the list of all image generation requests
@app.route('/api/search_images')
def images():
    user_input = request.args.get('input')
    # Return the list of user requests as JSON
    return jsonify(user_requests)
Generate Endpoint
The generate() function is the key to our application. It handles image generation requests, sends a request to the Stability.ai API, and writes the image received to a file. The function then appends the user's prompt and the image file path to the user_requests list. Below is the finalized generate() function:
# API Endpoint to handle image generation requests
@app.route('/api/generate')
def generate():
    # Get user input from POST data
    data = request.get_json()
    user_input = data.get('input')

    # Define where to store generated images
    storage_directory = "static/storage"

    # Create the directory if it doesn't exist
    if not os.path.exists(storage_directory):
        os.makedirs(storage_directory)

    # Set the parameters for the image generation API
    payload = {
    "cfg_scale": 7,
    "clip_guidance_preset": "FAST_BLUE",
    "height": 512,
    "sampler": "K_DPM_2_ANCESTRAL",
    "samples": 1,
    "seed": 0,
    "steps": 75,
    "text_prompts": [
        {
        "text": user_input,
        "weight": 1
        }
    ],
    "width": 512
    }

    # Set the URL for the image generation API
    url = f"https://api.stability.ai/v1/generation/{os.getenv('ENGINE_ID')}/text-to-image"

    # Set the headers for the image generation API
    headers = {"Accept": "image/png", "Content-Type": "application/json", "Authorization": os.getenv("STABILITY_AI_KEY")}

    # Call the image generation API
    try:
        response = requests.post(url, json=payload, headers=headers)

        # Check if request is successful
        if response.status_code == 200:
            # Save the PNG image into the storage directory
            image_filename = f"{user_input}.png"
            image_path = os.path.join(storage_directory, image_filename)
            user_requests.append({"user_input": user_input, "image_path": image_path})

            with open(image_path, "wb") as image_file:
                image_file.write(response.content)

            # Generate the URL for the new image and return it as JSON
            new_image_url = url_for('static', filename=image_path)
            return jsonify({'image_url': new_image_url})

        else:
            logging.error(f"Request failed: {response.status_code}. Reason: {response.text}")
            return jsonify({'error': f"Request failed: {response.status_code}. Reason: {response.text}"}), 500
    except Exception as e:
        logging.error(f"Unexpected error occurred: {e}")
        return jsonify({'error': f"Unexpected error occurred: {str(e)}"}), 500
We are using HTTP status codes to represent different states of the application, providing more information to the client. We've also included extensive error handling and logging to debug issues.
Home Endpoint
Finally, the home() function renders our home page. This function uses the render_template function to render our index.html file and passes the user_requests list to it.
@app.route("/")
def home():
    # Render the index.html template
    return render_template('index.html')
Test Running the Image Generation App
Now, let's test our web app. In your terminal, type the following command and press enter:
flask run
If the application is configured correctly, you'll see this output in your terminal:

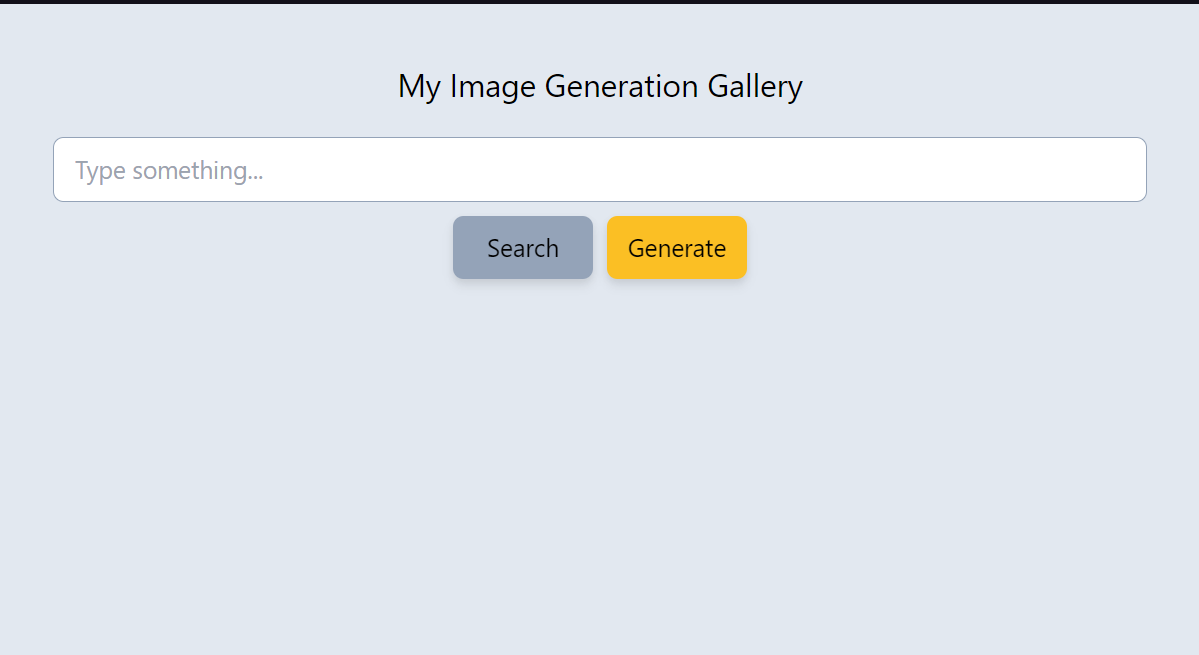
Navigate to localhost:5000 in your web browser to see the user interface of our image generation app:
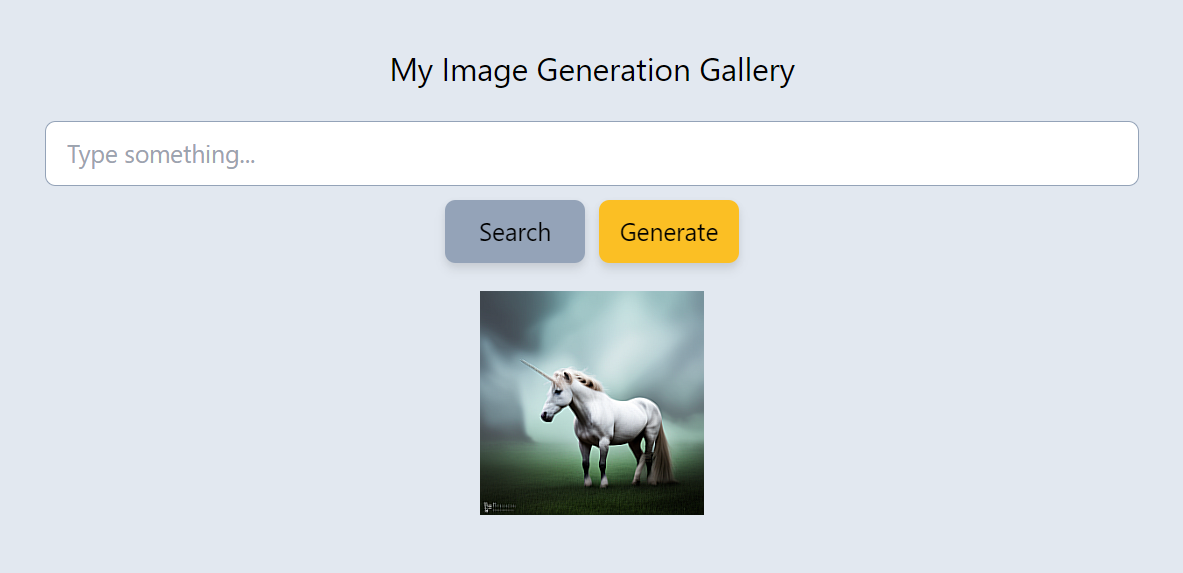
Let's generate some images. Type your desired text into the input field and click the "Generate" button. The loading indicator will appear while the request is sent to the Stability.ai API. Once the generated image is received, it will display under the input field:

Hover over the generated image to see the text prompt used to create it:
If you face any issues while running the application, try checking your .env configuration and ensure all dependencies are installed properly. If the problem persists, refer to Flask and Stability.ai's documentation for further troubleshooting.
Adding Search By Similar Term Feature
In this part of our tutorial, we're going to add a "Search" feature. Unlike traditional search functionality, which finds results based on exact matches, we're going to build a search feature that finds similar terms. For example, if we've generated images for "unicorn" and "mushroom", we could find the unicorn image by searching for "horse".
We'll accomplish this using ChromaDB, a database designed for storing and querying embedding vectors. Embeddings are a type of representation that can capture the semantic meaning of data. By using ChromaDB, we can perform similarity searches in a more sophisticated and efficient manner.
Now, let's begin by initializing ChromaDB and our embedding function:
pp = pprint.PrettyPrinter(indent=4)

++ # Initialize the ChromaDB client with specified settings.
++ chroma_client = chromadb.Client(Settings(
++     chroma_db_impl="duckdb+parquet",
++     persist_directory="database"
++ ))
++
++ # Set up an OpenAI Embedding Function for ChromaDB.
++ embedding_function = OpenAIEmbeddingFunction(api_key=os.getenv(
++     "OPENAI_KEY"), model_name=os.getenv("EMBEDDING_MODEL"))
++
++ # Get or create a collection from the ChromaDB client.
++ collection = chroma_client.get_or_create_collection(
++     name="image_generations", embedding_function=embedding_function)
Next, let's integrate ChromaDB into our images() function. We'll update the function to query ChromaDB for results based on the user's input:
++     results = collection.query(
++         query_texts=[user_input],
++         n_results=10
++     )
++     print(results)
++     result_list = []
++     for doc, md in zip(results['documents'][0], results['metadatas'][0]):
++         result_list.append(
++             {"image_path": md['image_path'], "user_input": doc})
++
--     return jsonify(user_requests)
++     return jsonify(result_list)
In the above code, we've replaced user_requests with result_list, a list populated by query results from ChromaDB. We retrieve the documents (image generation prompts) and metadata (image paths) from the query results and combine them into a dictionary for each result.
Finally, let's update our generate() function to store the image generation prompt and the image path as metadata in ChromaDB:
# Save the PNG image into the storage directory
image_filename = f"{user_input}.png"
image_path = os.path.join(storage_directory, image_filename)

++ # Initialize an index variable for unique identification of each image generation request
++ index = collection.count() if collection.count() is not None else 0

++ # Add the new image generation request to the ChromaDB collection
++ collection.add(
++     documents=[user_input],
++     metadatas=[{"image_path": image_path}],
++     ids=[f"text_{index}"]
++ )
In this updated code, we're now using collection.count() to determine the next available index for our ChromaDB entries. The collection.add() method is used to insert the image generation prompts into the ChromaDB collection as embeddings, and the image paths as metadata.
This concludes our update for integrating ChromaDB. These changes provide a more sophisticated and efficient way of storing and retrieving image generation prompts and paths. We've also added the capability to perform similarity searches, enhancing the functionality of our application.
Please note, in a production-grade application, it would be important to add error handling around database operations. This simplified example does not include that detail.
Also, it's worth noting that while the approach used here for indexing is appropriate for a tutorial, in a production system, you'd want to implement a more scalable solution for indexing, as querying all entries for each insertion could become slow with a large number of entries.
Testing the Search Capabilities of the Image Gallery App
To conclude this tutorial, let's test the search capabilities of our image gallery application. Assume we've generated three distinct images using some imaginative prompts: a unicorn, a mushroom, and butterflies, as shown below.
Suppose a visitor, upon seeing our vibrant unicorn image, decides to search for more horse-related images in our growing gallery. They might enter "horse" into the search bar. What do you think will happen?
Amazingly, the application returns the unicorn image as the top result! This happens even though the term "horse" wasn't in the original prompt, which was "an unicorn on a green field". It also returns images of butterflies and a glowing mushroom. These results might seem surprising at first. However, they demonstrate how embeddings capture the semantic meaning of words, leading to nuanced search results that take into account more than just exact matches.
From the application logs, you can see how the search operation works. The embeddings for the search term and the prompts are converted into vector representations. Then, the application calculates the cosine similarity between these vectors. This measure helps determine how close the vectors — and thus, the semantic meanings of the search term and the prompts — are to each other. By ordering results by cosine similarity, the application ensures that the most semantically relevant results are returned first.
Conclusion
We've reached the end of our tutorial on creating an image generation gallery app. This application leverages the power of Stable Diffusion AI for image generation and Chroma database for embedding storage. While our use case might seem simplistic, it serves to demonstrate the potency of embedding storage when combined with image generation. This combination allows us to create an image gallery capable of semantic searches, as opposed to searching by exact keyword match.
In our current app, we've stuck to the basics with a text input, two buttons, and a container element for displaying images. However, the possibilities for expansion are vast. For instance, to further explore the capabilities of embedding storage and image generation, we could store the embeddings of the images themselves. This approach would allow for search functionality based on uploading similar images.
Additionally, we could introduce an "inpainting" feature, which is a form of image manipulation where you fill in part of an image using the information from the surrounding area. This would allow for creative transformations of existing images!
I want to thank you for reading this tutorial. I hope it was as educational and fun for you as it was for me to create. You can view the completed project on my Github page.