Building an Intelligent AI Agent for Content Moderation with Structured Output
Building an Intelligent AI Agent for Content Moderation with Structured Output
In this tutorial, we'll explore how to create a smart AI agent that can moderate content and generate structured reports. We'll use OpenAI's new features for structured output and function calling to build this advanced system. Our goal is to develop an AI that can analyze content effectively and provide detailed, organized results.
The Evolution of AI Outputs
OpenAI recently introduced structured output capabilities, which have changed how we work with AI models. Before this update, developers faced many challenges when using AI-generated content. The responses were usually just plain text or simple JSON formats. This caused problems for both developers and businesses.
The lack of structure in AI outputs often led to inconsistent information. Developers had to write complex code to make sense of the AI's responses, which took a lot of time and could lead to mistakes. It was also hard to control how the AI presented information, making it difficult to use these outputs in existing systems.
These limitations made it especially challenging to build reliable applications for tasks that needed precise, structured data. Teams working on legal documents, compliance reports, and business analysis found themselves spending more time dealing with AI outputs than actually benefiting from them.
The Game-Changer: Structured Outputs
But now, things have changed. OpenAI has introduced something called "structured outputs." This means the AI can now give us information in a format that's much easier to use. Imagine asking for a recipe and getting back a neatly organized list of ingredients and steps, instead of just a block of text. That's the kind of improvement we're talking about.For our content moderation agent, this is really exciting. We can now ask the AI for specific types of information in exact formats. Need legal clauses, financial numbers, or compliance requirements? The AI can provide these in a structured way that's easy to work with. This saves a lot of time and effort in processing and organizing information.
But that's not all. OpenAI has also added something called "function calling" to its AI models. This is like giving our AI agent the ability to press buttons and pull levers based on the information it processes. It doesn't just provide data – it can take actions too.
By combining structured outputs and function calling, our agent becomes incredibly powerful. It can work with multiple sources of information, make complex decisions, and create highly customized reports. It's like having a super-smart assistant that can not only understand complex information but also do something useful with it. This kind of AI can be really useful for businesses that need to review a lot of content quickly. It can help ensure that content meets certain standards, flag potential issues, and even suggest improvements. And because it works quickly and consistently, it can free up human moderators to focus on more complex tasks.
In this tutorial, we'll walk through how to build this kind of AI agent. We'll show you how to set it up, how to use these new features, and how to make it work for your specific needs. By the end, you'll have a powerful tool that can help with all sorts of content moderation tasks.
Let's get coding
First, create a new directory for our project:
mkdir structuredOutput
cd structuredOutput
Next, let's set up a virtual environment. This will help us manage our project dependencies separately from other Python projects.
For Windows:
python -m venv venv
venv\Scripts\activate
For macOS and Linux:
python3 -m venv venv
source venv/bin/activate
With our virtual environment activated, let's install the required libraries:
pip install pydantic openai pandas colorama python-dotenv supabase
Now, create an app.py file in the structuredOutput directory. This will be the main file for our project.
Next, create a .env file in the same directory. This file will store our sensitive information like API keys. Add the following placeholders to the file:
OPENAI_API_KEY=your_openai_api_key_here
SUPABASE_URL=your_supabase_url_here
SUPABASE_KEY=your_supabase_key_here
Don't worry if you don't have these keys yet. In the next section, we'll guide you through creating a Supabase account, setting up a table, and obtaining the necessary credentials. We'll also explain how to get your OpenAI API key if you don't already have one.
By setting up our environment this way, we're ensuring that our project is organized, our dependencies are managed, and our sensitive information is kept secure. This approach sets us up for success as we move forward with building our structured output agent.
In the upcoming sections, we'll dive into the specifics of setting up Supabase and OpenAI, and then we'll start building the core functionality of our agent. Stay tuned!
Setting Up API Keys
Now that we have our project structure in place, let's obtain the necessary API keys for our application.
OpenAI API Key
To get your OpenAI API key:
- Visit your OpenAI dashboard at https://platform.openai.com/settings/organization/general
- Look for the API Keys section and create a new secret key
- Copy this key and paste it into your
.envfile for theOPENAI_API_KEYvariable
Introduction to Supabase
Supabase is an open-source Firebase alternative that provides a suite of tools for building scalable and secure applications. It offers a PostgreSQL database, authentication, instant APIs, and real-time subscriptions, all in one package.
We're using Supabase in this project for several reasons:
- Easy setup: Supabase provides a user-friendly interface for creating and managing databases.
- PostgreSQL power: It's built on top of PostgreSQL, giving us access to a robust, full-featured database.
- Real-time capabilities: Supabase allows for real-time data syncing, which can be useful for collaborative document generation.
- Built-in authentication: While we're not using it in this tutorial, Supabase's auth system can be valuable for securing your application in the future.
- Scalability: Supabase is designed to scale with your application, making it suitable for both small projects and large-scale deployments.
Setting Up Supabase
Now, let's set up your Supabase project:
- Visit https://supabase.com/dashboard/sign-up to create a Supabase account if you don't have one already.
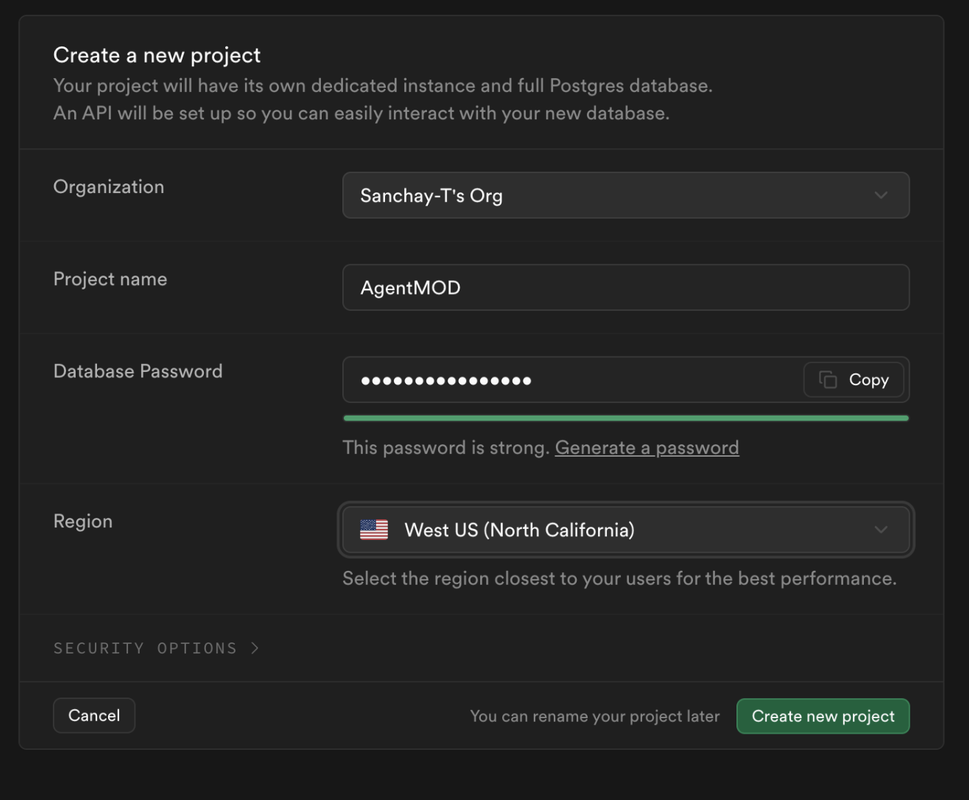
- Once logged in, click on "New Project" and follow the prompts to create a new project.
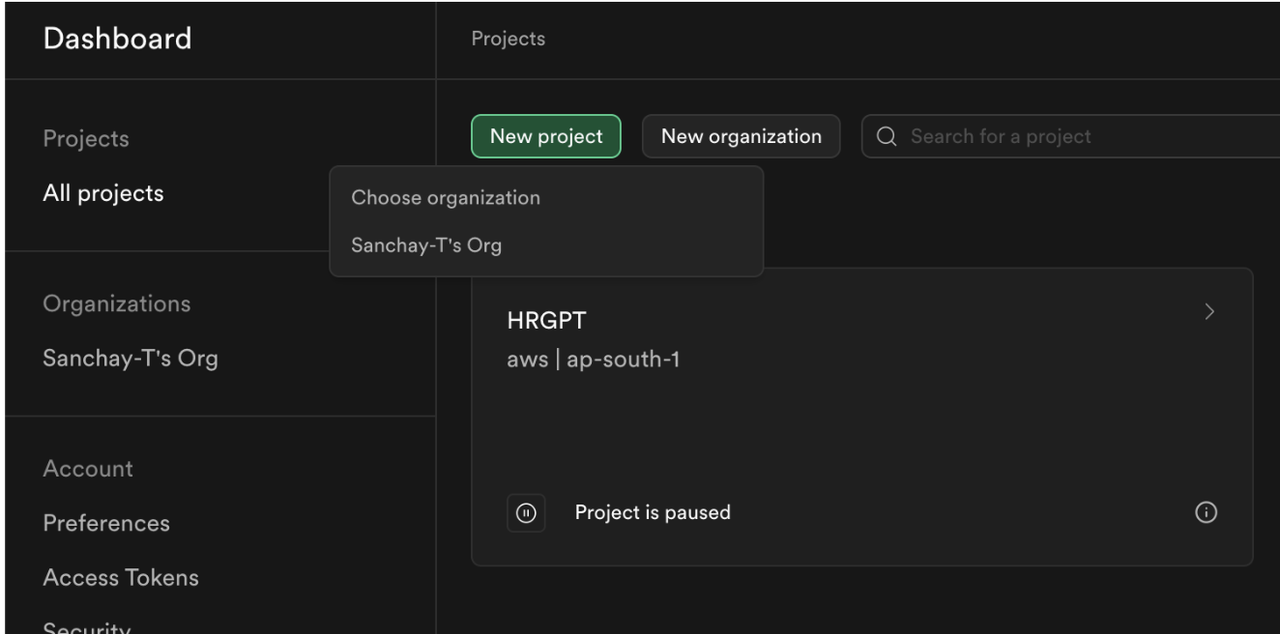
- After your project is created, you'll be taken to the project dashboard.
-
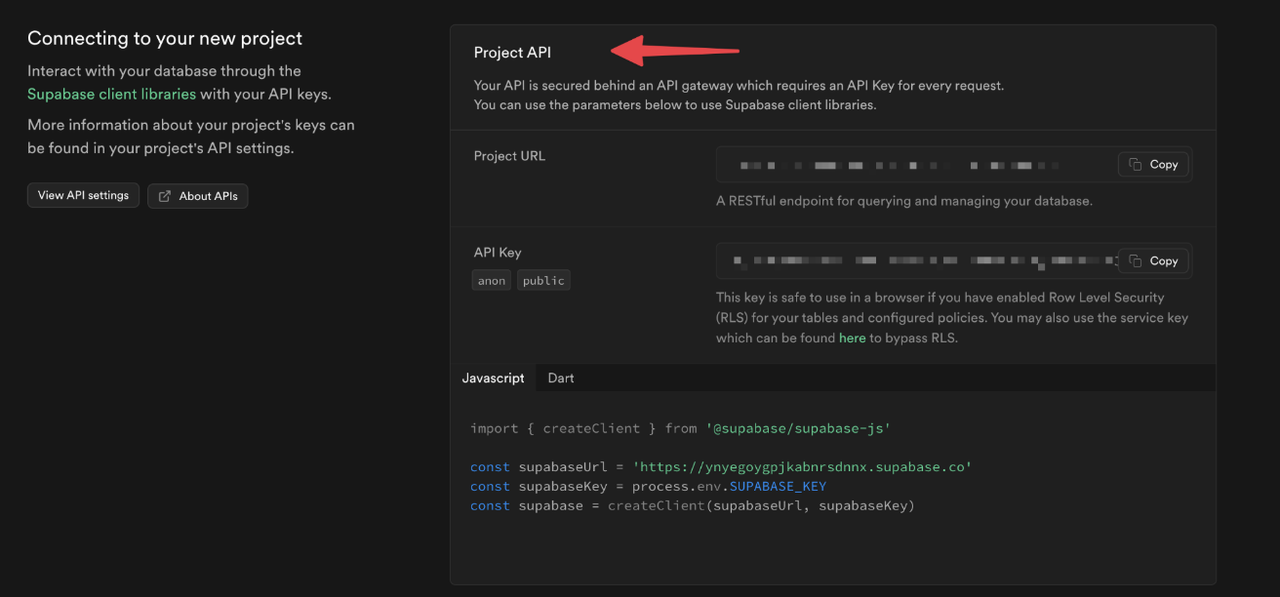
In the left sidebar, click on your Project Homepage and scroll down to find the api section.
-
Here, you'll find your project URL and API key. Copy these and add them to your
.envfile for theSUPABASE_URLandSUPABASE_KEYvariables respectively.
Your .env file should now look something like this (with your actual keys, of course):
OPENAI_API_KEY=sk-youropenaiapikeyhere
SUPABASE_URL=https://yourprojectid.supabase.co
SUPABASE_KEY=your.supabase.api.key.here
Next Steps
Great job! You've now set up the necessary accounts and API keys for our project. In the next section, we'll dive into creating our Supabase table, selecting the appropriate fields, and setting up the schema for our document generation system. This will lay the foundation for storing and retrieving the structured data our AI agent will work with.
Creating the Supabase Table
Now that we have our Supabase project set up, let's create the table that will store our moderation data. This table will be the backbone of our structured output system, allowing us to store and retrieve moderation results efficiently.
Steps to Create the Table
- In your Supabase project dashboard, look for the sidebar and click on the "Table editor" tab.
- Click on "Create a new table" button.
- Name your table
MODERATION_TABLE. - Uncheck the "Enable Row Level Security (RLS)" option for now. (Note: In a production environment, you'd want to set up proper security rules.)
Setting Up the Schema
For our moderation project, we need a specific schema that can accommodate various aspects of content moderation. In the Supabase UI, you'll see a section titled "Columns" with options for "About data types" and "Import data via spreadsheet". Below that, you'll find fields for "Name", "Type", "Default Value", and "Primary".
Here's the schema we'll use:
- id (text) - Set as Primary
- content_id (text)
- status (text)
- content (text)
- reported_to (text)
- is_offensive (bool)
- confidence_score (float4)
- flagged_terms (text)
- created_at (timestamp) - Set Default Value to
now() - moderation_result (text)
Add each of these columns to your table using the Supabase UI. Make sure to set the correct data type for each column and mark the 'id' column as the primary key.
After adding all the columns, click the "Save" button to create your table.
Next Steps
With our Supabase table now set up, we have a solid foundation for storing the structured output from our AI moderation agent. In the next section, we'll start building the Python code to interact with this table, including functions to insert new moderation entries and retrieve existing ones. This will form the core of our moderation system's data management capabilities.
Getting into Actual Coding
Let's break down this code into sections and then dive into each function. We'll start with the first two sections.
Imports and Initial Setup
from pydantic import BaseModel
from openai import OpenAI
import json
import re
import time
import pandas as pd
from colorama import Fore, Back, Style, init
import os
from supabase import create_client, Client
from dotenv import load_dotenv
from datetime import datetime
from typing import List

# Load environment variables from .env file
load_dotenv()

# Initialize colorama for cross-platform colored output
init(autoreset=True)

# Initialize Supabase client
url: str = os.getenv("SUPABASE_URL")
key: str = os.getenv("SUPABASE_KEY")
supabase: Client = create_client(url, key)

# Hardcoded table name
MODERATION_TABLE = "MODERATION_TABLE"
This section sets up our environment by importing necessary libraries and initializing key components. We're using Pydantic for data validation, OpenAI for AI interactions, and Supabase for database operations. Colorama is used for colored console output, enhancing readability.
Database Operations
def supabase_operation(operation, data=None, filters=None):
    query = supabase.table(MODERATION_TABLE)

    if operation == "insert":
        query = query.insert(data)
    elif operation == "select":
        query = query.select("*")
    elif operation == "update":
        query = query.update(data)
    elif operation == "delete":
        query = query.delete()
    else:
        raise ValueError("Unsupported operation")

    if filters:
        for column, operator, value in filters:
            if operator == "eq":
                query = query.eq(column, value)
            elif operator == "gt":
                query = query.gt(column, value)
            elif operator == "lt":
                query = query.lt(column, value)
            elif operator == "like":
                query = query.like(column, value)

    return query.execute()
This function, supabase_operation, is a versatile helper for interacting with our Supabase database. It supports various operations like insert, select, update, and delete. Let's break it down:
- We start by creating a query object for our
MODERATION_TABLE. - Depending on the operation (insert, select, update, or delete), we modify the query accordingly.
- If filters are provided, we apply them to the query. This allows for more specific database operations.
- Finally, we execute the query and return the result.
This function abstracts away the complexities of database operations, making it easier to perform various actions on our moderation data throughout the rest of the code.
Data Models and Moderation Functions
Let's examine the next section of our code, which defines our data models and core moderation functions.
# Step 1: Define Pydantic Models for Structured Outputs
class ModerationResult(BaseModel):
    is_offensive: bool
    confidence_score: float
    flagged_terms: list[str]

class ModerationOutput(BaseModel):
    content_id: str
    content: str
    status: str
    is_offensive: bool
    confidence_score: float
    flagged_terms: List[str]
    created_at: str

# Step 2: Define the Moderation Functions
def moderate_text(content_id: str, content: str) -> dict:
    offensive_terms = ["badword1", "badword2", "offensivephrase"]
    flagged_terms = [
        term
        for term in offensive_terms
        if re.search(r"\b" + re.escape(term) + r"\b", content, re.IGNORECASE)
    ]
    is_offensive = len(flagged_terms) > 0
    confidence_score = 0.9 if is_offensive else 0.1  # Simplified confidence score

    result = {
        "content_id": content_id,
        "content": content,
        "status": "moderated",
        "is_offensive": is_offensive,
        "confidence_score": confidence_score,
        "flagged_terms": flagged_terms,  # Keep as a list
        "created_at": datetime.utcnow().isoformat(),
    }

    try:
        supabase_operation("insert", data=result)
        print(f"{Fore.GREEN}✅ Moderation result saved to database.{Style.RESET_ALL}")
    except Exception as e:
        print(f"{Fore.RED}❌ Error saving to database: {e}{Style.RESET_ALL}")

    return result
This section defines the core structures and functions for our moderation system:
-
Pydantic Models: We use Pydantic to define structured data models.
ModerationResultrepresents the core moderation output, whileModerationOutputincludes additional metadata about the moderated content. -
moderate_text Function: This is our main moderation function. Here's how it works:
- It takes a
content_idand thecontentto be moderated. - It checks the content against a list of predefined offensive terms.
- It calculates whether the content is offensive and assigns a confidence score.
- The result is formatted into a dictionary that matches our
ModerationOutputmodel. - The result is then inserted into our Supabase database using the
supabase_operationfunction we defined earlier. - Finally, it returns the moderation result.
- It takes a
This function forms the core of our moderation system. It's a simplified version that could be expanded with more sophisticated moderation techniques, such as machine learning models or more complex rule sets.
The use of Pydantic models ensures that our data is consistently structured throughout the application, making it easier to work with and validate.
def block_content(content_id: str) -> dict:
    result = {
        "content_id": content_id,
        "status": "blocked",
        "reason": "Content deemed too offensive.",
    }

    # Insert the blocked content record into the database
    supabase_operation("insert", data=result)

    return result
The block_content function takes a content_id as input. It's designed to mark content as blocked when it's deemed too offensive. This function creates a record in our database indicating that the content has been blocked, along with the reason. It's a crucial function for maintaining content standards on a platform.
def issue_warning(content_id: str) -> dict:
    result = {
        "content_id": content_id,
        "status": "warning_issued",
        "reason": "Content is borderline inappropriate.",
    }

    # Insert the warning record into the database
    supabase_operation("insert", data=result)

    return result
issue_warning is used for content that's borderline inappropriate. It also takes a content_id and records a warning in the database. This function is useful for tracking users who frequently post questionable content or for giving users a chance to modify their behavior before more severe actions are taken.
def report_to_human(content_id: str, content: str) -> dict:
    result = {
        "content_id": content_id,
        "status": "reported",
        "content": content,
        "reported_to": "[email protected]",
    }

    # Insert the report record into the database
    supabase_operation("insert", data=result)

    return result
The report_to_human function is our fallback for complex cases. It takes both the content_id and the content itself. This function flags content for review by a human moderator, which is essential for handling nuanced situations that AI might not be equipped to judge accurately.
Each of these functions returns a dictionary containing information about the action taken. They all use our supabase_operation function to insert records into the database, ensuring that all moderation actions are logged and traceable.
These functions work together to create a comprehensive moderation system. They allow for a range of responses to different types of content, from outright blocking to human review, providing flexibility and nuance in content moderation.
Now we need to initialise the client and add define our schemas
# Initialize the OpenAI client
client = OpenAI(
    api_key=os.getenv("OPENAI_API_KEY")
)
First, we initialize the OpenAI client. This client is our gateway to interact with OpenAI's powerful language models. The API key is crucial as it authenticates our requests to OpenAI's services.
Now, let's look at each function schema individually:
moderate_text_function = {
    "name": "moderate_text",
    "description": "Moderate the provided text content to detect offensive language.",
    "parameters": {
        "type": "object",
        "properties": {
            "content_id": {
                "type": "string",
                "description": "A unique identifier for the content being moderated.",
            },
            "content": {
                "type": "string",
                "description": "The text content to be moderated.",
            },
        },
        "required": ["content_id", "content"],
        "additionalProperties": False,
    },
}
The moderate_text_function schema defines how our AI should understand and use our main moderation function. This schema tells the AI that when it needs to moderate text, it should use this function. It likely includes parameters for the content ID and the actual text content to be moderated.
block_content_function = {
    "name": "block_content",
    "description": "Block the content if it's deemed highly offensive.",
    "parameters": {
        "type": "object",
        "properties": {
            "content_id": {
                "type": "string",
                "description": "A unique identifier for the content being blocked.",
            }
        },
        "required": ["content_id"],
        "additionalProperties": False,
    },
}
The block_content_function schema is used when content needs to be blocked outright. This function would be called in cases where the AI determines that content violates guidelines severely enough to warrant immediate removal. The schema probably includes a parameter for the content ID that needs to be blocked.
issue_warning_function = {
    "name": "issue_warning",
    "description": "Issue a warning for borderline inappropriate content.",
    "parameters": {
        "type": "object",
        "properties": {
            "content_id": {
                "type": "string",
                "description": "A unique identifier for the content being warned.",
            }
        },
        "required": ["content_id"],
        "additionalProperties": False,
    },
}
For issue_warning_function, the schema describes how to issue a warning for borderline content. This function is useful for content that's questionable but not severe enough for an outright block. The schema likely includes a parameter for the content ID that's receiving the warning.
report_to_human_function = {
    "name": "report_to_human",
    "description": "Report the content to a human moderator for further review.",
    "parameters": {
        "type": "object",
        "properties": {
            "content_id": {
                "type": "string",
                "description": "A unique identifier for the content being reported.",
            },
            "content": {
                "type": "string",
                "description": "The text content to be reported.",
            },
        },
        "required": ["content_id", "content"],
        "additionalProperties": False,
    },
}
The report_to_human_function schema is used when the AI determines that human intervention is necessary. This could be for complex cases that the AI isn't confident about handling autonomously. The schema probably includes parameters for both the content ID and the content itself, allowing human moderators to review the full context.
# Define the function list
functions = [
    moderate_text_function,
    block_content_function,
    issue_warning_function,
    report_to_human_function,
]
Finally, we compile all these function schemas into a single list. This list represents the complete toolkit available to our AI for content moderation. When interacting with the OpenAI API, we'll pass this list, allowing the AI to choose the most appropriate function based on its analysis of the content.
By structuring our functions this way, we're giving the AI a clear understanding of the tools at its disposal for content moderation, enabling more intelligent and context-aware decision-making.
Initial Messages Setup
messages = [
    {
        "role": "system",
        "content": "You are an intelligent content moderation assistant. Engage in a conversation and moderate content when required. You have a set of tools to use and after every response and word blocked report to the human",
    },
    {
        "role": "user",
        "content": "Let's start the moderation. I'll provide some content.",
    },
]
This section initializes the messages list, which is crucial for maintaining the conversation context with the AI:
- The first message sets the system role, defining the AI's behavior as a content moderation assistant.
- The second message simulates an initial user input to start the conversation.
These messages provide the initial context for the AI, setting the stage for the moderation process.
I apologize for the confusion. I'll provide the detailed explanation with proper H2 headers and code blocks as requested.
Main Conversation Loop
The heart of our content moderation system is the main conversation loop. This loop manages the ongoing interaction between the user and the AI, handling input, processing responses, and executing moderation actions.
Initialization
try:
    print(f"{Fore.CYAN}{Style.BRIGHT}=== Content Moderation System Initialized ===\n")
    while True:
The loop begins with an initialization phase. We print a welcome message to signal that the moderation system is ready. This gives the user a clear indication that they can start interacting with the system. The use of colored text enhances the user experience.
We then enter an infinite while loop, allowing our system to continuously accept and process user input until explicitly told to stop.
User Input Handling
        user_input = input(f"{Fore.GREEN}User: {Style.RESET_ALL}")
        if user_input.lower() in ["exit", "quit", "stop"]:
            print(f"{Fore.YELLOW}Exiting the conversation. Generating final report...")
            break

        messages.append({"role": "user", "content": user_input})
In each iteration, we handle user input. The system prompts the user with a green "User:" prefix. We then check if the user wants to exit the conversation by comparing their input against a list of exit commands. If they're not exiting, we append their input to our messages list, maintaining the entire conversation history.
Content Analysis
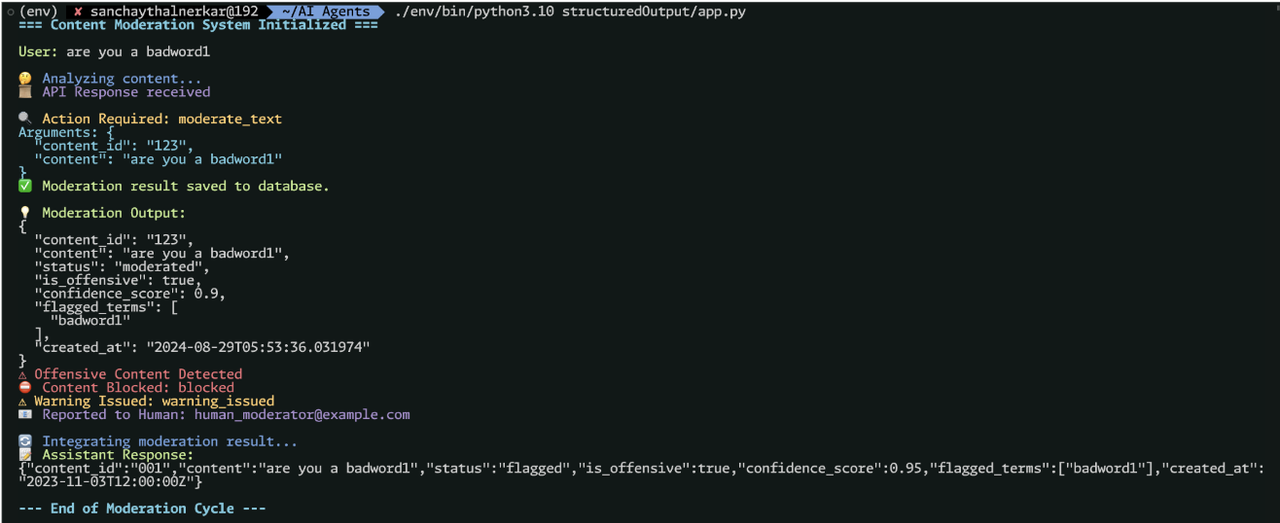
        print(f"\n{Fore.BLUE}🤔 Analyzing content...{Style.RESET_ALL}")
        time.sleep(1)  # Reduced thinking time for better UX

        response = client.beta.chat.completions.parse(
            model="gpt-4o-2024-08-06",
            messages=messages,
            functions=functions,
            function_call="auto",
            response_format=ModerationOutput,
        )

        print(f"{Fore.MAGENTA}📜 API Response received{Style.RESET_ALL}")
With the user's input captured, we move to the analysis phase. We indicate that content analysis is in progress and add a brief pause for better UX. The system then sends a request to the OpenAI API, passing the entire conversation history, available functions, and specifying that the AI can decide whether to call a function.
Response Processing
        choice = response.choices[0]

        if choice.message.function_call:
            function_name = choice.message.function_call.name
            function_args = json.loads(choice.message.function_call.arguments)

            print(f"\n{Fore.YELLOW}🔍 Action Required: {function_name}{Style.RESET_ALL}")

            print(f"{Fore.CYAN}Arguments: {json.dumps(function_args, indent=2)}{Style.RESET_ALL}")
After receiving the API response, we process it. We check if the AI decided to call a function. If so, we extract the function name and arguments, preparing to execute the appropriate moderation action.
Function Execution
Depending on the function called, different actions are taken:
            if function_name == "moderate_text":
                moderation_result = moderate_text(
                    content_id=function_args["content_id"],
                    content=function_args["content"],
                )

                output = ModerationOutput(**moderation_result)
                print(f"\n{Fore.GREEN}💡 Moderation Output:{Style.RESET_ALL}")
                print(f"{json.dumps(output.dict(), indent=2)}")

                if output.is_offensive:
                    print(f"{Fore.RED}⚠️ Offensive Content Detected{Style.RESET_ALL}")
                    block_response = block_content(output.content_id)
                    print(
                        f"{Fore.RED}⛔ Content Blocked: {block_response['status']}{Style.RESET_ALL}"
                    )

                    if output.confidence_score > 0.8:
                        warning_response = issue_warning(output.content_id)
                        print(
                            f"{Fore.YELLOW}⚠️ Warning Issued: {warning_response['status']}{Style.RESET_ALL}"
                        )

                    report_response = report_to_human(
                        output.content_id, function_args["content"]
                    )
                    print(
                        f"{Fore.MAGENTA}📧 Reported to Human: {report_response['reported_to']}{Style.RESET_ALL}"
                    )

                # Prepare the function call result message
                function_call_result_message = {
                    "role": "function",
                    "name": function_name,
                    "content": json.dumps(moderation_result),
                }

                # Append the function call result to the messages
                messages.append(
                    {
                        "role": "assistant",
                        "content": "Moderation completed. Here's the output.",
                    }
                )
                messages.append(function_call_result_message)  # The function's response

                print(
                    f"\n{Fore.BLUE}🔄 Integrating moderation result...{Style.RESET_ALL}"
                )
                time.sleep(1)

                # Make a second API call with the updated messages
                second_response = client.beta.chat.completions.parse(
                    model="gpt-4o-2024-08-06",
                    messages=messages,
                    response_format=ModerationOutput,
                )

                # Print the final response from the model
                final_message = second_response.choices[0].message.content
                print(f"{Fore.GREEN}📝 Assistant Response:{Style.RESET_ALL}")
                print(f"{final_message}")
For text moderation, we call the moderate_text function and process its result. Additional actions may be taken based on the moderation output, such as blocking content or issuing warnings.
            elif function_name == "block_content":
                block_response = block_content(function_args["content_id"])
                print(f"{Fore.RED}⛔ Content Blocked: {block_response['status']}{Style.RESET_ALL}")
            elif function_name == "issue_warning":
                warning_response = issue_warning(function_args["content_id"])
                print(f"{Fore.YELLOW}⚠️ Warning Issued: {warning_response['status']}{Style.RESET_ALL}")
            elif function_name == "report_to_human":
                report_response = report_to_human(
                    function_args["content_id"], function_args["content"]
                )
                print(f"{Fore.MAGENTA}📧 Reported to Human: {report_response['reported_to']}{Style.RESET_ALL}")
Other functions handle actions like blocking content, issuing warnings, or reporting to human moderators. Each action is executed and its result is printed for the user to see.
Regular AI Response
        else:
            assistant_reply = choice.message.content
            print(f"{Fore.CYAN}💬 Assistant Reply:{Style.RESET_ALL}")
            print(f"{assistant_reply}")
If no function call is made, we simply print the AI's response to the user.
Cycle Completion
print(f"\n{Fore.CYAN}{Style.BRIGHT}--- End of Moderation Cycle ---\n")
Error Handling and Conclusion
except Exception as e:
    print(f"{Fore.RED}❌ An error occurred: {e}{Style.RESET_ALL}")

print(
    f"{Fore.GREEN}{Style.BRIGHT}✅ Moderation log saved to database.{Style.RESET_ALL}"
)
This section manages exceptions and provides a final status update. The except block catches and displays any errors that occur during the main loop's execution, printing them in red for visibility. The final print statement, regardless of any errors, confirms that the moderation log has been saved to the database, displayed in green for positive reinforcement. This ensures users are informed of both errors and successful completion of the moderation process.
Running the Agent
To run the content moderation agent, follow these steps:
- Open your terminal or command prompt.
- Navigate to the directory containing
app.py. - Run the following command:
python app.py
This will start the agent, and you'll see the initialization message. You can then begin interacting with the system by typing your messages.
Workflow of the Agent
Data Entry into the Database

Real-Life Scenario
In a real-life application, this agent would likely be part of a larger, asynchronous system. Here's how it might work:
- Every message in a chat or social media platform would be sent to this agent for moderation.
- The agent would process each message asynchronously, allowing for high-volume, real-time moderation.
- Based on the agent's decision, messages could be:
- Allowed through immediately
- Blocked from being posted
- Flagged for human review
- Trigger warnings or actions on user accounts
- The moderation results would be logged in the database for auditing and improving the system over time.
This setup allows for scalable, AI-powered content moderation that can handle large volumes of messages across multiple conversations or platforms simultaneously, providing a safer and more controlled user experience.
Conclusion
In this tutorial, we've built a sophisticated AI-powered content moderation system using OpenAI's structured output capabilities and function calling. This system demonstrates how to:
- Set up a development environment for AI-driven applications
- Integrate OpenAI's API for advanced language processing
- Implement a database solution using Supabase for logging and data persistence
- Create a robust, interactive content moderation loop
By running python app.py, you can start the agent and experience real-time content moderation. In a production environment, this system could be scaled to handle multiple conversations asynchronously, providing efficient, AI-driven moderation for various platforms.
This project serves as a foundation for building more complex AI systems, showcasing the potential of combining structured outputs with function calling in practical applications. As AI technology continues to evolve, systems like this will play a crucial role in maintaining safe and productive online environments.