n8n MCP Server Triggers: Expose Workflows as AI Tools for AI Hackathons
Introduction
Imagine having your AI assistant in Cursor seamlessly trigger complex GitHub workflows—fetching issue details, analyzing commit history, and creating professional pull requests—all through natural language commands. This tutorial will show you how to make this a reality using n8n's powerful MCP (Model Context Protocol) Server Triggers.
This workflow automation is particularly valuable for AI hackathons, where developers need to streamline their development process and maximize productivity within tight timeframes. Whether you're participating in online AI hackathons or virtual AI hackathons, understanding how to connect AI assistants with automation tools can significantly accelerate your project development. If you're looking for upcoming AI hackathons to apply these skills, explore LabLab.ai's global AI hackathons.
In this comprehensive guide, we'll build an MCP server on n8n that connects two essential GitHub operations to Cursor:
- GitHub Issue Tracker - Fetch detailed issue information and comment threads to give Cursor complete context for implementation planning
- AI-Powered PR Creator - Automatically generate professional pull requests with intelligent descriptions based on commit history
By the end of this tutorial, you'll have a fully functional MCP server that transforms your n8n workflows into AI-accessible tools, making your development workflow more efficient and intelligent.
What You'll Build
You'll create an MCP server that exposes n8n workflows as standardized tools that Cursor can understand and execute. This enables your AI assistant to:
- Retrieve GitHub issue details with full context from discussions
- Analyze commit messages and generate professional PR descriptions
- Create pull requests automatically with AI-generated titles and descriptions
Quick Start: Test the Working Example
Before we dive into building, you can test the final MCP server using this URL: https://stevekimoi.app.n8n.cloud/mcp/dcd48feb-ce2a-4ef4-ba3e-431ec494b274
To connect it to Cursor:
- Open your Cursor IDE
- Navigate to Settings → Tools & MCP
- Click on "New MCP Server" → "Add custom MCP server"
- This will open an
mcp.jsonfile - Add the following configuration:
{
  "mcpServers": {
    "github-agent-mcp": {
      "url": "https://stevekimoi.app.n8n.cloud/mcp/dcd48feb-ce2a-4ef4-ba3e-431ec494b274"
    }
  }
}
Testing the Integration
Once connected, you can test the integration with these example prompts:
Fetching GitHub Issues:
We're working on issue number #5 in my repo https://github.com/Stephen-Kimoi/Example-Auth-Service

Let's draft an implementation plan for it
This will retrieve issue #5 from the specified repository, including all comments and context, allowing Cursor to draft a comprehensive implementation plan.
Creating Pull Requests:
I want to create a pull request from the feature/rate-limiting-middleware branch to the main branch of https://github.com/Stephen-Kimoi/Example-Auth-Service
Make sure your branch has active commits. The system will analyze the commit history and generate a professional title and description for your pull request automatically.
Getting Started
Prerequisites
Before we begin, make sure you have the following accounts and tools set up:
- n8n Account - Sign up at app.n8n.cloud/register if you don't have one yet
- Gemini Account - Get your API key from Google AI Studio for LLM access (we'll use this for AI-powered PR descriptions)
- Cursor IDE - Download and install from cursor.com/download
- GitHub Account - You'll need a GitHub personal access token with appropriate permissions
Setting Up Your MCP Server Trigger Workflow
Let's start by creating the foundation of our MCP server. This workflow will serve as the entry point that exposes our tools to Cursor.
Step 1: Create a New Workflow
- Sign up or sign in to your n8n account
- Navigate to
/home/workflowsand click the "Create Workflow" button in the top right corner
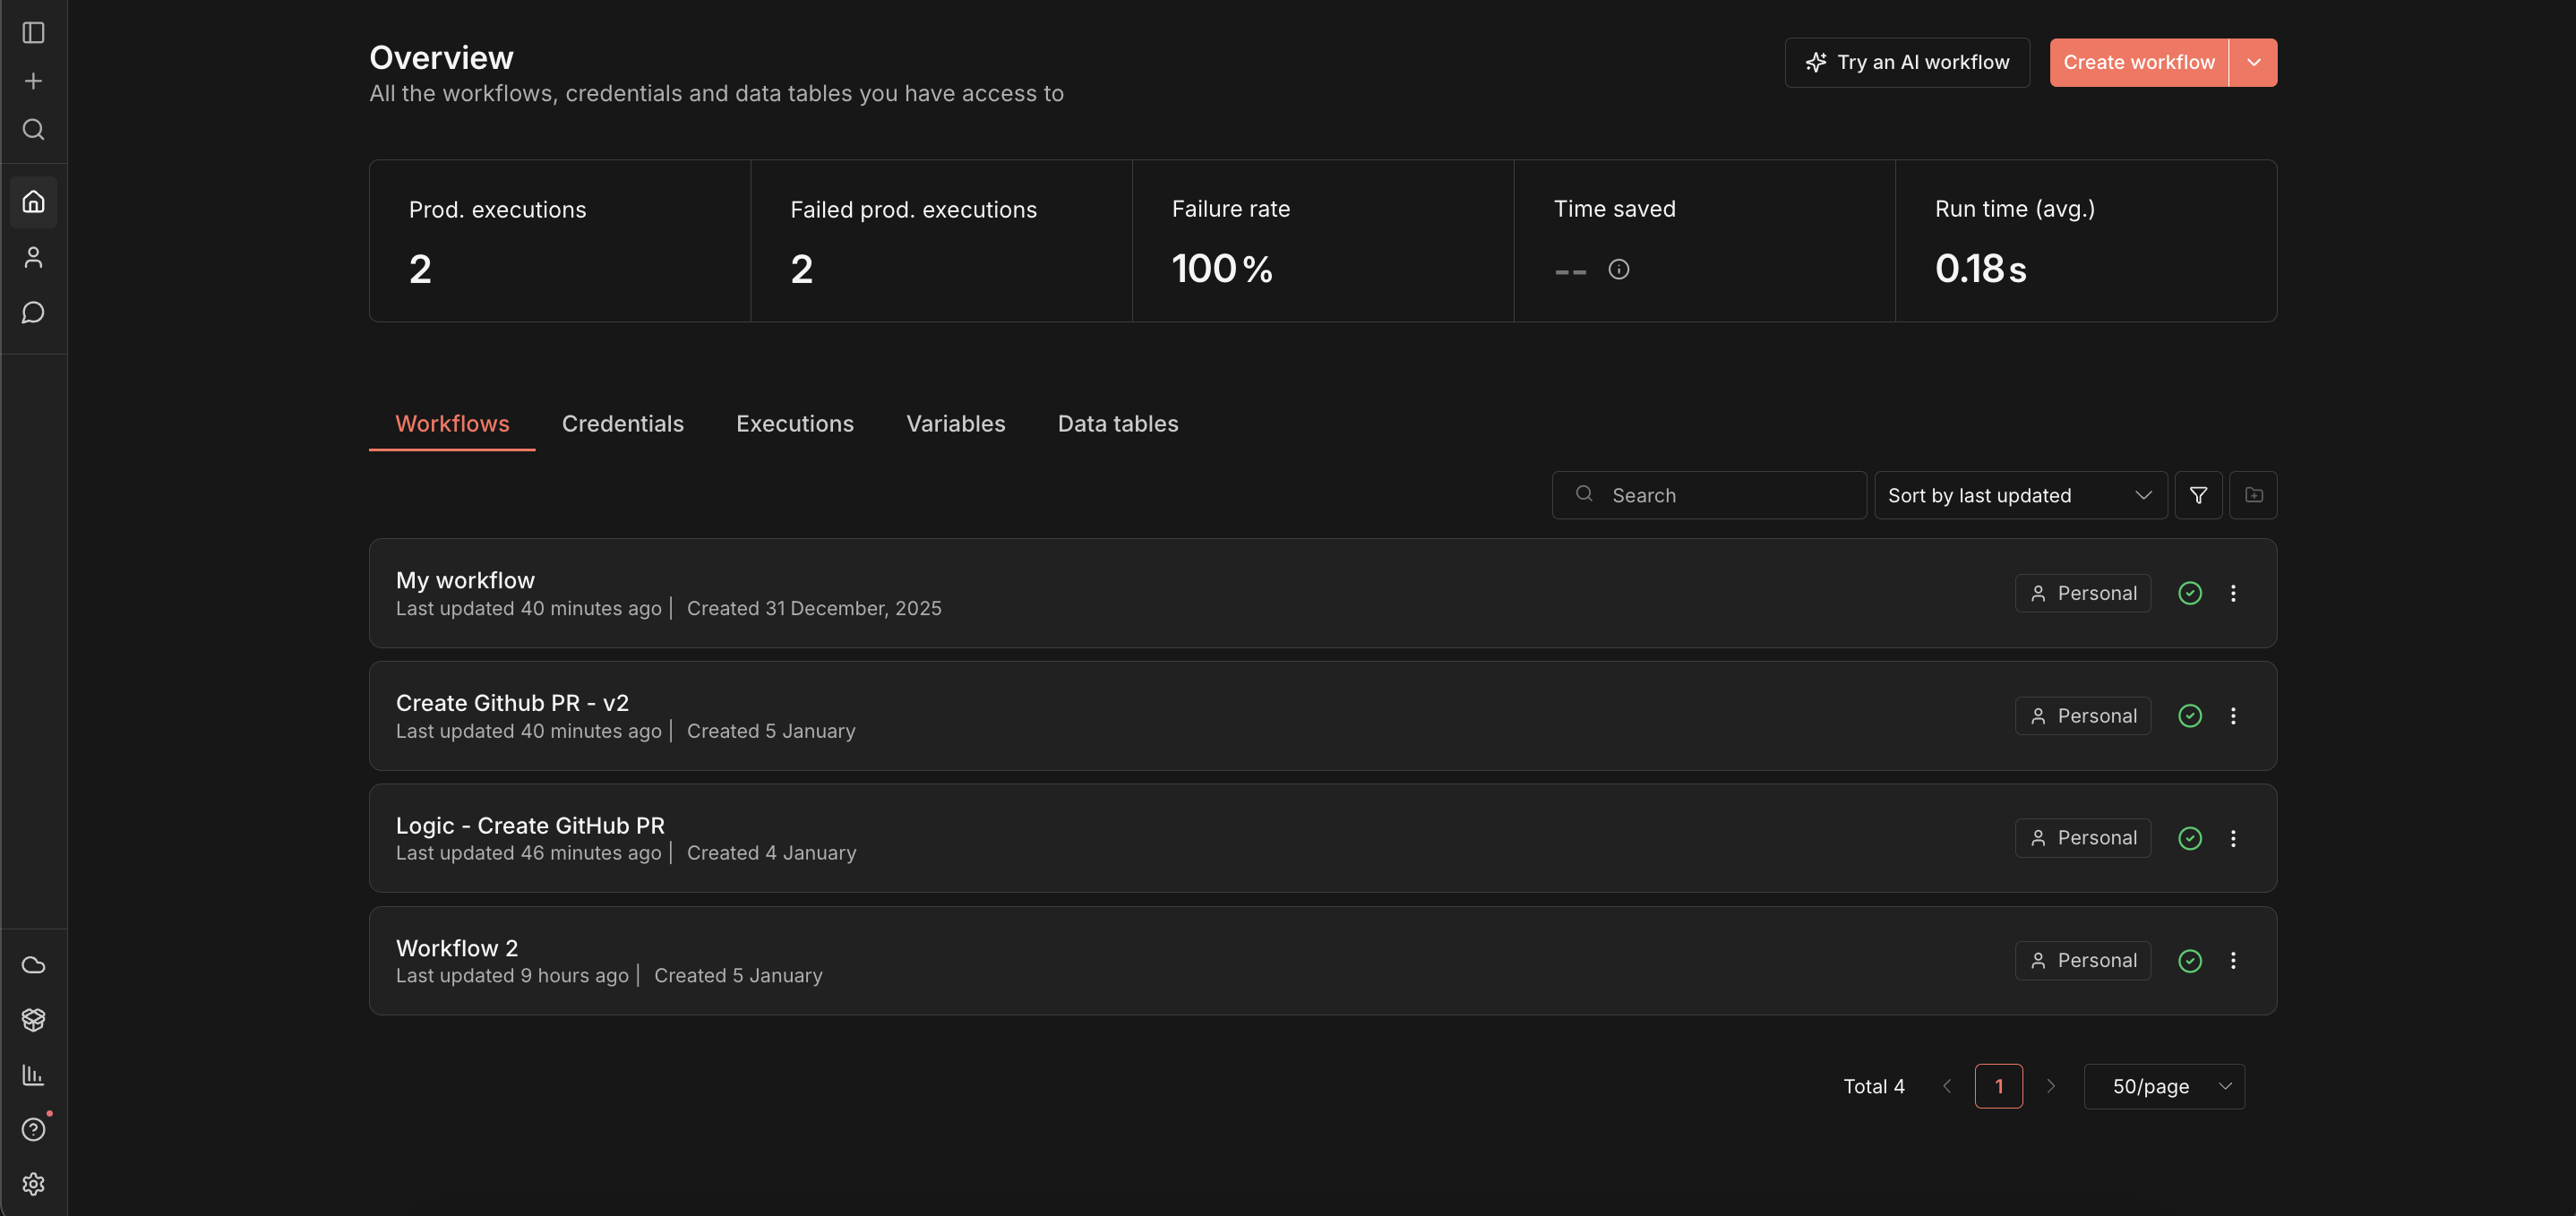
- Click on "Add First Step" and search for "MCP Server triggers"

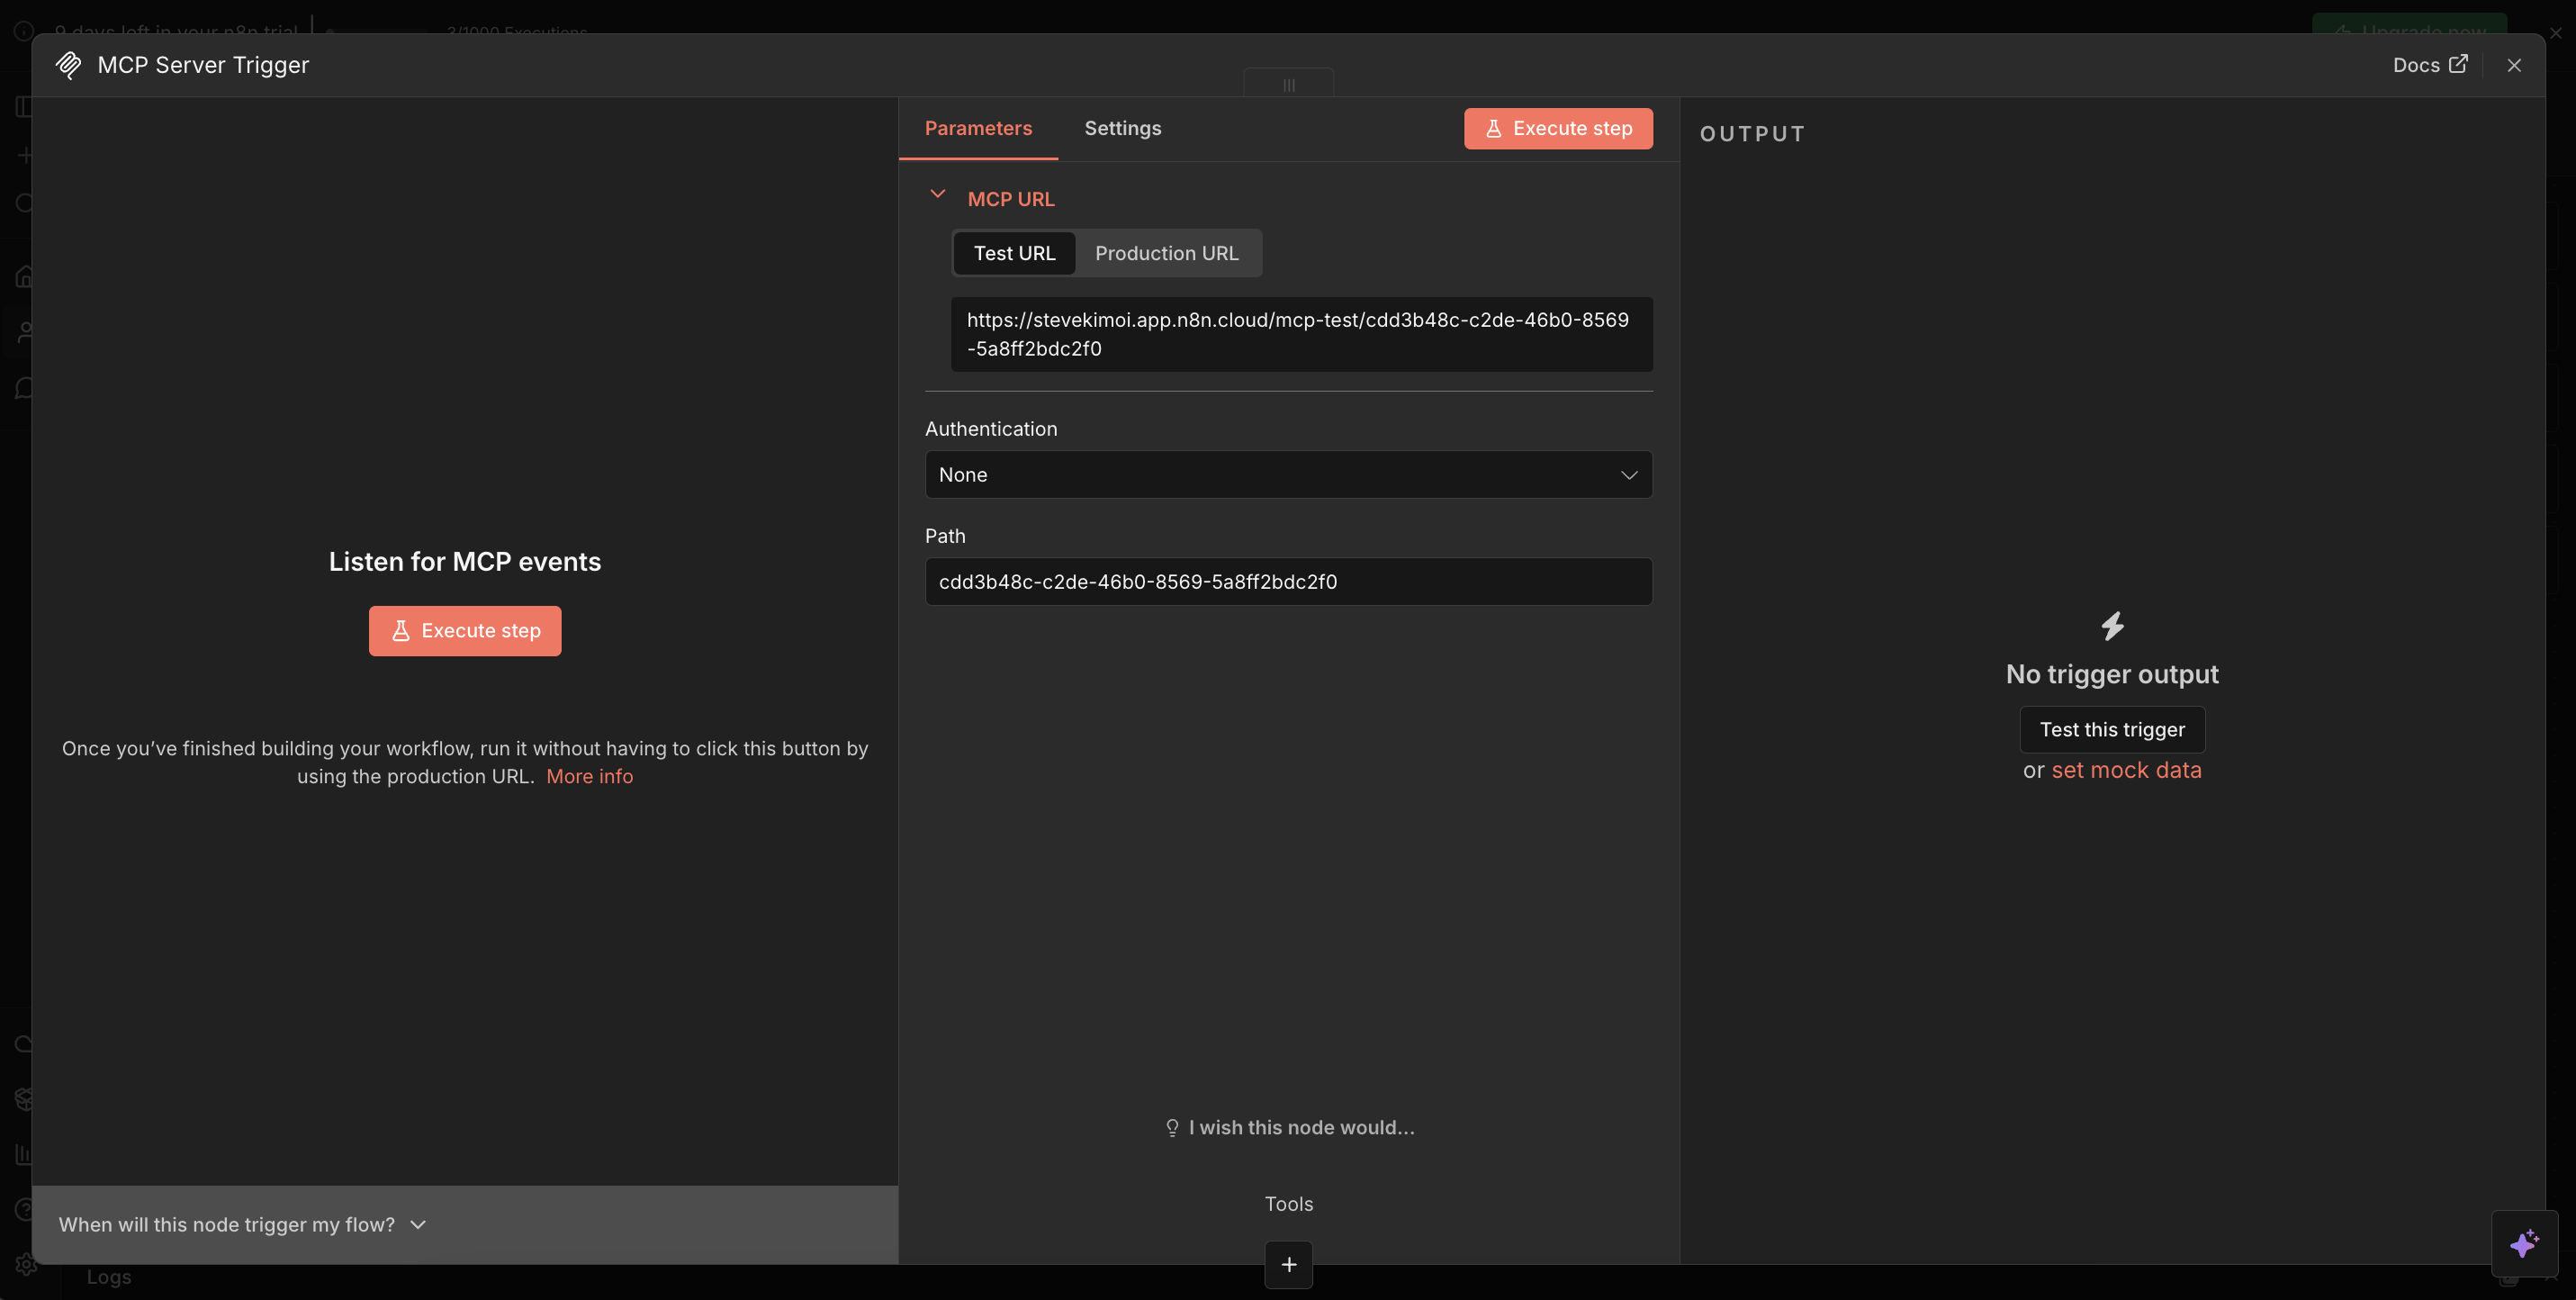
- Close the MCP Server modal by clicking the "x" button in the top right corner
Step 2: Building the GitHub Issue Tracker Tool
Now we'll create a GitHub issue tracker that fetches comprehensive issue details, including the full comment thread. This gives Cursor complete context to understand requirements and draft implementation plans.
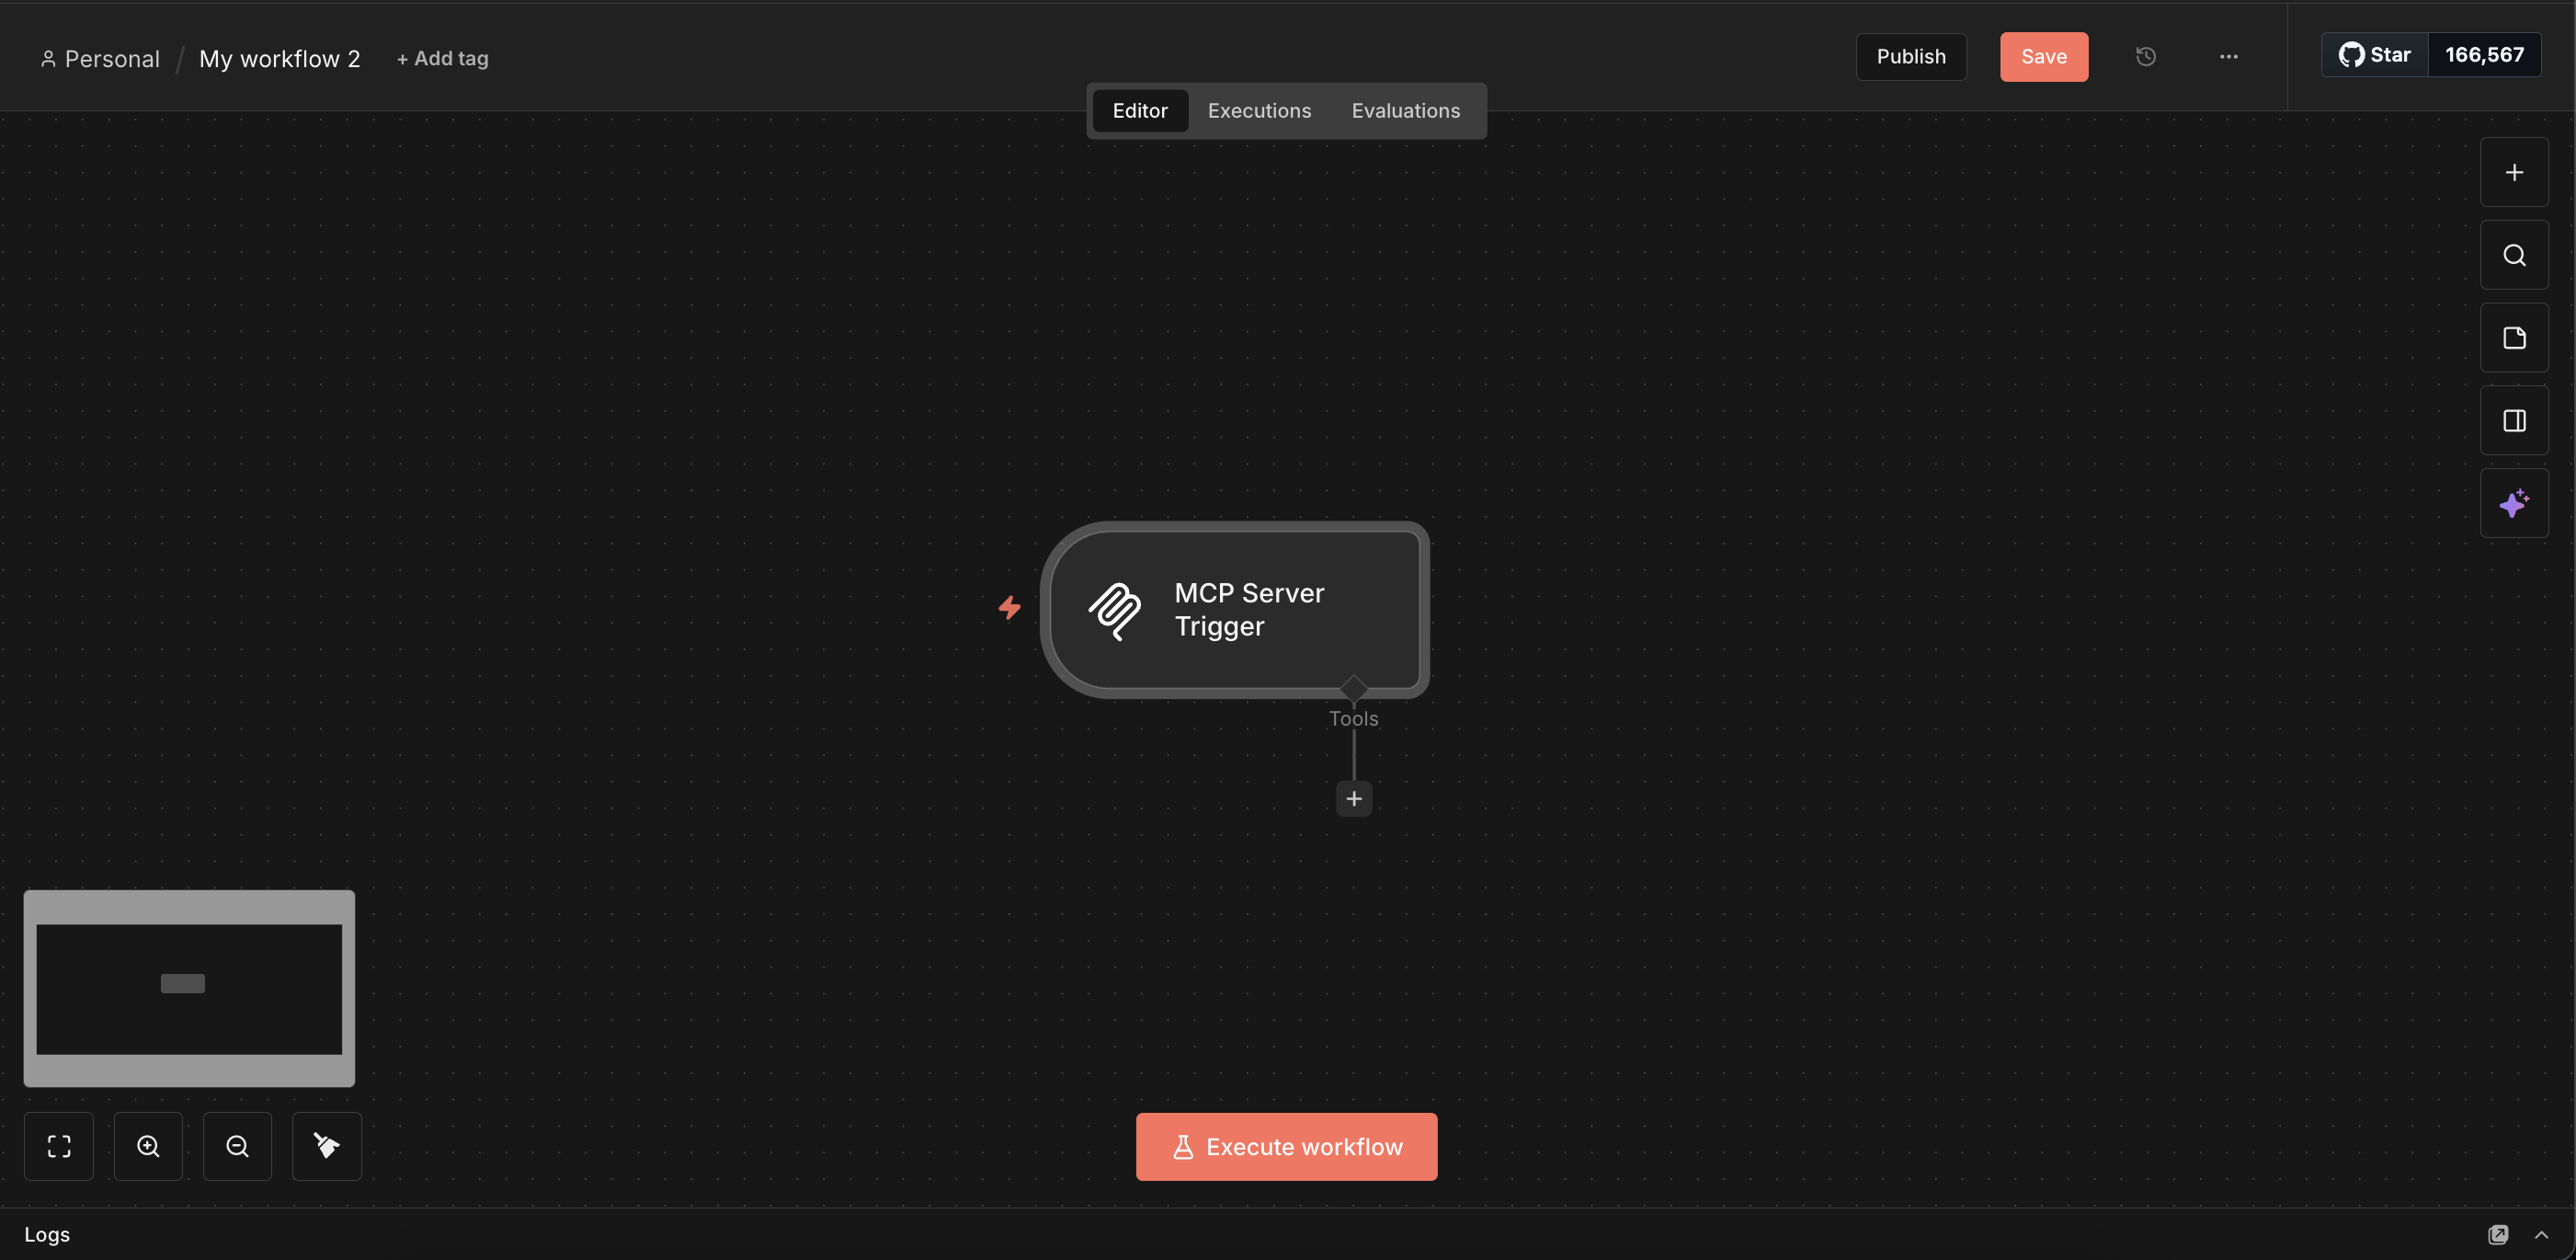
- Click on the "+" icon next to the MCP Server trigger node. This opens the tools section
- Search for "GitHub" tools and select it
- Configure the parameters as follows:

Configuration Details:
a. Credential to connect with:
- Select "Github Account"
- If this is your first time connecting, you'll need to provide a GitHub personal access token
- To create a token, go to GitHub → Settings → Developer settings → Personal access tokens → Tokens (classic)
- Generate a new token with the following permissions:
repo(full control of private repositories)issues:read(read issues)issues:write(write issues)pull_requests:write(create PRs)
b. Tool Description:
- Set this to "Manually"
c. Description:
- Enter this exact description:
Fetch GitHub issue details including the full comment thread, so Cursor can understand complete context and requirements from discussions. - This description is crucial—it needs to be specific so the LLM understands exactly what this tool does
d. Resource:
- Select "Repository"
e. Operation:
- Set to "Get Issues"
f. Repository Owner:
- Select "By URL" and enter your GitHub profile URL
g. Repository Name:
- Select "By URL" and enter the repository URL
-
Close the modal and click the "Publish" button to make your MCP server accessible to external services like Cursor
-
Click the "Execute Workflow" button at the bottom center of the screen
-
Hover over the MCP Server trigger node and click the three dots menu → "Open"
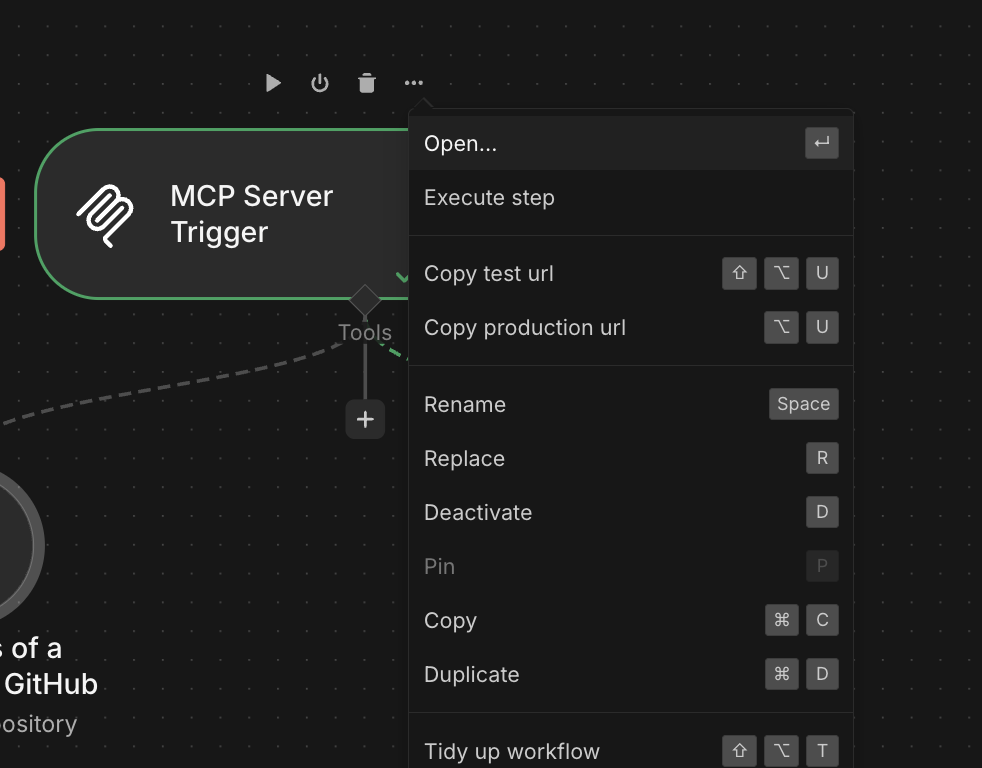
- Copy the test URL provided and save it for later use
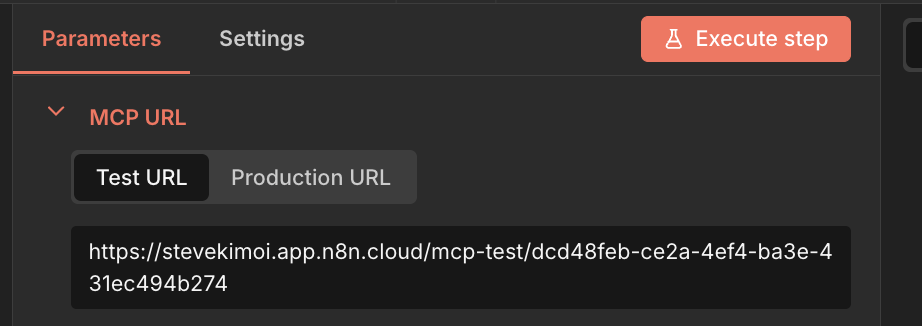
Step 3: Testing the Issue Tracker
Now let's connect your MCP server to Cursor and test the issue tracker functionality.
- Open Cursor IDE and navigate to Settings → Tools & MCP
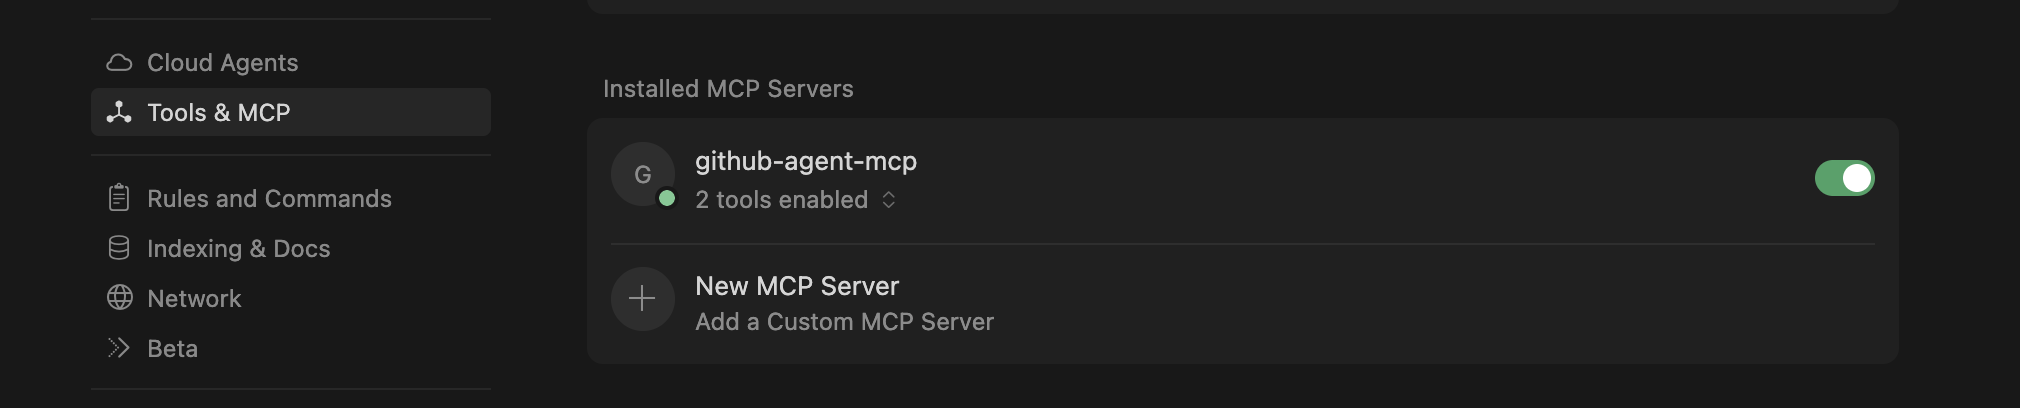
- Click on "New MCP Server" to open the
mcp.jsonfile - Replace the URL with the test URL you copied earlier:
{
  "mcpServers": {
    "github-agent-mcp": {
      "url": "https://stevekimoi.app.n8n.cloud/mcp-test/dcd48feb-ce2a-4ef4-ba3e-431ec494b274"
    }
  }
}
- Wait for the tools to load. You'll see a green dot appear, indicating that Cursor is successfully connected to your MCP server

- Open the chat section in Cursor (press
CMD + Lon Mac orCTRL + Lon Windows/Linux) and test with a request like:
We're working on issue #5 in my repo https://github.com/Stephen-Kimoi/Example-Auth-Service

Let's draft an implementation plan for it
The AI will fetch the issue details, including all comments and context, then help you draft a comprehensive implementation plan.
Building the AI-Powered PR Creator
Now we'll create a sophisticated workflow that generates professional pull requests with AI-powered descriptions. This workflow will analyze commit messages, extract repository information, and create PRs with intelligent titles and descriptions.
Step 4: Setting Up the PR Creator Workflow
Let's create a new workflow that will be triggered by our MCP server to handle PR creation.
- Create a new workflow in n8n
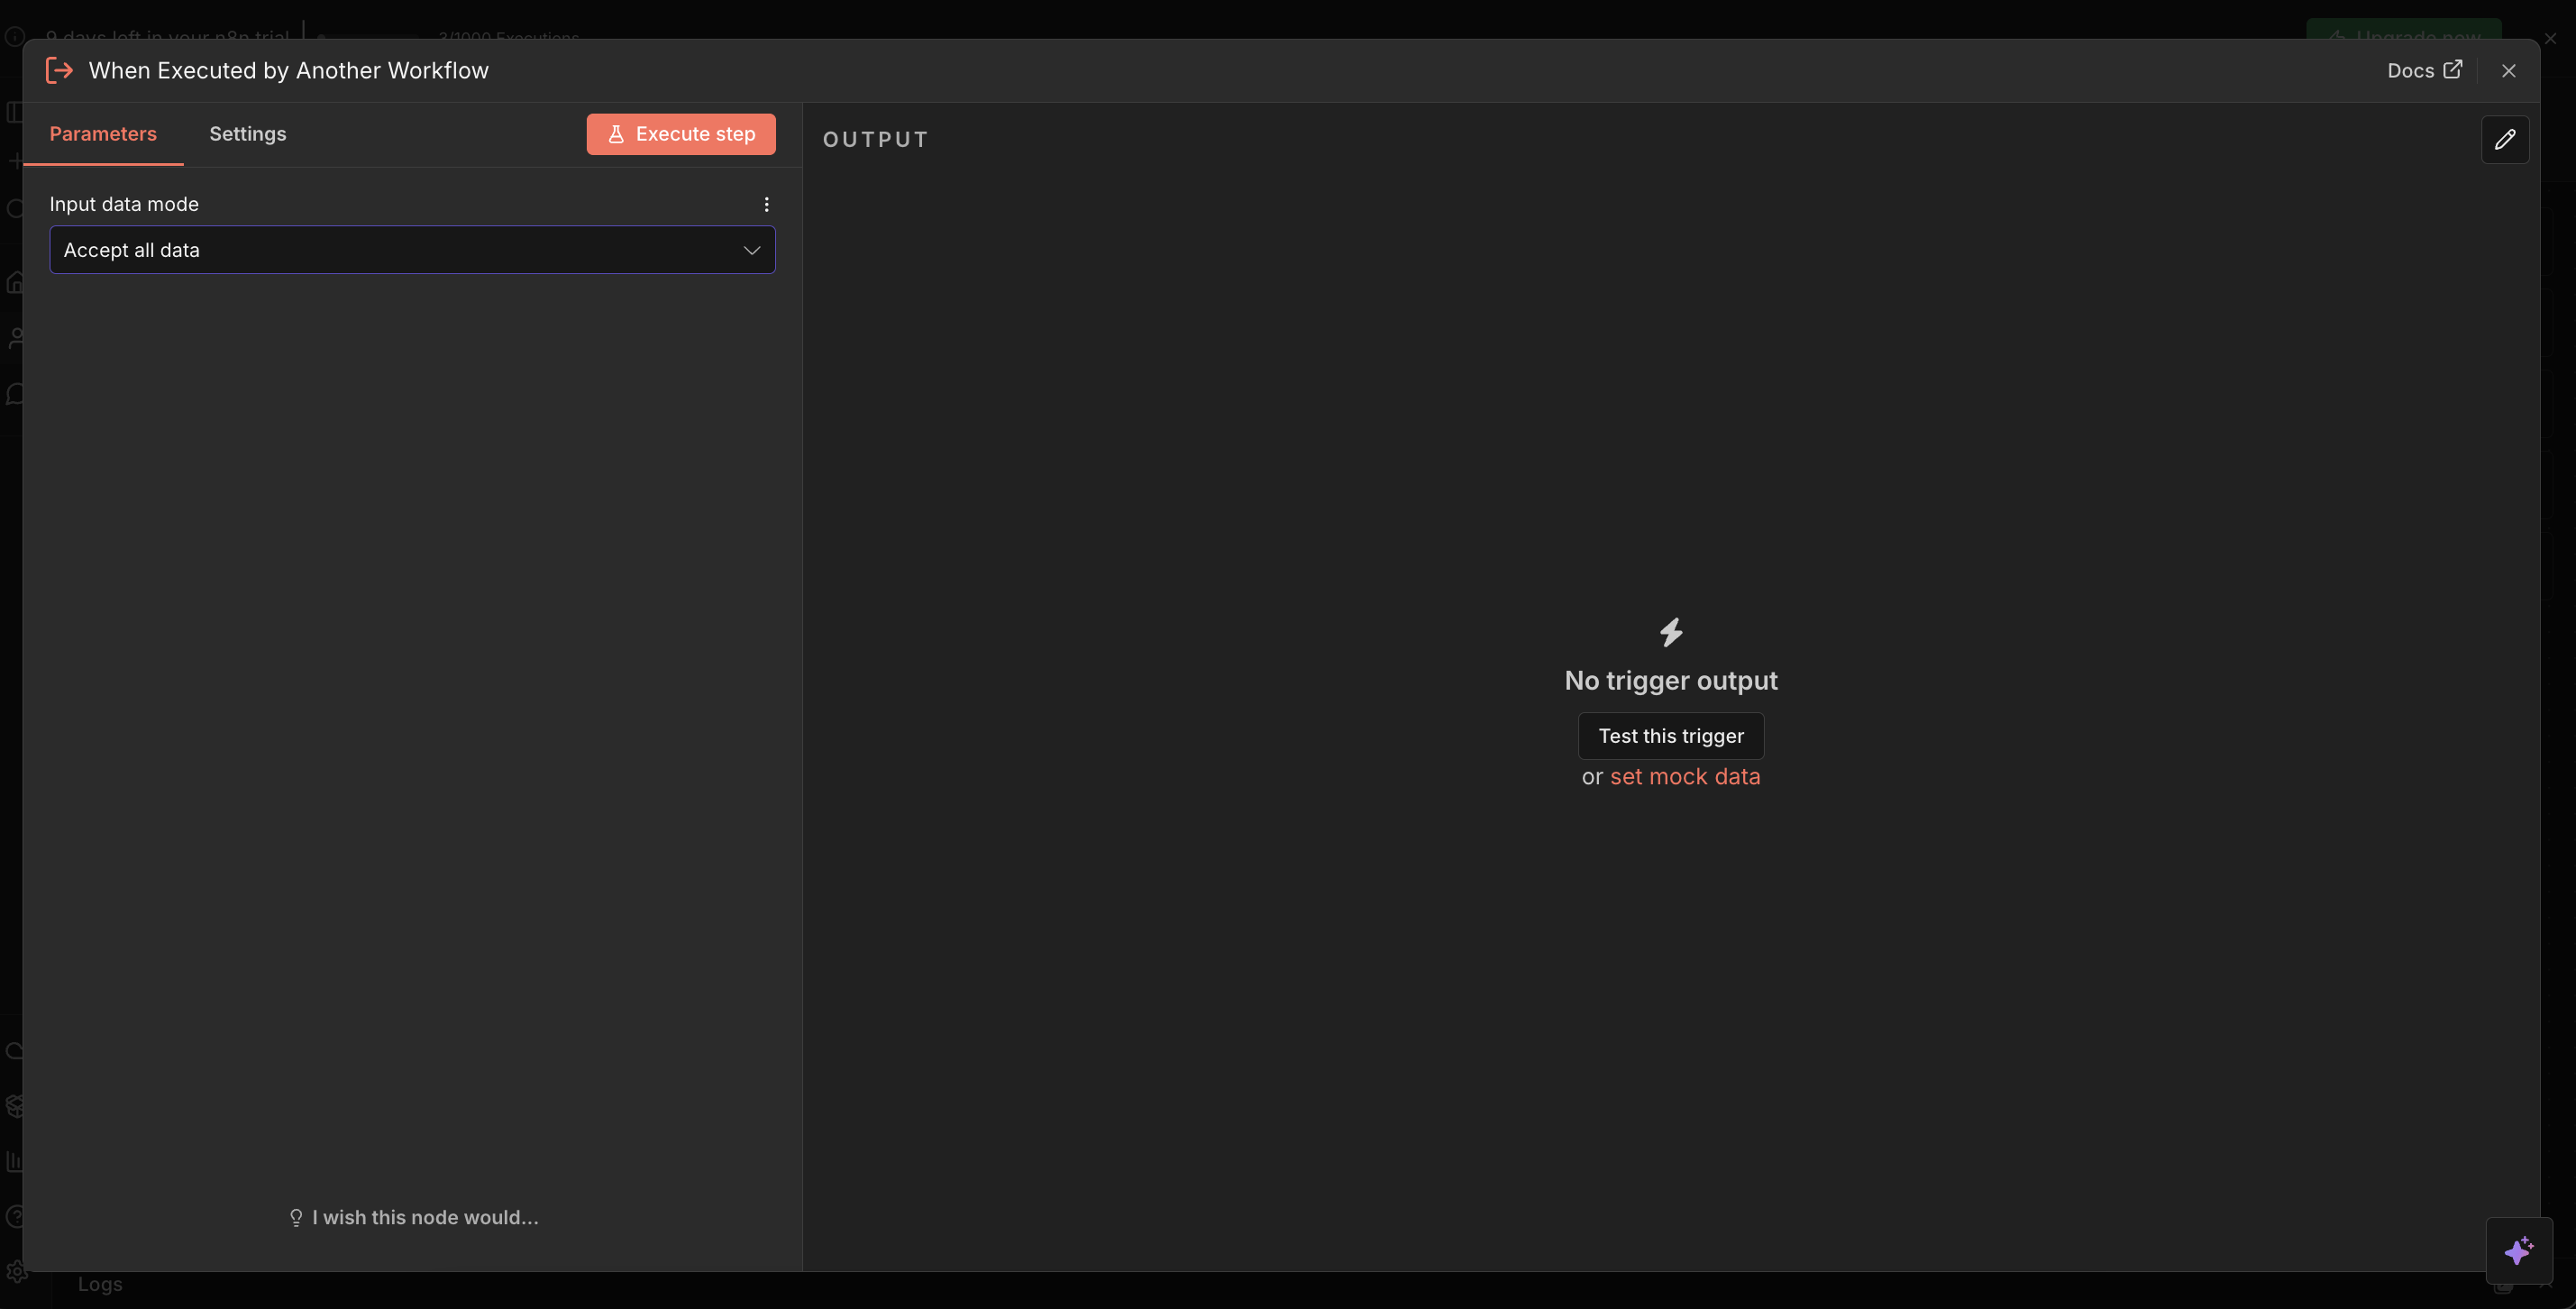
- Click "Add first step" and select "When executed by another workflow"
- In the parameter section, select "Accept all data"
Step 5: Creating the Repository Info Extraction Agent
We'll use an AI agent to intelligently extract repository information from natural language queries. This allows users to describe PRs in plain English, and the system will extract the necessary details.
Configuring the AI Agent
- Click the "+" icon on the right side of the workflow trigger node
- Select "AI Agent" tool
- Rename it to "Extract repository info"
- Configure the parameters as shown:
Parameter Settings:
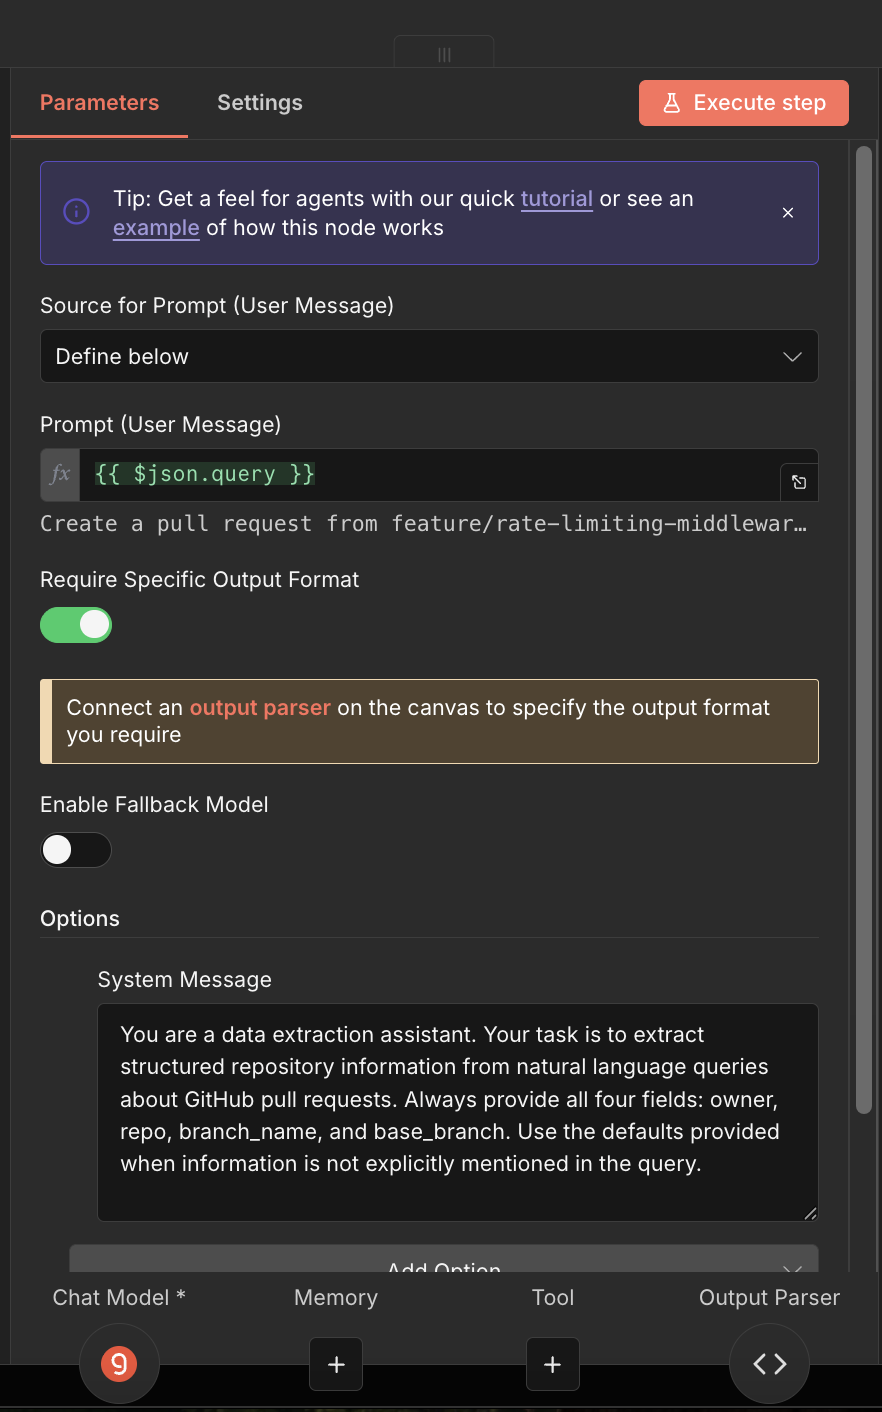
a. Source for Prompt (User Message):
- Set to "Define below"
b. Prompt (User Message):
- Set to:
{{ $json.query }}
c. Require Specific Output Format:
- Toggle this ON
d. Options:
- Add a "System Message" option
- Set the system message to:
You are a data extraction assistant. Your task is to extract structured repository information from natural language queries about GitHub pull requests. Always provide all four fields: owner, repo, branch_name, and base_branch. Use the defaults provided when information is not explicitly mentioned in the query.
Setting Up the Chat Model
- Click the "+" icon in the "Chat Mode" section
- Select "Gemini Chat Model" or "Google Gemini Chat Model"
- Configure as follows:
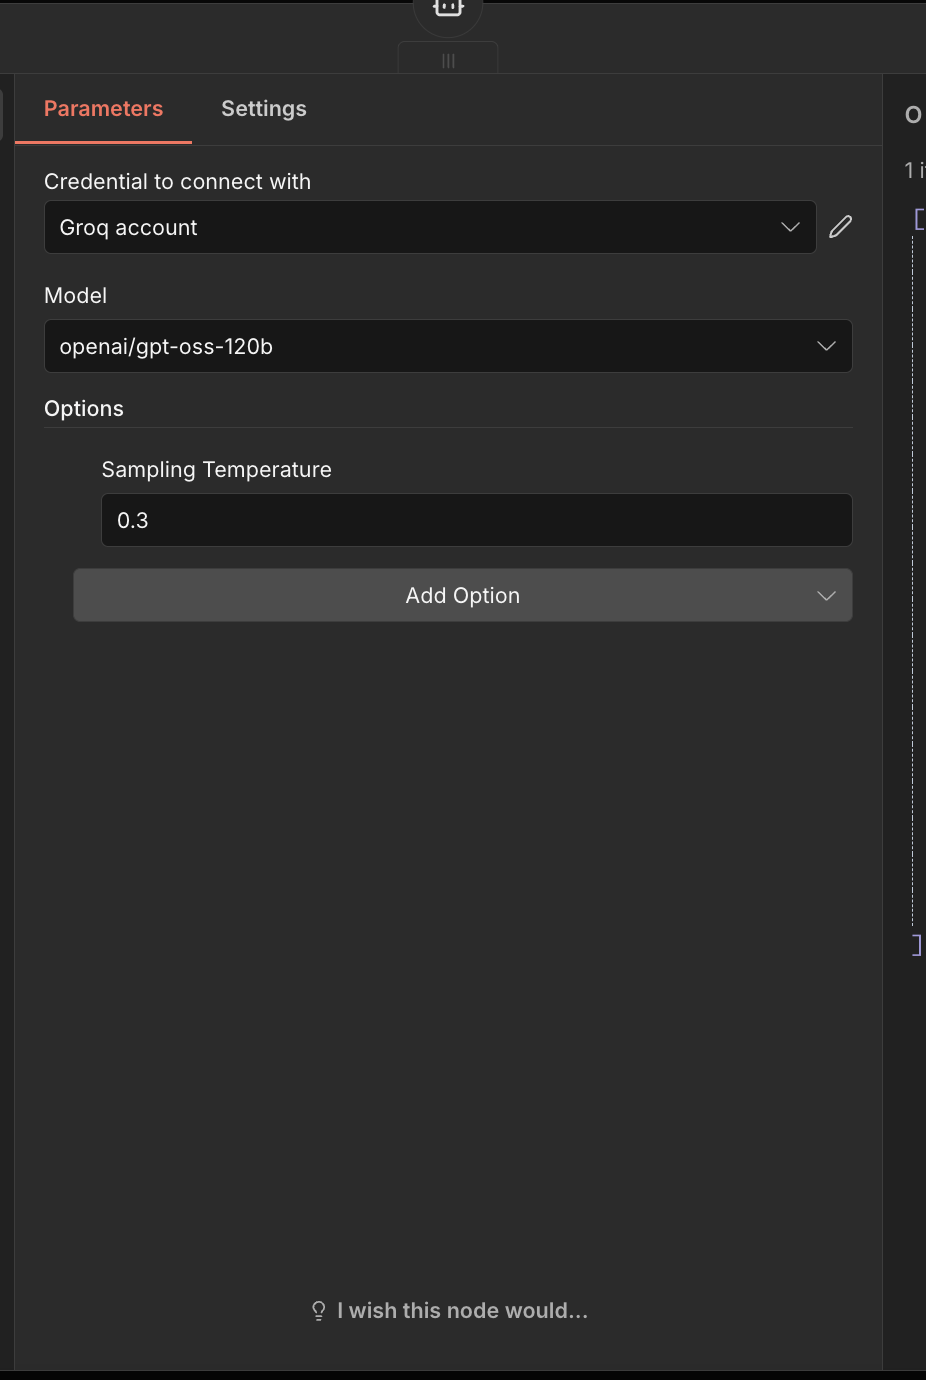
a. Credential to connect with:
- Connect your Gemini account (get your API key from Google AI Studio)
b. Model:
- Select "google/gemini-2.0-flash"
Configuring the Output Parser
- Click the "+" icon in the "Output parser" section
- Select "Structured Output Parser"
- Configure the parameters:
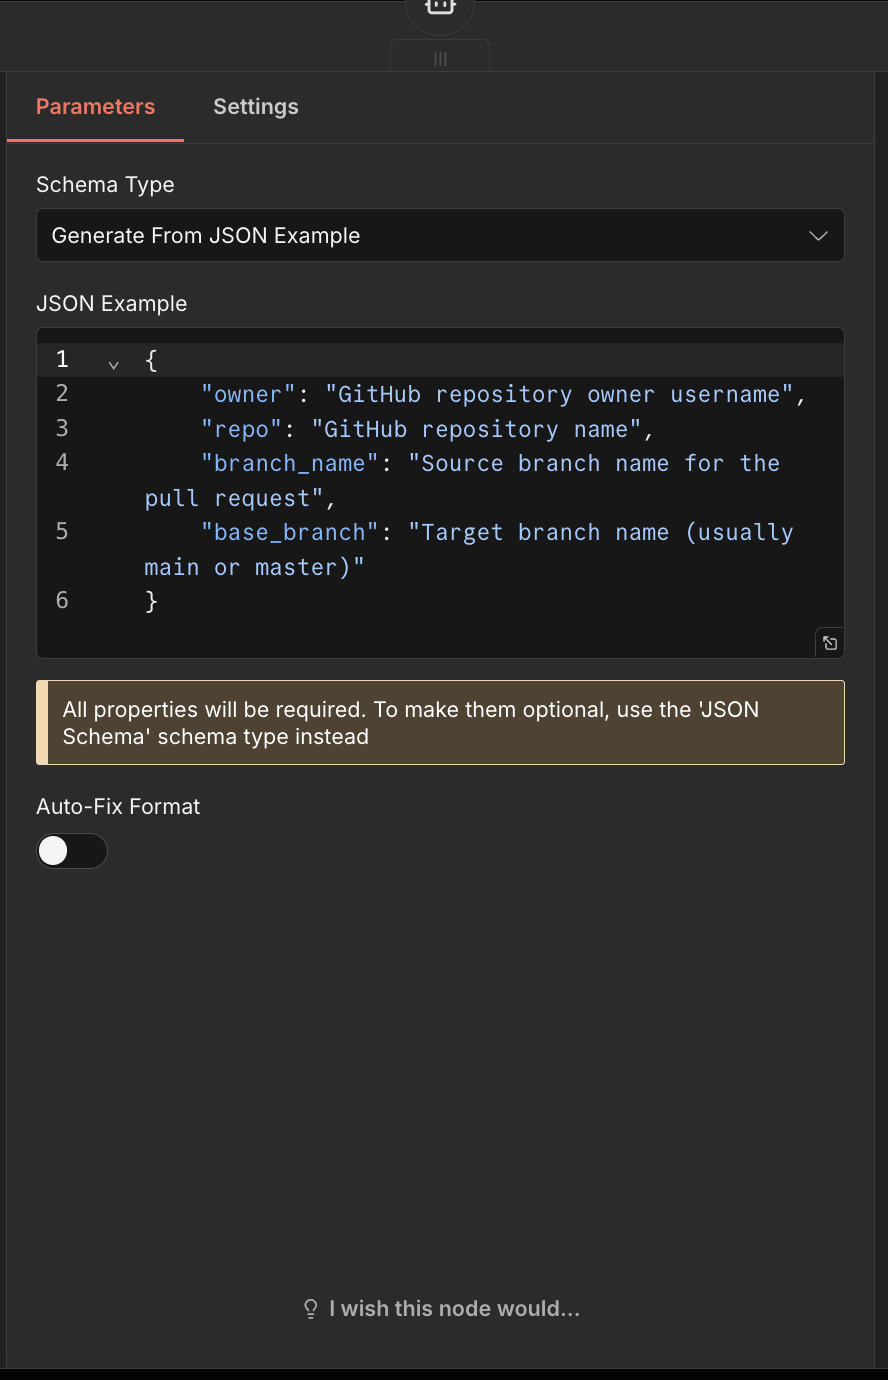
a. Schema Type:
- Select "Generate From JSON Example"
b. JSON Example:
- Insert this schema:
{
	"owner": "GitHub repository owner username",
	"repo": "GitHub repository name",
	"branch_name": "Source branch name for the pull request",
	"base_branch": "Target branch name (usually main or master)"
}
Step 6: Fetching Commit History
Now we'll retrieve the commit messages from the specified branch to analyze what changes have been made.
Setting Up the GitHub API Request
- Click the "+" button on the right side of the "Extract repository info" node
- Search for and select "HTTP Request"
- Configure the parameters:
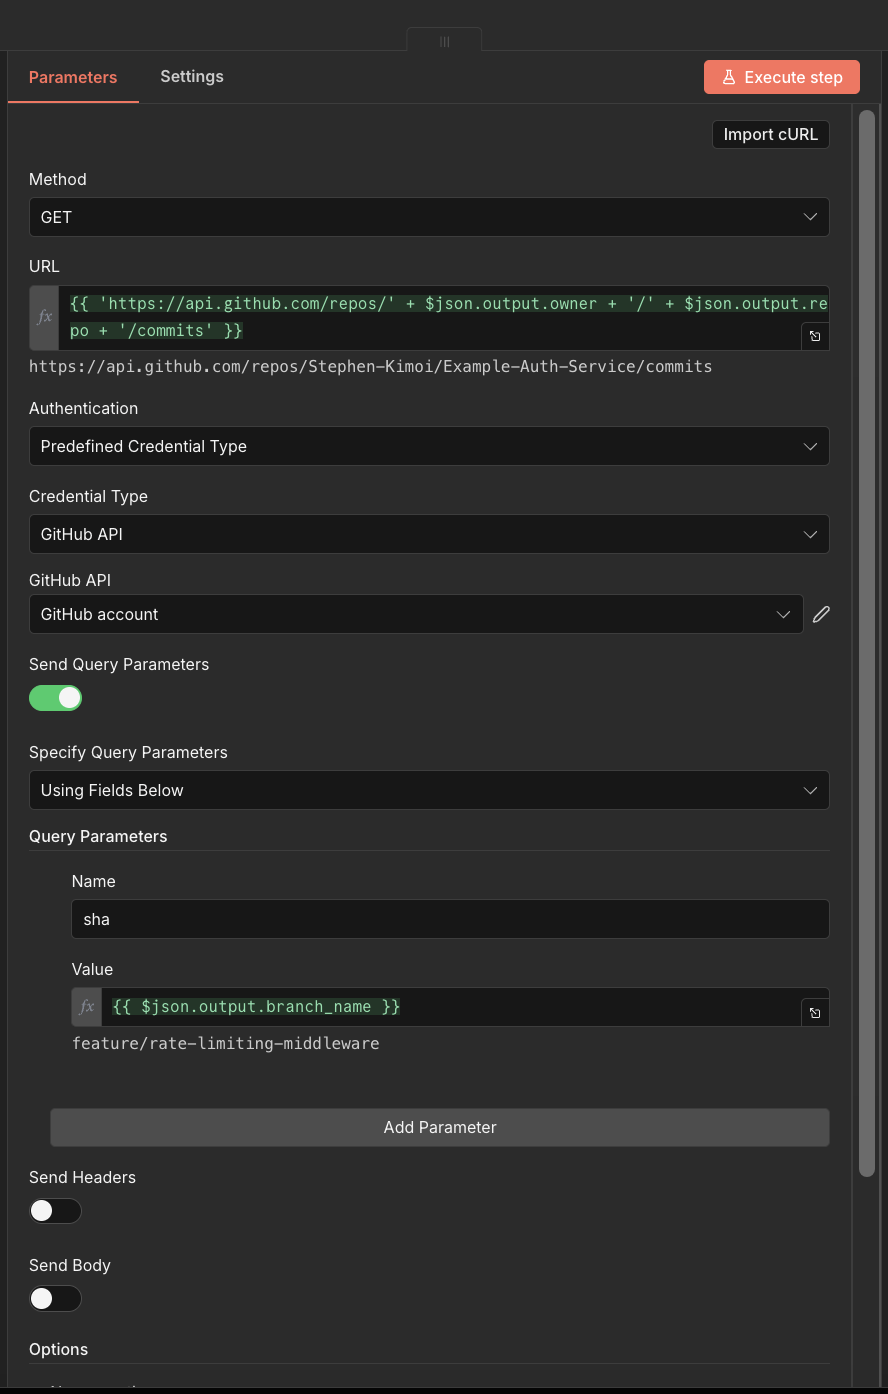
Configuration:
a. Method:
- Set to "GET"
b. URL:
- Set to:
{{ 'https://api.github.com/repos/' + $json.output.owner + '/' + $json.output.repo + '/commits' }}
c. Authentication:
- Set to "Predefined Credential Type"
d. Credential Type:
- Select "Github API"
e. GitHub API:
- Select "Github Account" (the same credential you used earlier)
f. Send Query Parameters:
- Toggle this ON
g. Specify Query Parameters:
- Select "Using Fields Below"
- Set "Name" to:
sha - Set "Value" to:
{{ $json.output.branch_name }}
- Switch to the "Settings" tab
- Under "On Error", select "Continue (using error output)"
Adding Error Handling
- Click on the "success" output extension of the HTTP Request node
- Select "If" statement
- Rename it to "Check for Repository error"
- Configure the condition:
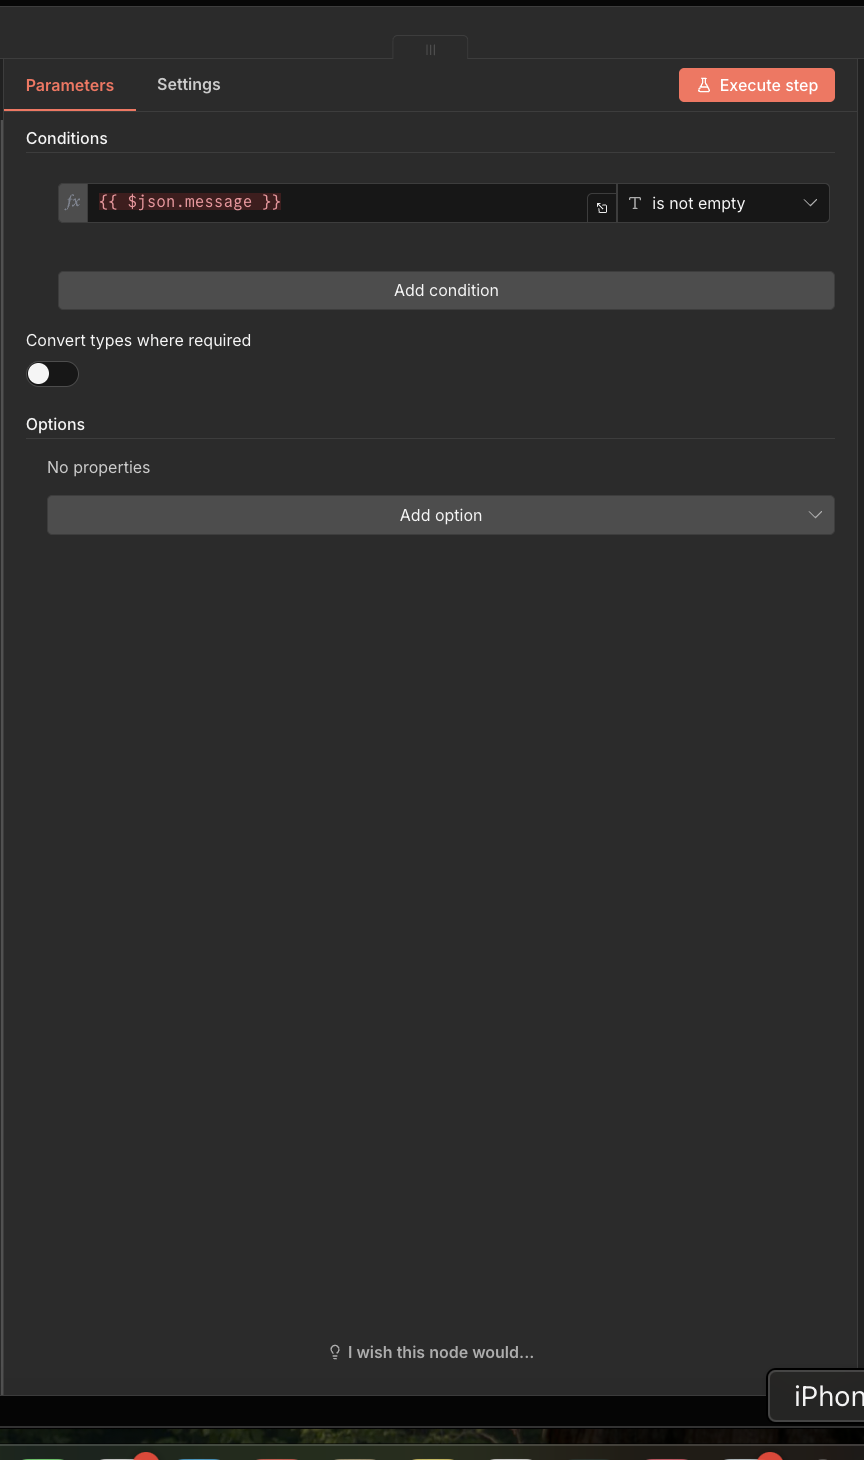
If the condition is "true" (error occurred):
- Click on the "true" output
- Select "Edit Fields"
- Configure as follows:
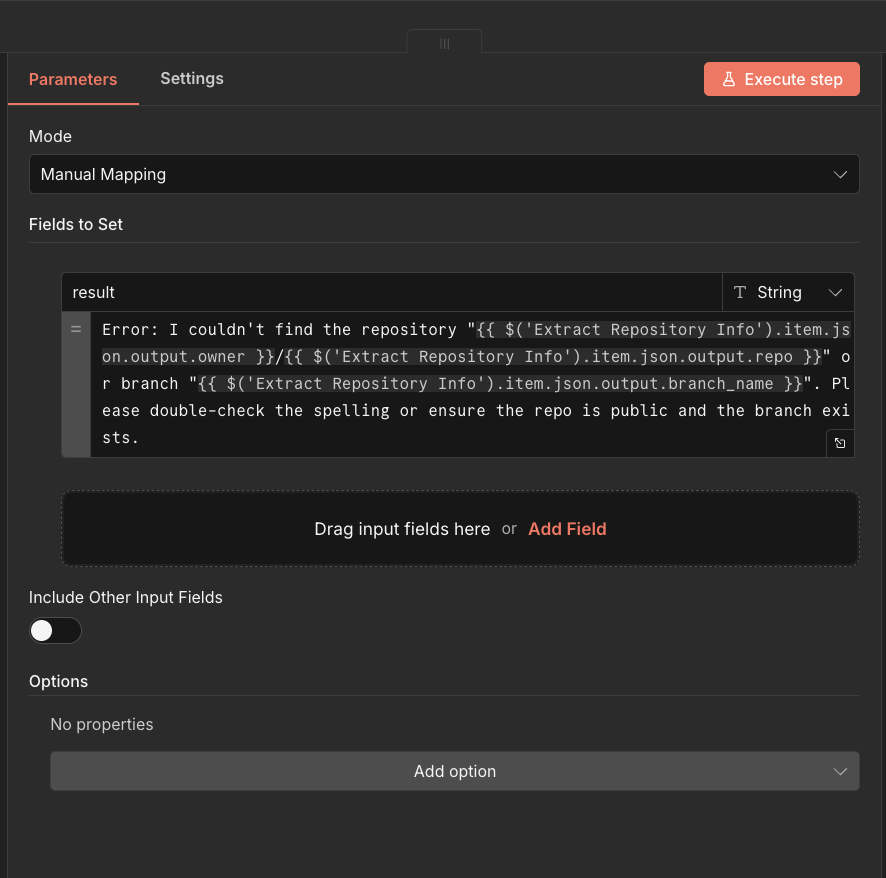
a. Mode:
- Select "Manual Mapping"
b. Fields to Set:
- Click "Add field"
- name:
result - value:
Error: I couldn't find the repository "{{ $('Extract Repository Info').item.json.output.owner }}/{{ $('Extract Repository Info').item.json.output.repo }}" or branch "{{ $('Extract Repository Info').item.json.output.branch_name }}". Please double-check the spelling or ensure the repo is public and the branch exists.
If the condition is "false" (success):
- Click on the "false" output
- Select "Edit Fields"
- Configure:
a. Mode:
- Select "Manual Mapping"
b. Fields to Set:
- Add the following fields:
- owner:
{{ $('Extract Repository Info').item.json.output.owner }} - repo:
{{ $('Extract Repository Info').item.json.output.repo }} - branch_name:
{{ $('Extract Repository Info').item.json.output.branch_name }} - base_branch:
{{ $('Extract Repository Info').item.json.output.base_branch }} - message:
{{ $json.commit.message }}
- owner:
Summarizing Commits
- Click the "+" button and search for "Summarize"
- Configure the parameters:
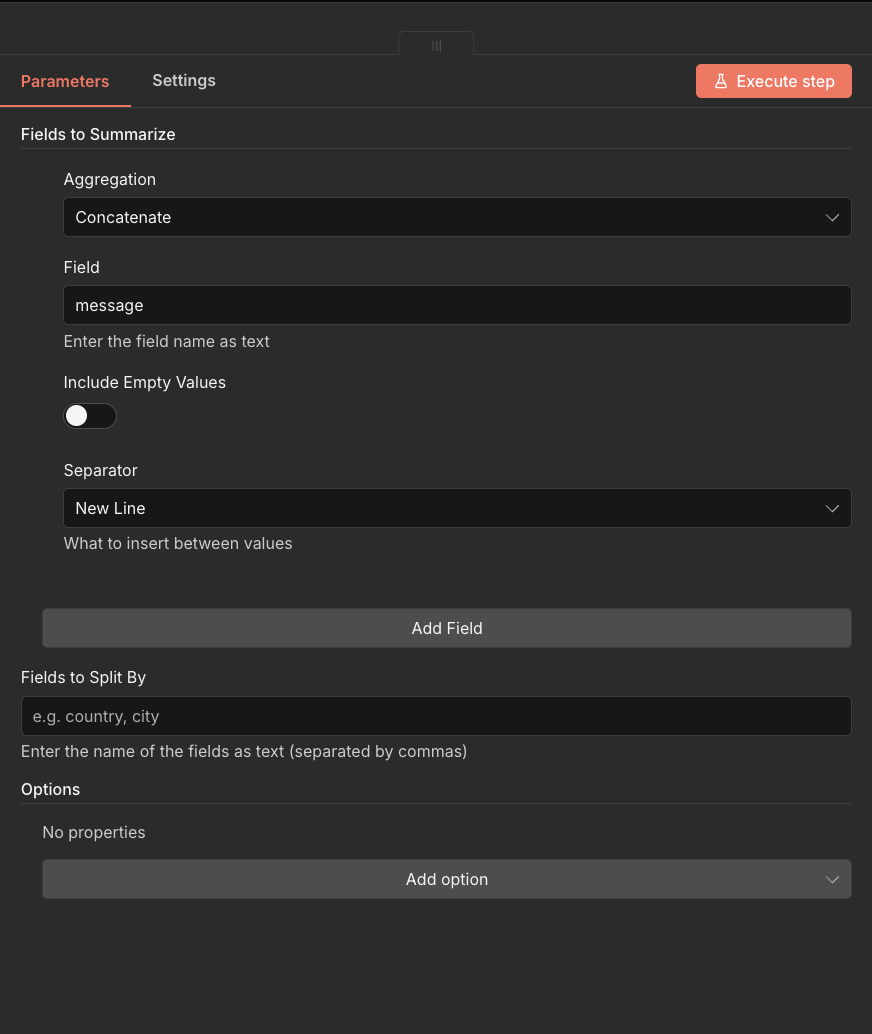
a. Aggregation:
- Select "Concatenate"
b. Field:
- Select "message"
c. Separator:
- Select "New Line"
Step 7: Generating PR Description with AI
Now we'll use an LLM to analyze the commit messages and generate a professional PR title and description.
- Click the "+" icon on the right of the "Summarize" node
- Search for and select "Basic LLM Chain"
- Configure the parameters:
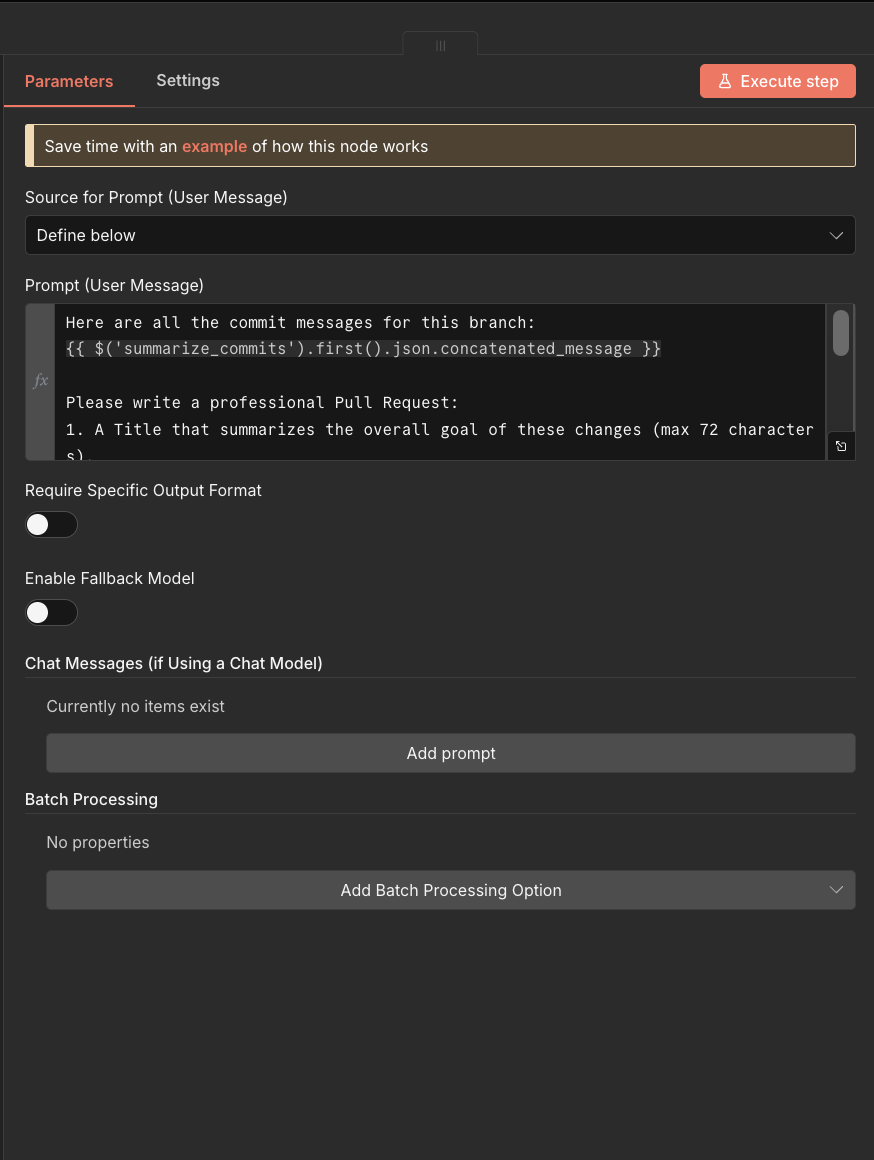
Parameter Settings:
a. Source for Prompt (User Message):
- Select "Define below"
b. Prompt (User Message):
- Set to:
Here are all the commit messages for this branch:
{{ $('summarize_commits').first().json.concatenated_message }}

Please write a professional Pull Request:
1. A Title that summarizes the overall goal of these changes (max 72 characters).
2. A Description that lists the key changes in bullet points.

IMPORTANT: Return ONLY plain text without any markdown formatting. Do not use asterisks (**), bold, italics, or any other markdown syntax.

Format your response as:
Title: [your title here]
Description:
[your description here]
Configuring the Model
- Click the "+" icon in the "Model" section
- Select "Gemini Chat Model" or "Google Gemini Chat Model"
- Configure:
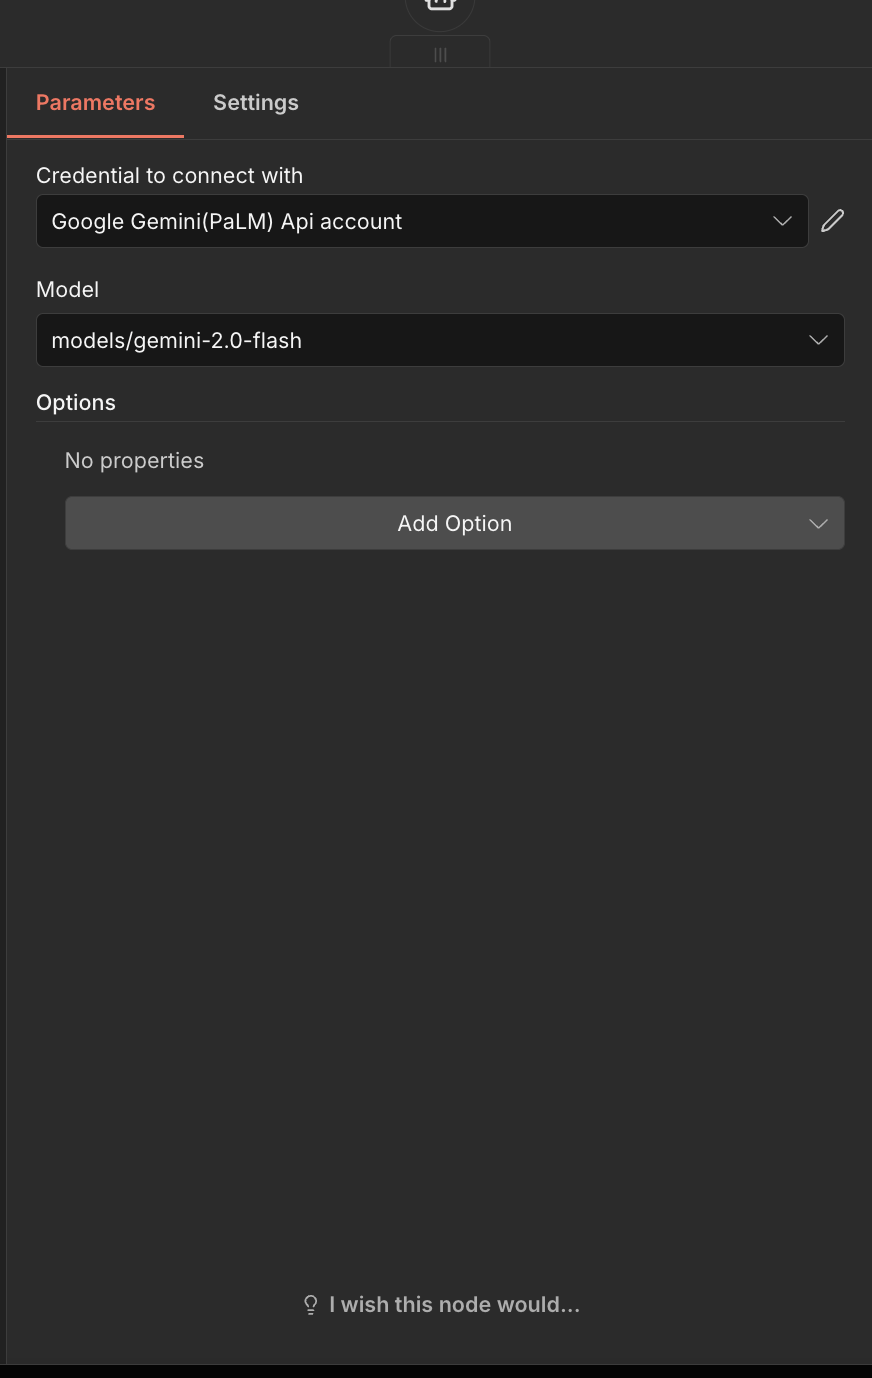
a. Credential to connect with:
- Select "Gemini Account"
b. Model:
- Select "google/gemini-2.0-flash"
Step 8: Creating the Pull Request
Finally, we'll send the PR creation request to GitHub using the AI-generated title and description.
- Click the "+" icon on the "Basic LLM Chain" node
- Select "HTTP Request"
- Configure the parameters:
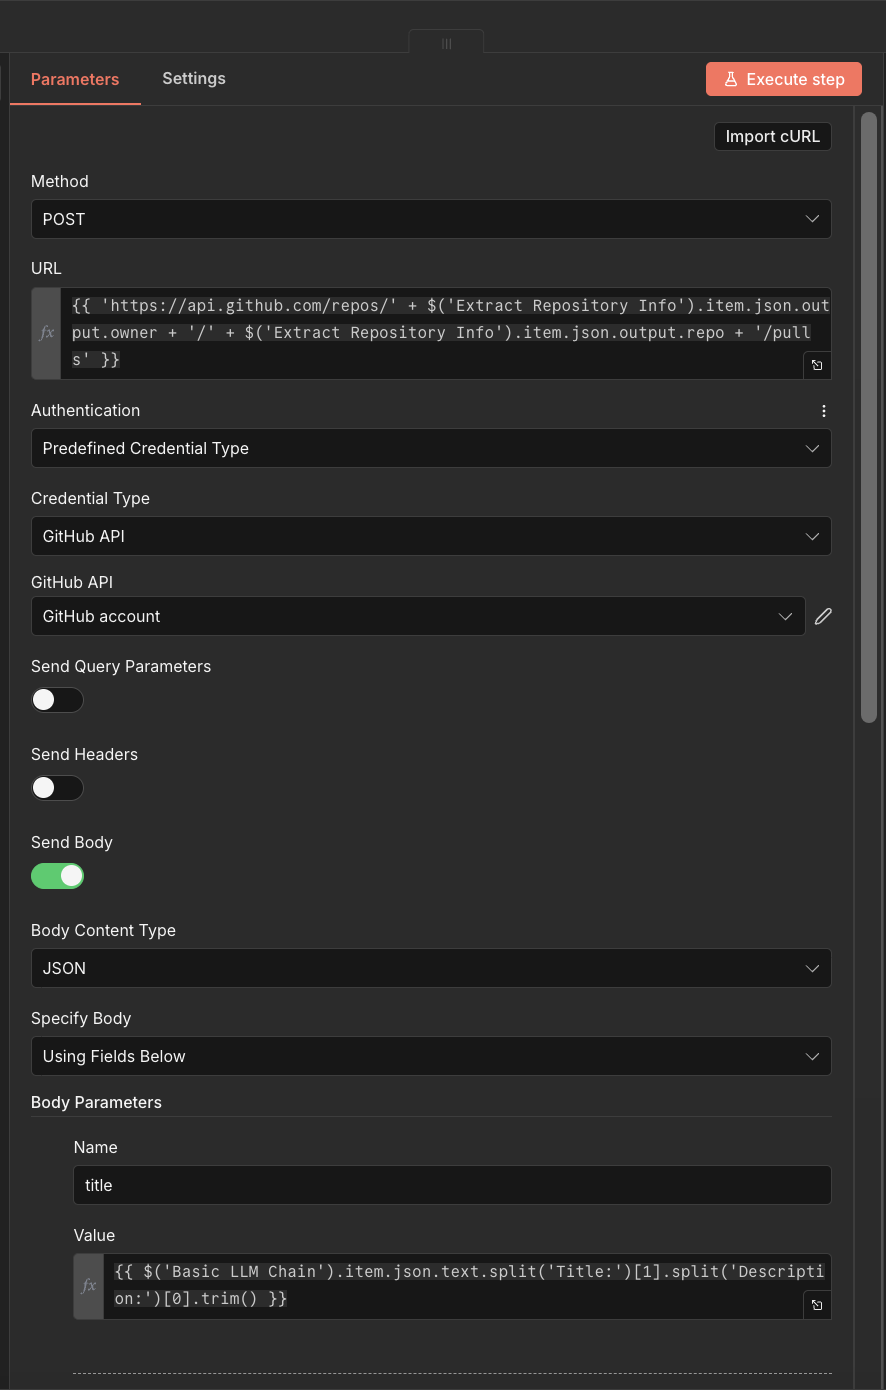
Parameter Configuration:
a. Method:
- Set to "POST"
b. URL:
- Set to:
{{ 'https://api.github.com/repos/' + $('Extract Repository Info').item.json.output.owner + '/' + $('Extract Repository Info').item.json.output.repo + '/pulls' }}
c. Authentication:
- Select "Predefined Credential Type"
d. Credential Type:
- Select "Github API"
e. GitHub API:
- Select "Github Account"
f. Send body:
- Toggle this ON
g. Body Content Type:
- Select "JSON"
h. Specify Body:
- Select "Using Fields Below"
- Add these body parameters:
- title:
{{ $('Basic LLM Chain').item.json.text.split('Title:')[1].split('Description:')[0].trim() }} - head:
{{ $('Extract Repository Info').item.json.output.branch_name }} - base:
{{ $('Extract Repository Info').item.json.output.base_branch }} - body:
{{ $('Basic LLM Chain').item.json.text.split('Description:')[1].trim() }}
- title:
Finalizing the Workflow
Once configured, your complete n8n workflow should look like this:
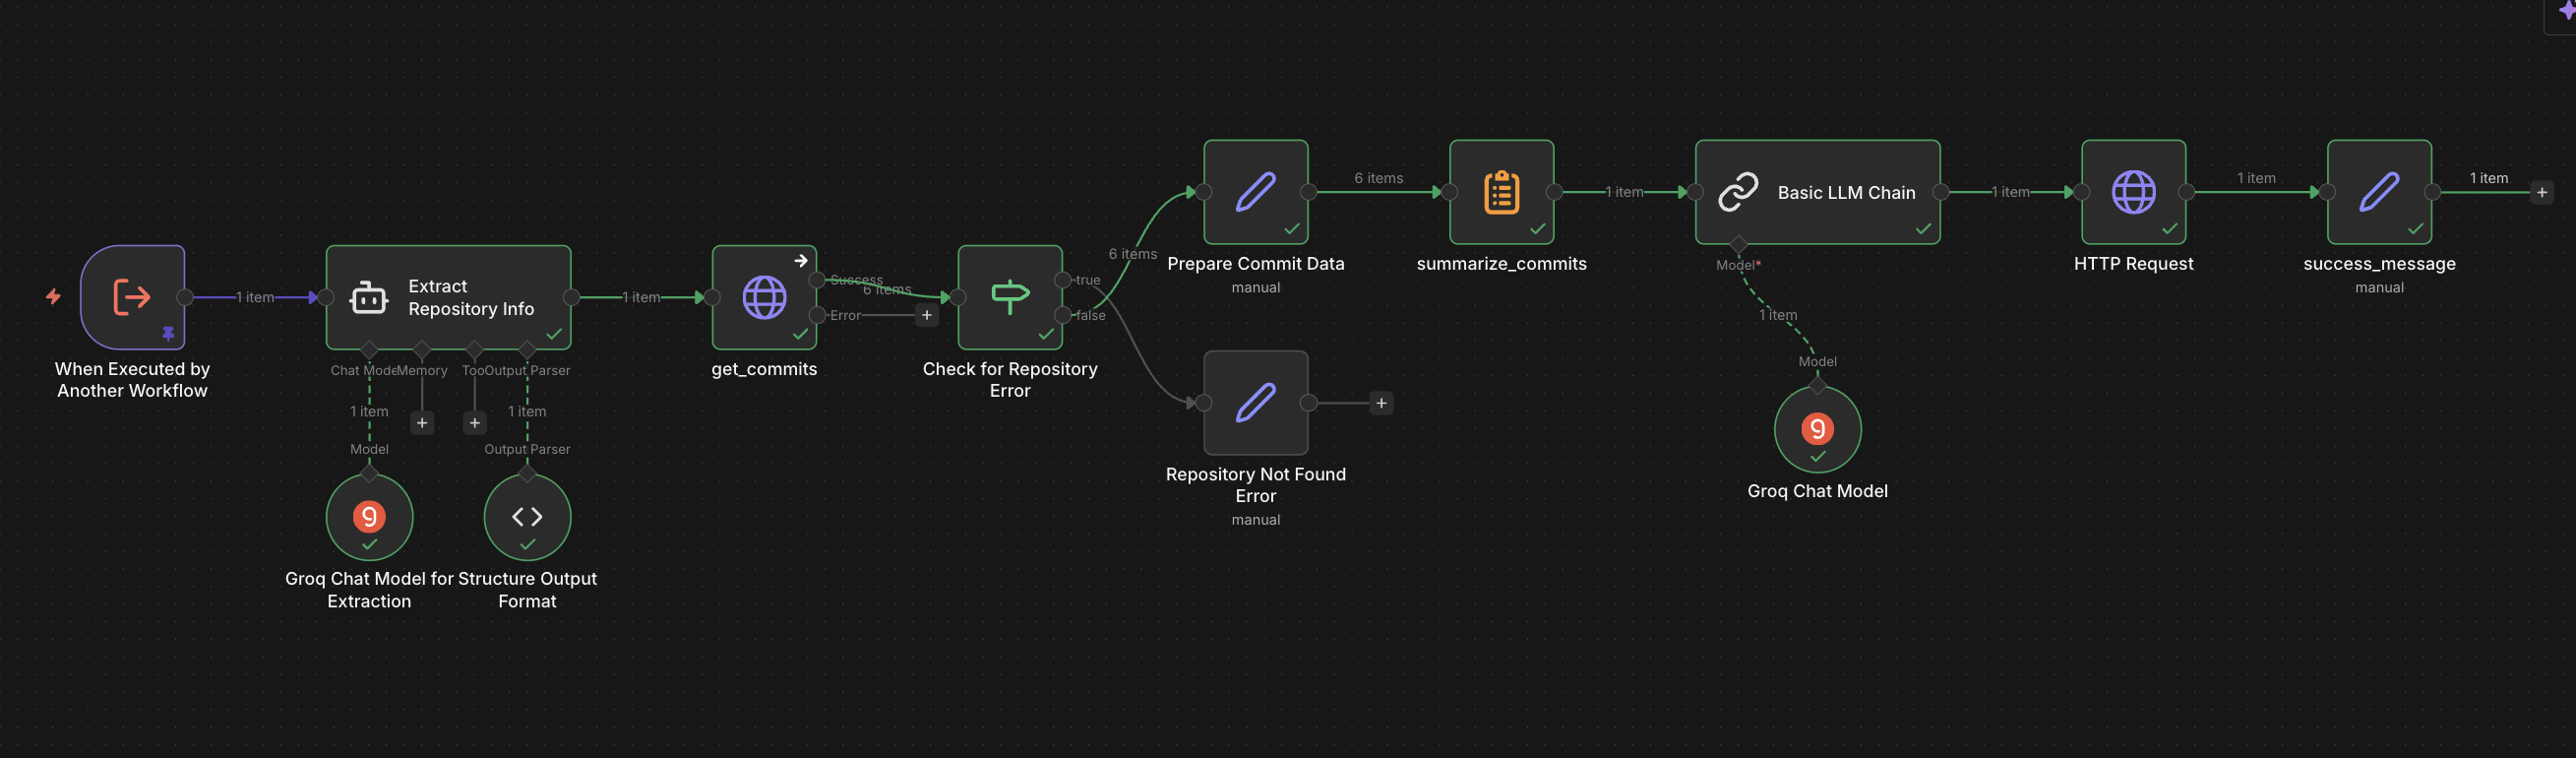
- Click "Save" to preserve your work
- Click "Publish" to make the workflow available
- Click "Execute workflow" to test it
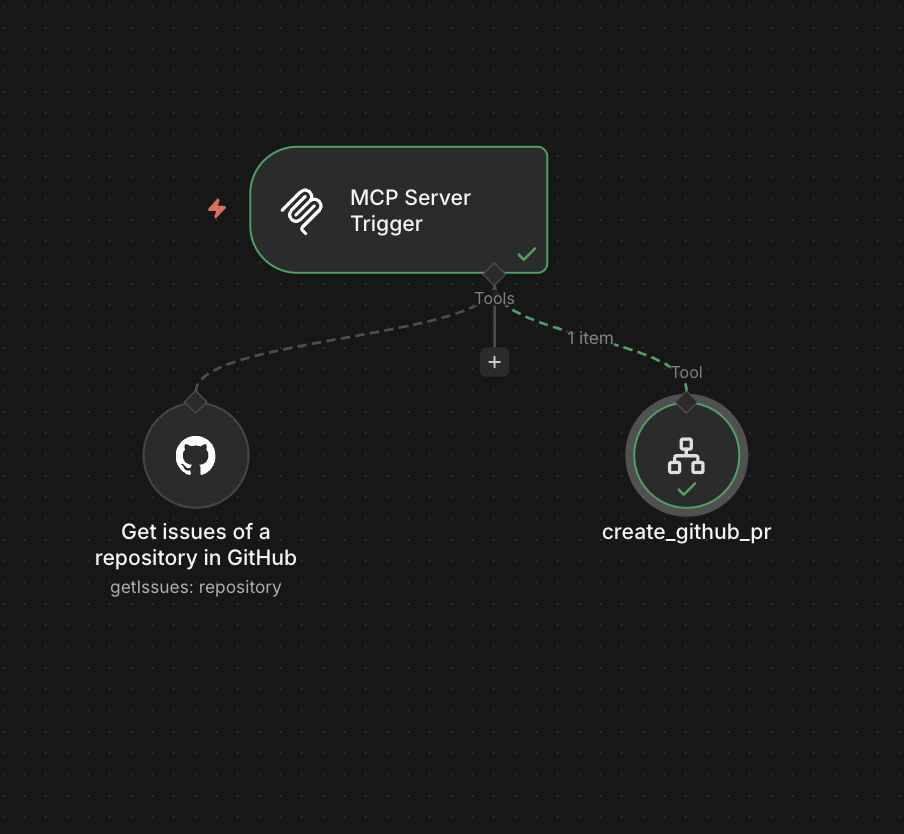
Step 9: Linking PR Creation to MCP Server
Now we need to connect our PR creation workflow to the MCP server so Cursor can access it.
- Go back to your first workflow (the one with the MCP Server trigger)
- Click on the "create_github_pr" workflow tool in the MCP Server trigger node
- Open the "create_github_pr" tool configuration
- Set the parameters:
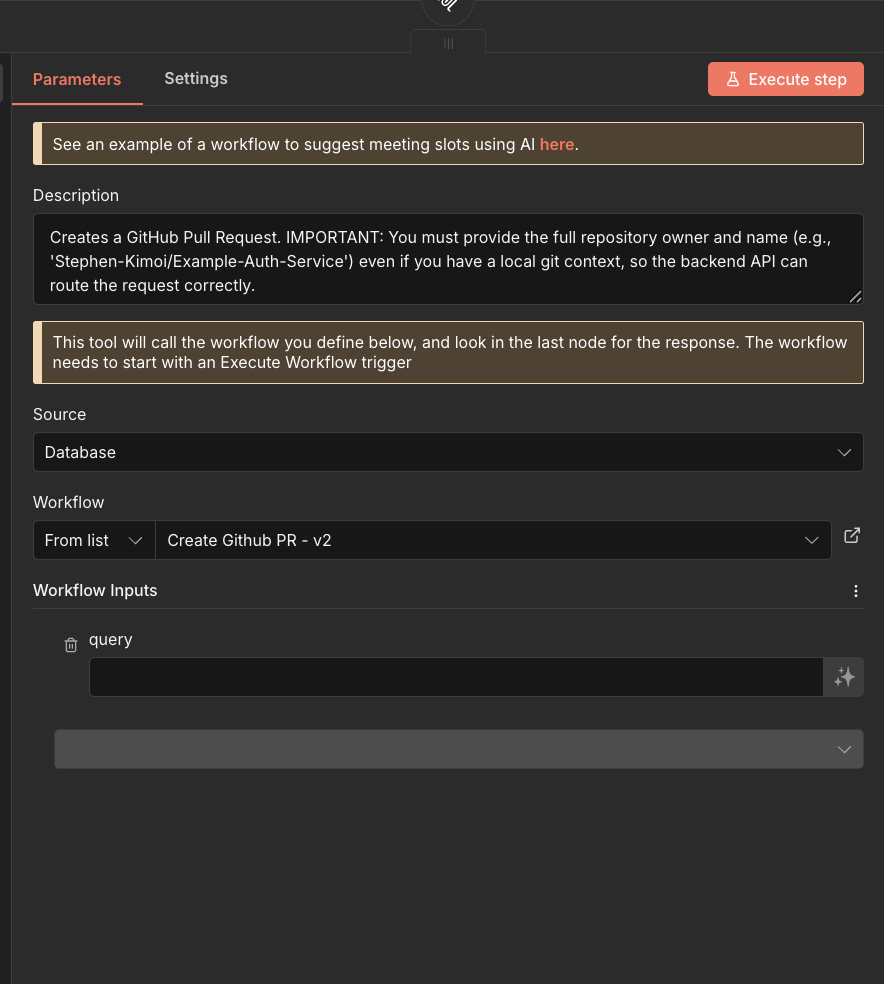
Configuration:
a. Description:
- Set to:
Creates a GitHub Pull Request. IMPORTANT: You must provide the full repository owner and name (e.g., 'Stephen-Kimoi/Example-Auth-Service') even if you have a local git context, so the backend API can route the request correctly.
b. Source:
- Select "Database"
c. Workflow:
- Select "From List"
- Choose the workflow you created in the previous steps (e.g., "Create Github PR")
- Click "Save" and "Publish"
- Click "Execute workflow" to activate the changes
Your MCP server is now fully configured! You can test the PR creation functionality directly from your Cursor IDE using natural language commands.
Conclusion
Congratulations! You've successfully built a powerful MCP server that connects n8n workflows to Cursor, enabling your AI assistant to:
- Fetch GitHub Issues - Retrieve comprehensive issue details with full comment threads for better context understanding
- Create Pull Requests - Automatically generate professional PRs with AI-powered titles and descriptions based on commit history
What You've Learned
Throughout this tutorial, you've mastered:
- MCP Server Setup - Creating and configuring MCP Server triggers in n8n
- GitHub Integration - Connecting GitHub tools to fetch issues and create PRs
- AI-Powered Automation - Using LLMs to extract information and generate professional content
- Error Handling - Implementing robust error checking for invalid repositories or branches
- Workflow Orchestration - Connecting multiple workflows to create a seamless automation pipeline
Next Steps
Now that you have a working MCP server, consider expanding it with additional capabilities:
- Add more GitHub operations (merge PRs, create issues, manage labels)
- Integrate other services (Slack notifications, email alerts, project management tools)
- Create custom tools for your specific workflow needs
- Build more sophisticated AI agents for different use cases
The power of MCP servers lies in their ability to expose any n8n workflow as an AI-accessible tool. Experiment, iterate, and build automations that make your development workflow more efficient and intelligent!
Frequently Asked Questions
How can I use n8n MCP Server Triggers in an AI hackathon?
n8n MCP Server Triggers are perfect for AI hackathons because they allow you to quickly connect AI assistants with external services and APIs. You can automate repetitive tasks like fetching data, creating pull requests, or managing workflows—freeing up time to focus on building your core hackathon project. This is especially valuable in time-limited AI hackathon environments where efficiency matters.
Is n8n MCP Server Triggers suitable for beginners in AI hackathons?
Yes, this tutorial is accessible for beginners participating in AI hackathons for beginners. While some familiarity with APIs and workflows is helpful, the step-by-step instructions make it easy to follow. The visual workflow builder in n8n makes it intuitive to create automations without extensive coding knowledge, which is perfect for hackathon participants who want to build quickly.
What are some AI hackathon project ideas using n8n MCP Server Triggers?
Some popular AI hackathon project ideas include: building an AI assistant that automatically manages your GitHub repository, creating a workflow that processes and summarizes incoming data, developing an automation system that connects multiple services for a complete solution, or building a smart assistant that handles project management tasks. These projects demonstrate the power of AI-driven automation, which is highly valued in AI hackathons.
How long does it take to learn n8n MCP Server Triggers for an AI hackathon?
With this tutorial, you can set up your first MCP server and connect it to Cursor in about 1-2 hours. For AI hackathons, this means you can quickly add powerful automation capabilities to your project without spending too much time on setup. The tutorial covers everything you need to get started, so you can begin building your hackathon project immediately.
Are there any limitations when using n8n MCP Server Triggers in time-limited hackathons?
The main consideration is that you'll need accounts for n8n (free tier available), GitHub, and any other services you want to integrate. However, the setup process is straightforward, and once configured, the automations run automatically. This makes it ideal for online AI hackathons where you need reliable, automated workflows that work consistently throughout the event.
Happy automating!
Software Developer