Google Colab tutorial: How to create your own AI image generator
Image Generators Uncovered: Crafting Visuals with AI
Image generators are sophisticated algorithms designed to produce visuals from a blank canvas. The most prevalent type of image generator is a graphics program that can create or modify images. Others include fractal and random number generators.
These innovative tools have broad applications across art, science, and engineering. Artists employ them to craft digital art like 3D models or 2D visuals, while scientists use them for simulating real-world phenomena, such as particle behavior. Engineers leverage image generators for designing products or structures.
In addition to generating new images, these tools can manipulate existing ones, like adding color to monochrome pictures or refining digital photos.
Numerous image generators cater to both personal and commercial use, with some available for free online or for purchase, making it easy to harness their power and versatility.
Diffusers
Suraj Patil, Pedro Cuenca, Nathan Lambert, and Patric von Platen create great image generator. You can find the paper here. In this tutorial, I will show you how you can use it. Please read about license here.
In this tutorial, we will use Google Colab. This platform allows using good GPU. To do it you have to click Runtime, then change Runtime type, and choose GPU.
Let's go!
In the beginning we are going to connect our Google Colab with our Google Drive, to do that use
from google.colab import drive
drive.mount('/content/drive')
When you run this command, you will be able to log in to your disc.
Now, we have to install all the needed requirements, we will do it with pip. If you want to see logs, please remove > /dev/null 2>&1
!pip install diffusers==0.2.4 > /dev/null 2>&1
!pip install transformers scipy ftfy > /dev/null 2>&1
!pip install "ipywidgets>=7,<8" > /dev/null 2>&1
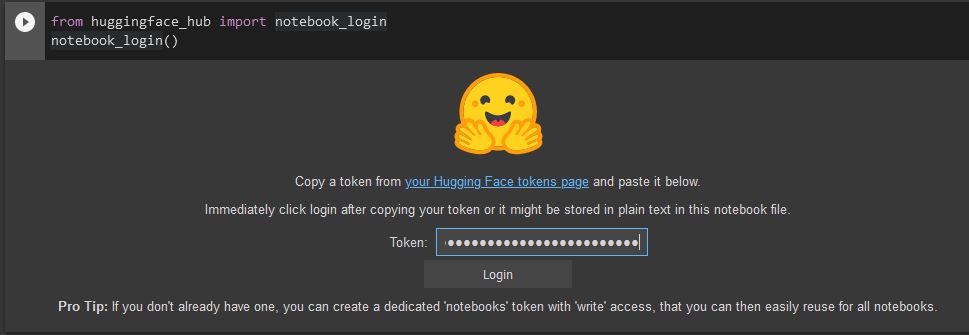
If everything is fine we can move to the next step and connect by a token with Hugging Face. Just create an account and create a token (Settings -> Access Tokens -> New token).
from google.colab import output
from huggingface_hub import notebook_login
output.enable_custom_widget_manager()
notebook_login()
We are almost ready to create an image!
If you want to create more than one photo I recommend do create a new folder.
!mkdir "Saved data"
We should also create a pipe
pipe = pipe.to("cuda")
Finally, we can create images. We will create it with a prompt, that will be used in the loop to create N-images.
from torch import autocast

prompt = "cat is fighting with robots, digtal art"  # prompt to describe images to create
no_of_images = 100 # number of images to generate

for i in range(no_of_images):

  with autocast("cuda"):
    image = pipe(prompt, height=512, width=768, num_inference_steps=50)["sample"][0]

  image.save(f"Saved data/sample_{i}.png") # if you not create folder

image
There are serval arguments such as:
height, width - size of generated image
num_inference_steps - number of generation steps
More information you can find here
Result
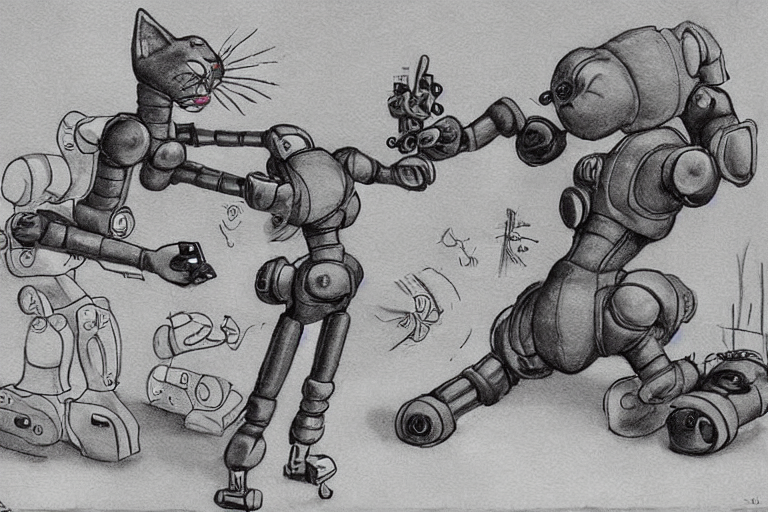
If your purpose is to create images with the shape 300x300px you can generate images with bigger resolution and then resize them.
import cv2
from glob import glob

# glob is reading all names of images in the folder Saved data
for i in glob("/content/Saved data/*.png"):
    img = cv2.imread(i, cv2.IMREAD_COLOR)
    img = cv2.resize(img, (300, 300))
    cv2.imwrite(i, img)
In the end, you can copy your folder to your Google Drive.
!sudo cp -r '/content/Saved data' /content/drive/MyDrive/
The AI journey doesn't end here!
Why would you stop here? Why not build an AI app using image generations and many other models? Why not an app that will change the audio into an image? And many more!
With AI potential is limitless! Let's explore it together! And stay tuned for future AI tutorials!
The Colab of this code can check here.
Thank you! - Adrian Banachowicz, Data Science Intern in New Native

Data Lover