AI Meets Robotics: Control Robots with Gemini for AI Hackathons
Introduction to AI-Powered Robotics
This tutorial shows you how to bridge the gap between human conversation and machine motion, turning simple English instructions into real-world robotic actions. We'll use Google's Gemini AI model to control a simulated Franka Emika Panda robot arm in Webots, demonstrating how natural language can be transformed into precise robotic movements.
This technology is particularly valuable for AI hackathons, where developers need to rapidly prototype intelligent systems within tight timeframes. Whether you're participating in online AI hackathons or virtual AI hackathons, understanding how to integrate AI with robotics can give you a competitive edge in building innovative solutions. If you're looking for upcoming AI hackathons to apply these skills, explore LabLab.ai's global AI hackathons.
Setting Up Your Environment
Installing Webots Simulator
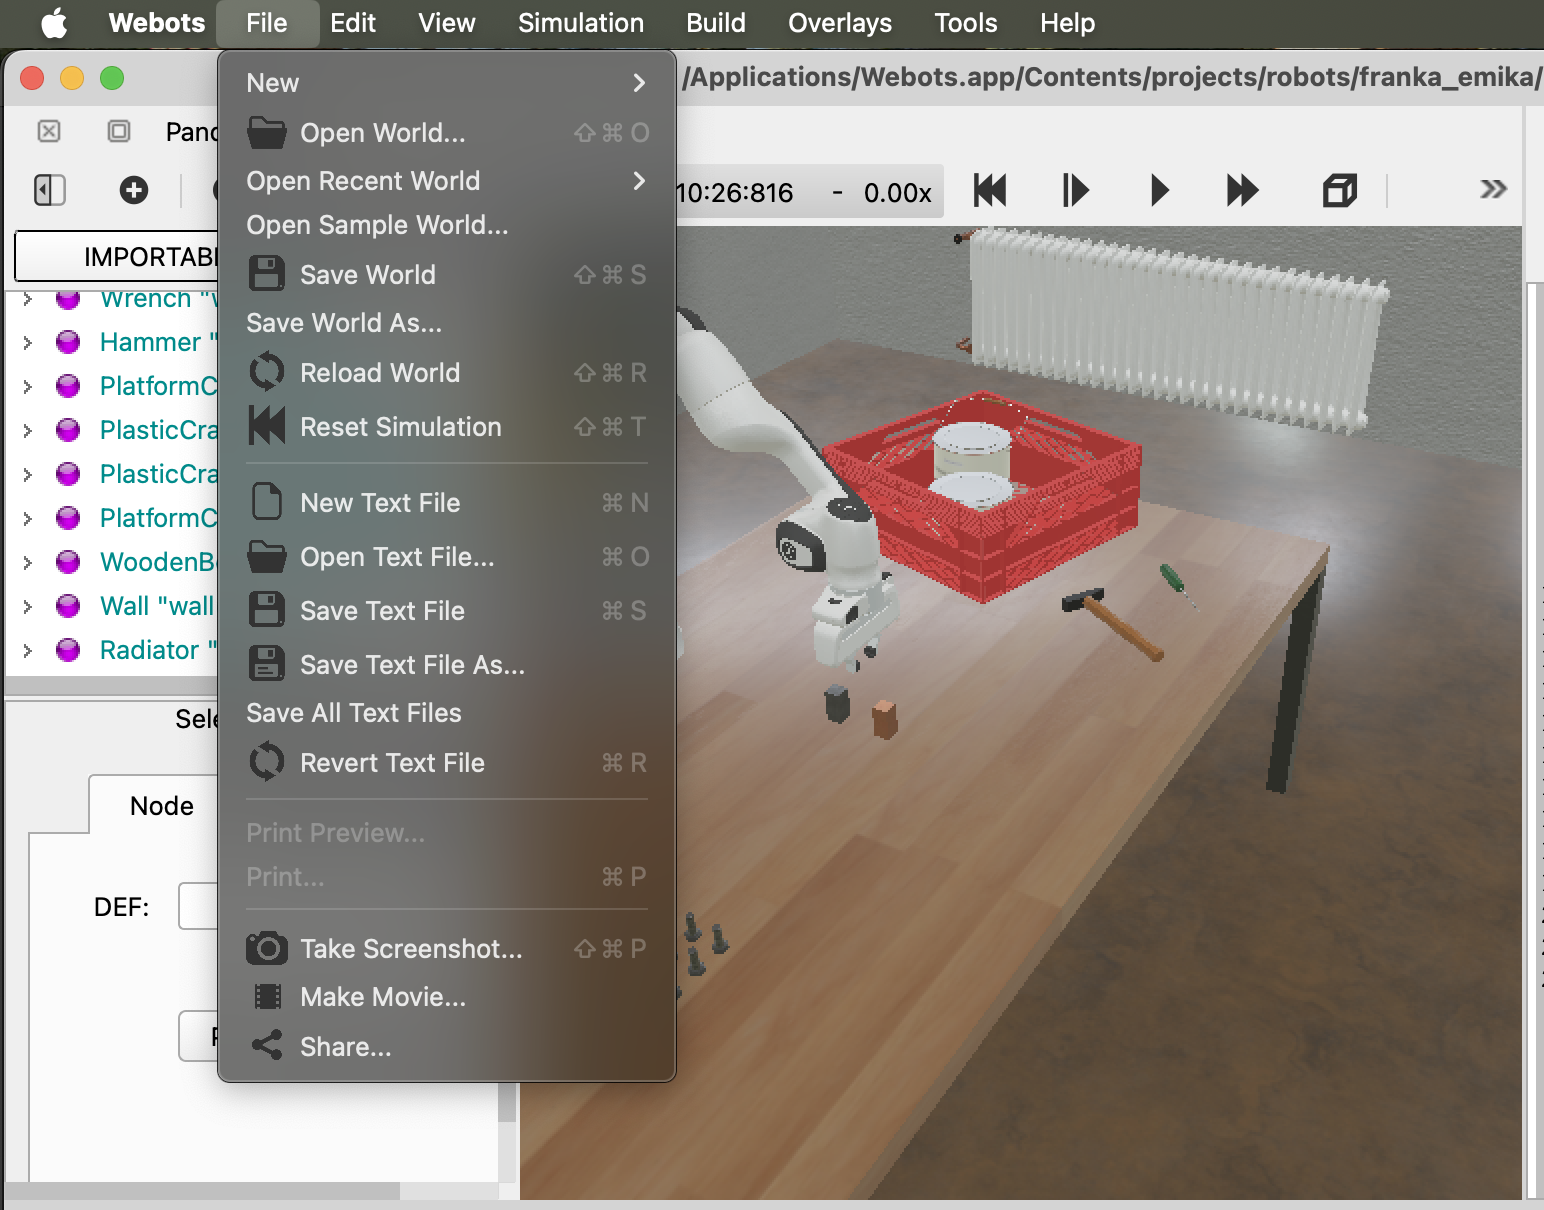
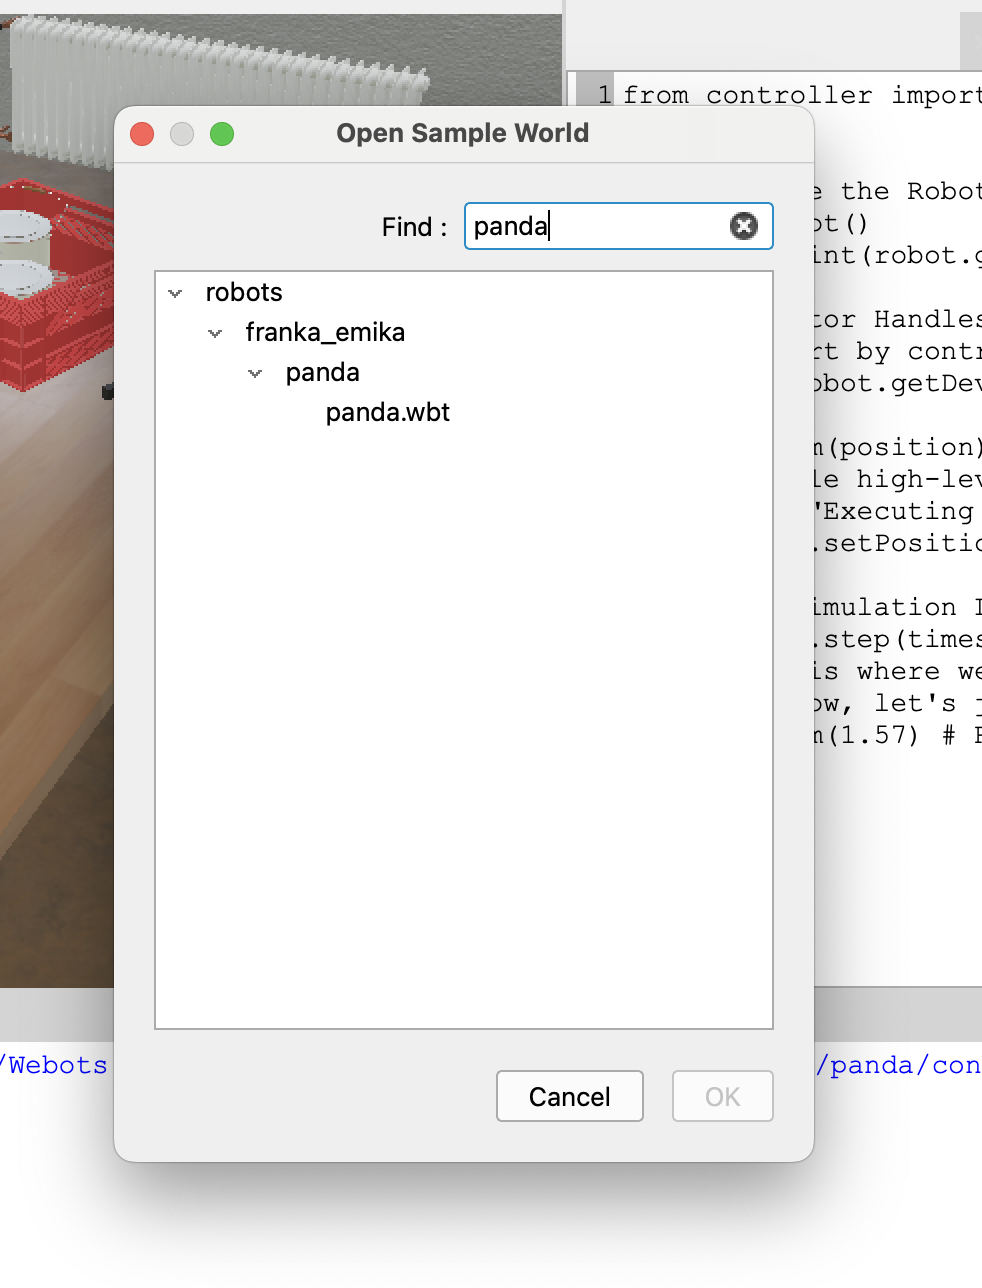
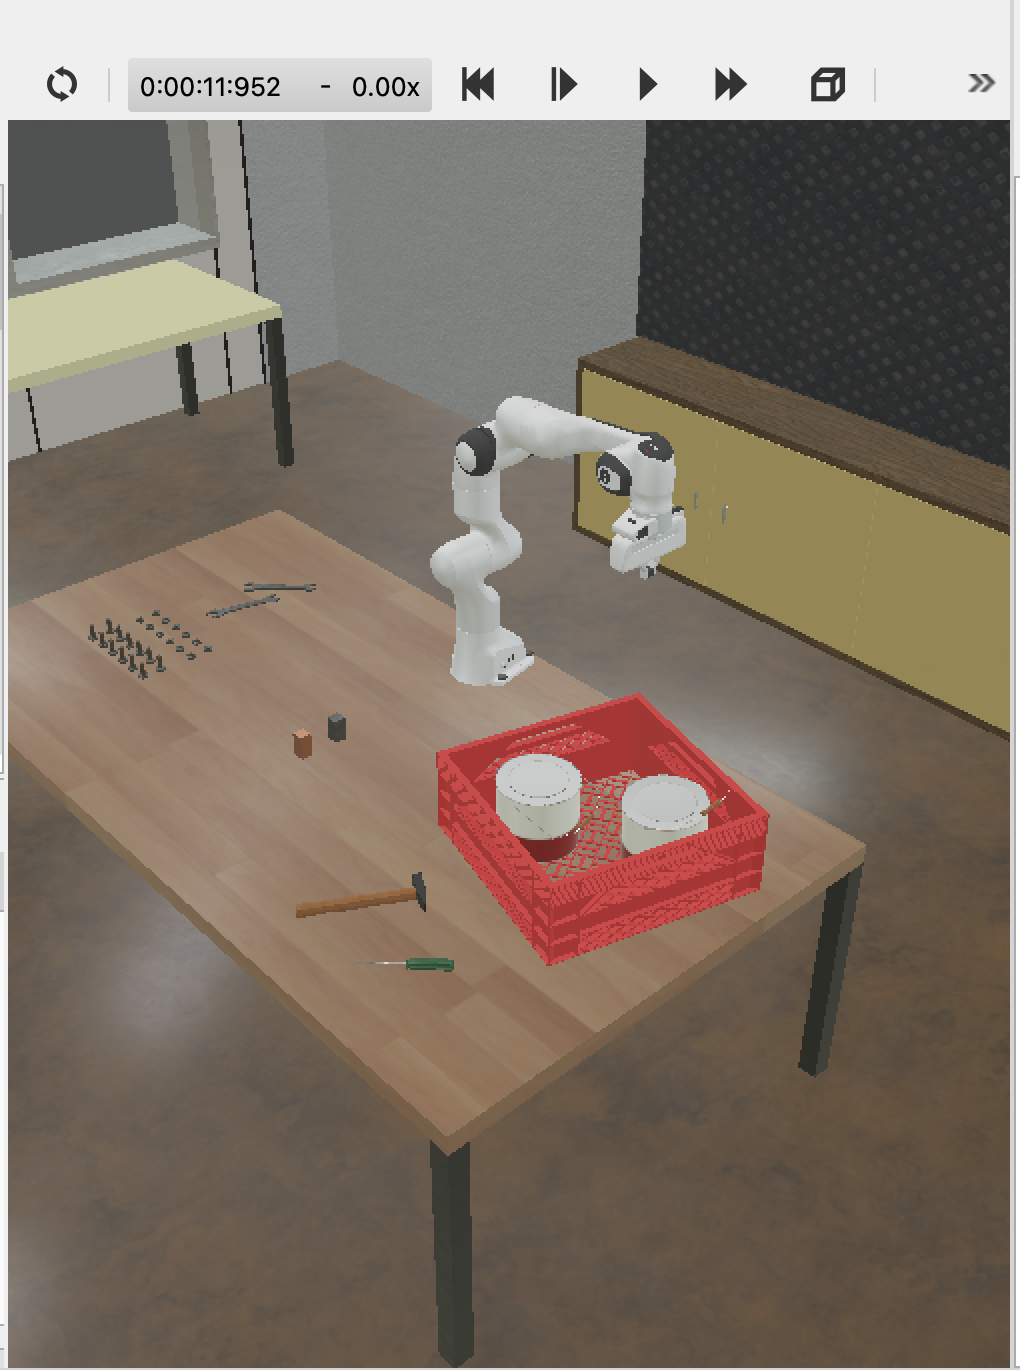
To get started, you'll need to download and install Webots R2025a. Once installed, open the built-in Franka Emika Panda sample world. You can locate this via File > Open Sample World and search for "Panda."

Creating the Controller Setup
To ensure the robot "brain" is always available in the simulator's internal library, we use a manual injection method via the Terminal/Command Prompt.
Important: First, you need to locate your Webots installation path. The default paths are:
- macOS:
/Applications/Webots.app/Contents/ - Windows:
C:\Program Files\Webots\(orC:\Program Files (x86)\Webots\) - Linux:
/usr/local/webots/or/opt/webots/
If Webots is installed in a different location, you can find it by checking where Webots is installed on your system.
Create the Controller Folder: Open your Terminal (macOS/Linux) or Command Prompt/PowerShell (Windows) and run the appropriate command for your operating system:
macOS:
sudo mkdir -p /Applications/Webots.app/Contents/projects/robots/franka_emika/panda/controllers/llm_robot_planner
Windows (PowerShell as Administrator):
New-Item -ItemType Directory -Force -Path "C:\Program Files\Webots\projects\robots\franka_emika\panda\controllers\llm_robot_planner"
Linux:
sudo mkdir -p /usr/local/webots/projects/robots/franka_emika/panda/controllers/llm_robot_planner
Note: Adjust the path if your Webots installation is in a different location.
Set Permissions (macOS/Linux only): Ensure Webots has permission to execute your code:
macOS:
sudo chmod -R 777 /Applications/Webots.app/Contents/projects/robots/franka_emika/panda/controllers/llm_robot_planner
Linux:
sudo chmod -R 777 /usr/local/webots/projects/robots/franka_emika/panda/controllers/llm_robot_planner
Create the Initial Controller Code: Create your Python file (llm_robot_planner.py) in the controller directory. The code below includes platform-specific path handling:
import os
import sys

# Manually add Webots library path for macOS
sys.path.append('/Applications/Webots.app/Contents/lib/controller/python')
from controller import Robot

# Initialize the Robot
robot = Robot()
timestep = int(robot.getBasicTimeStep())

# 1. Get Motor Handles (The Panda has 7 joints + a gripper)
# We'll start by controlling just one for this test
joint_1 = robot.getDevice('panda_joint1')

def move_arm(position):
    """Simple high-level function for the LLM to call"""
    print(f"Executing movement to position: {position}")
    joint_1.setPosition(position)

# 2. Main Simulation Loop
while robot.step(timestep) != -1:
    # This is where we will eventually 'listen' for LLM commands
    # For now, let's just test a basic movement
    move_arm(1.57) # Rotates the base 90 degrees
    break
Create the file using your preferred method:
macOS/Linux:
# Replace the path with your actual Webots installation path
nano /Applications/Webots.app/Contents/projects/robots/franka_emika/panda/controllers/llm_robot_planner/llm_robot_planner.py
Windows:
# Replace the path with your actual Webots installation path
notepad "C:\Program Files\Webots\projects\robots\franka_emika\panda\controllers\llm_robot_planner\llm_robot_planner.py"
Paste the code above and save the file. Remember to adjust the webots_path variable in the code if your Webots installation is in a different location.
Linking the Controller to the Robot
In the Webots Scene Tree (left panel), find the Panda robot.
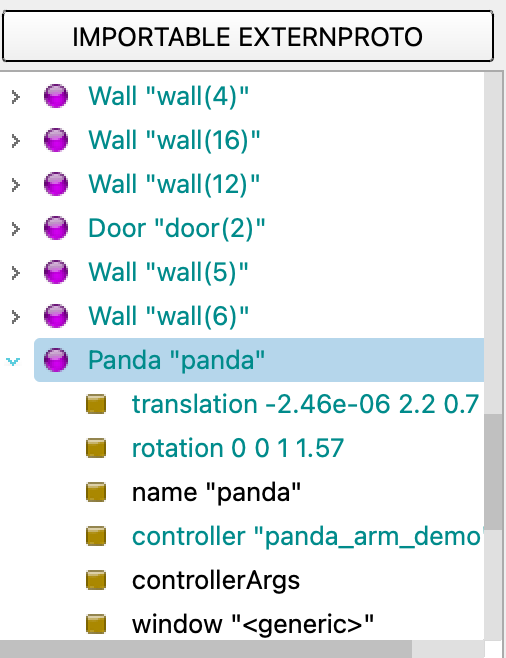
Expand the node and find the controller field.
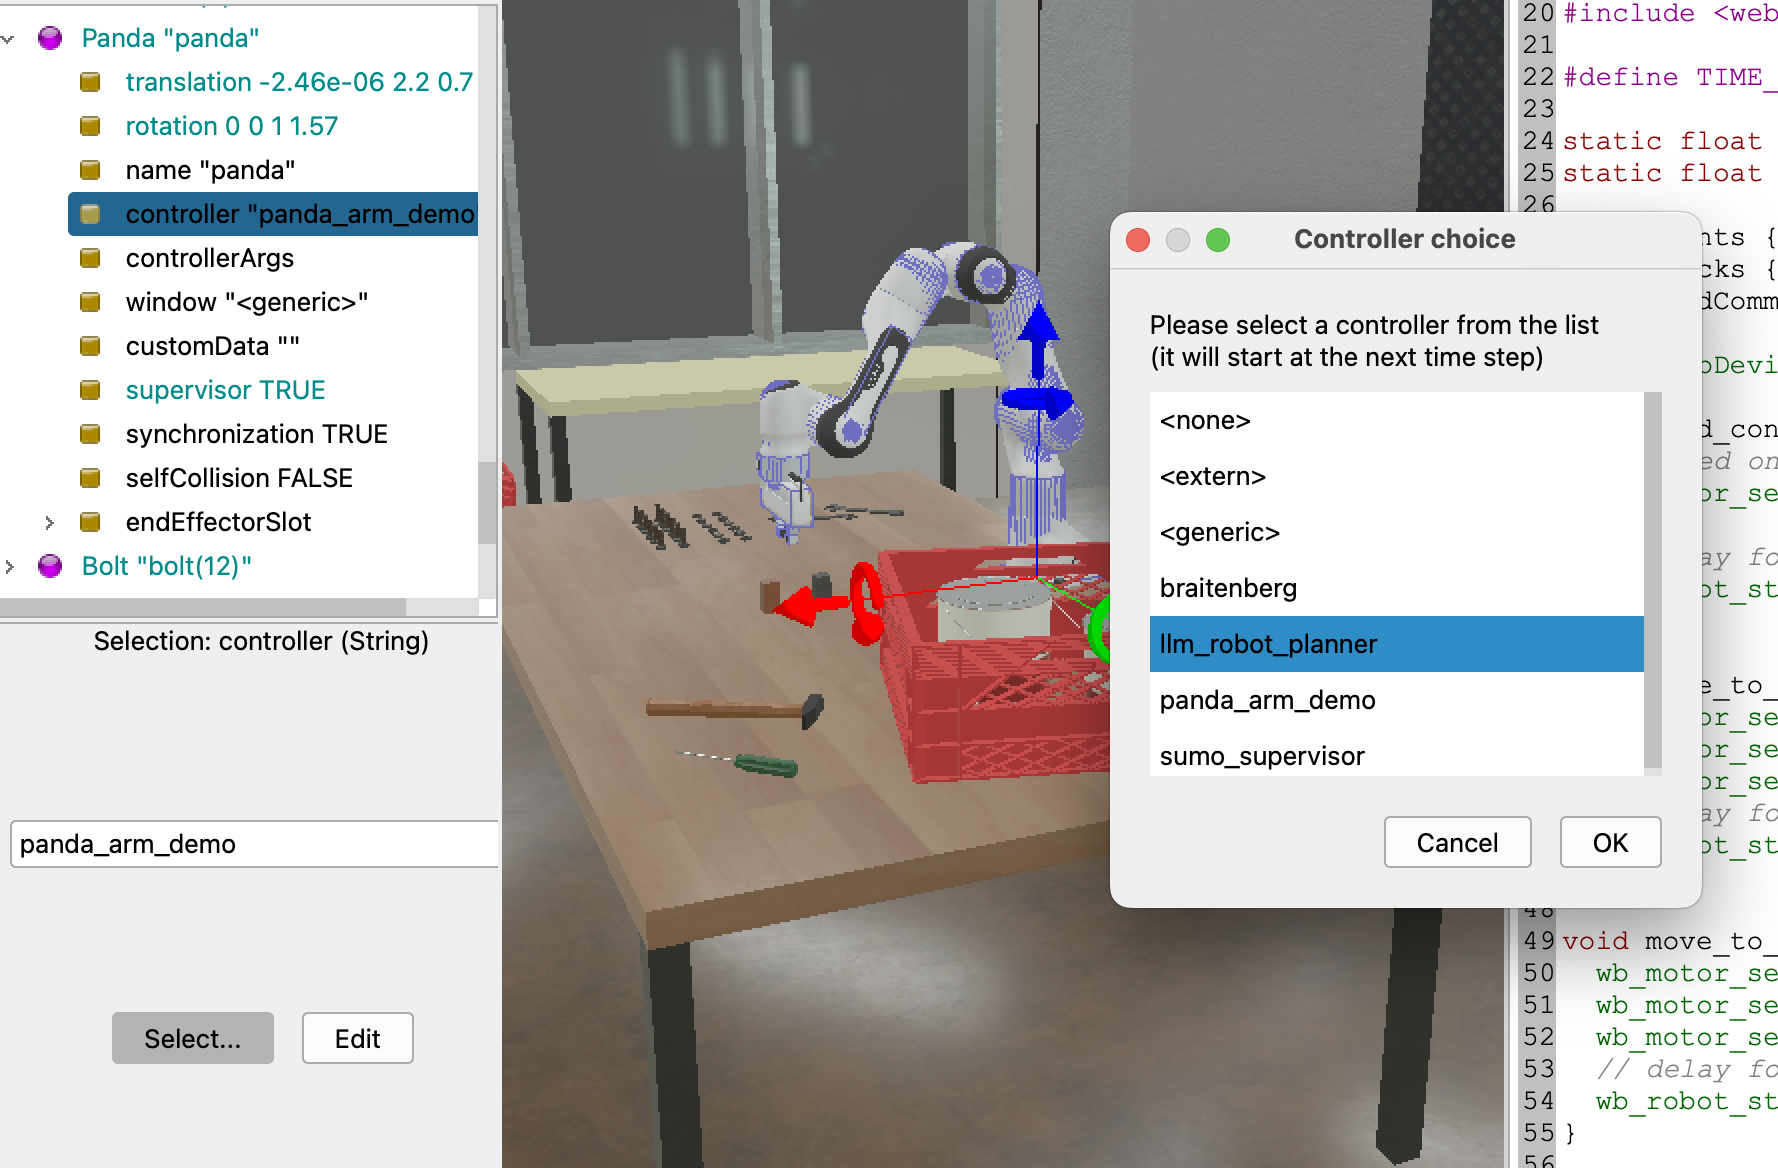
Click Select... and choose llm_robot_planner from the list.
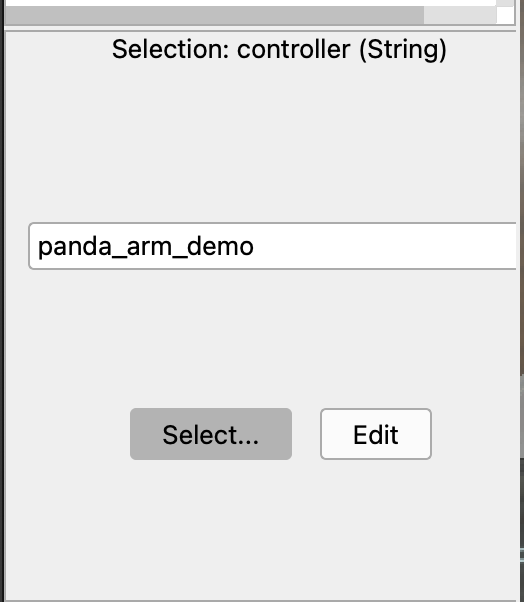

Note: Because we placed it in the system directory, it will now appear as a native option.
Now click on the play button on the top part of the screen, and you'll see your robot arm moving 90 degrees.
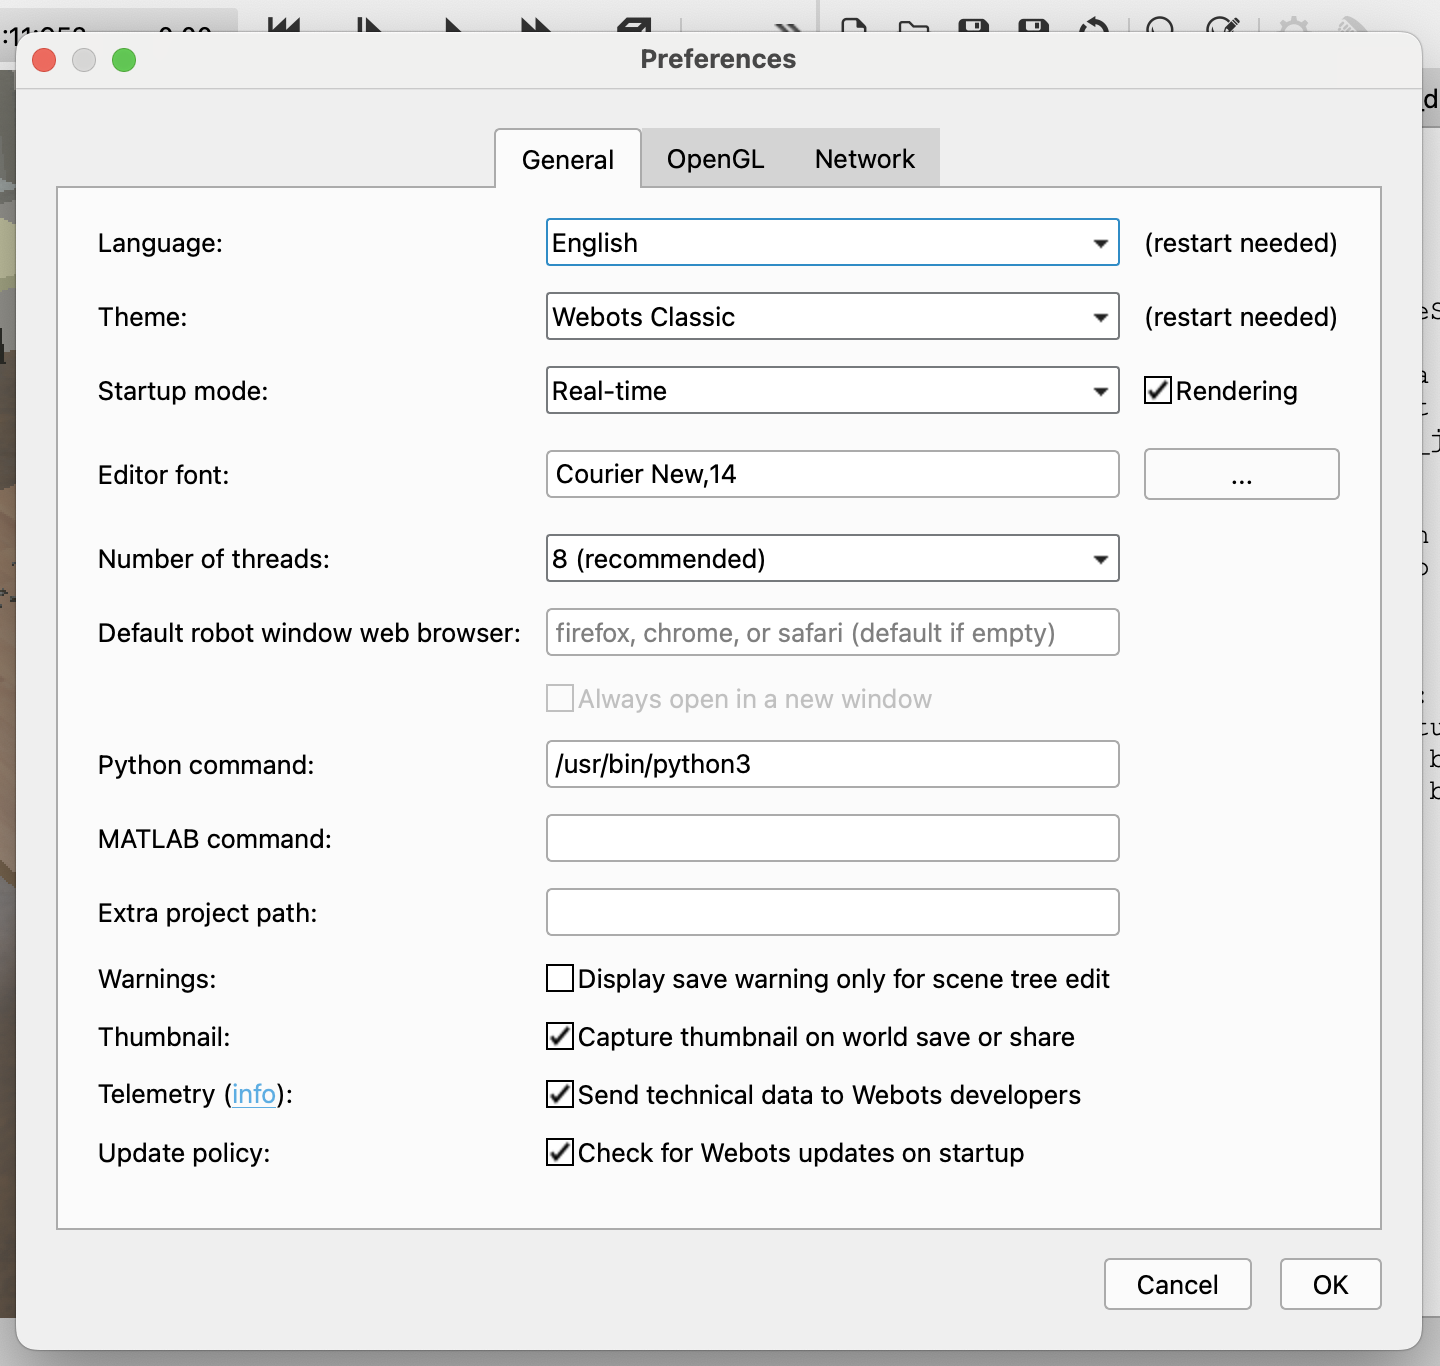
Configuring Python
To avoid "Controller failed to start" errors, point Webots to your system's Python 3:
- Go to Webots > Preferences > General.
- Set the Python command to your system's Python 3 path:
- macOS:
/usr/bin/python3or/usr/local/bin/python3 - Windows:
pythonorpy(if Python is in your PATH) or the full path likeC:\Python39\python.exe - Linux:
/usr/bin/python3or/usr/local/bin/python3
- macOS:
Tip: You can find your Python 3 path by running which python3 (macOS/Linux) or where python (Windows) in your terminal.
Integrating Gemini AI
Now we transform our static script into an AI-powered planner that can understand natural language commands.
Installing the Google Gen AI SDK
Open your terminal and install the Google Gen AI library within your controller's virtual environment:
./venv/bin/pip install google-genai
Setting Up Your API Key
Get your API key from Google AI Studio.
Insert your API key in the runtime.ini file:
nano runtime.ini
Inside your runtime.ini file:
[environment variables]
GEMINI_API_KEY=YOUR_API_KEY_HERE
Implementing the AI Controller
Modify your code to include Gemini AI integration:
import os
import sys
import tkinter as tk
from tkinter import simpledialog
from google import genai
from google.genai import types
from controller import Supervisor

def log(msg):
    print(f"[LOG] {msg}")

# --- 1. SETUP ---
API_KEY = os.getenv('GEMINI_API_KEY')
client = genai.Client(api_key=API_KEY)
MODEL_ID = 'gemini-2.0-flash'

robot = Supervisor()
timestep = int(robot.getBasicTimeStep())

# Joints and Sensors
joints = [robot.getDevice(f'panda_joint{i}') for i in range(1, 8)]
fingers = [robot.getDevice('panda_finger::left'), robot.getDevice('panda_finger::right')]
sensors = [j.getPositionSensor() for j in joints]
for s in sensors: s.enable(timestep)

# --- 2. STATUS HELPER ---
def get_robot_status():
    # Attempt to find the block by multiple possible names
    block = None
    for name in ["WOODEN_BOX", "PANDA_BLOCK", "CUBE", "solid"]:
        block = robot.getFromDef(name)
        if block: break

    if block:
        p = block.getField("translation").getSFVec3f()
        block_str = f"BLOCK FOUND AT: X={p[0]:.2f}, Y={p[1]:.2f}, Z={p[2]:.2f}"
    else:
        block_str = "BLOCK NOT FOUND (Verify DEF name in Webots)"

    angles = [round(s.getValue(), 2) for s in sensors]
    return f"\n--- STATUS ---\n{block_str}\nJOINTS: {angles}\n--------------", block_str

# --- 3. THE BRAIN ---
def get_ai_instruction(user_text):
    status_msg, block_info = get_robot_status()
    log(status_msg)

    sys_msg = f"""You are a Panda Robot Controller.
    {block_info}

    Return ONLY 'COMMAND|VALUE'.
    Example: '30 degrees left' -> LEFT|0.52
    Example: 'Pick it up' -> PICK|0

    COMMANDS: LEFT, RIGHT, UP, DOWN, PICK, DROP, RESET.
    If you don't know the value, use 0. Never return 'NULL' or 'TRUE'."""

    try:
        response = client.models.generate_content(
            model=MODEL_ID, contents=user_text,
            config=types.GenerateContentConfig(system_instruction=sys_msg, temperature=0.1)
        )
        parts = response.text.strip().split("|")
        if len(parts) != 2: return "ERROR", 0.0
        return parts[0].upper(), float(parts[1])
    except Exception as e:
        log(f"AI Error: {e}")
        return "ERROR", 0.0

# --- 4. MAIN LOOP ---
root = tk.Tk(); root.withdraw()

while robot.step(timestep) != -1:
    user_cmd = simpledialog.askstring("Robot Input", "What should I do?")
    if not user_cmd: break

    cmd, val = get_ai_instruction(user_cmd)

    # Execute Movements
    if cmd == "LEFT":
        joints[0].setPosition(joints[0].getTargetPosition() + val)
    elif cmd == "RIGHT":
        joints[0].setPosition(joints[0].getTargetPosition() - val)
    elif cmd == "UP":
        joints[1].setPosition(joints[1].getTargetPosition() - (val * 0.4))
        joints[3].setPosition(joints[3].getTargetPosition() + val)
    elif cmd == "DOWN":
        joints[1].setPosition(joints[1].getTargetPosition() + (val * 0.4))
        joints[3].setPosition(joints[3].getTargetPosition() - val)
    elif cmd == "PICK":
        log("Skill: PICK (Reaching forward/down)")
        # 1. Open
        for f in fingers: f.setPosition(0.04)
        # 2. Reach (J2 lean forward, J4 curl down)
        joints[1].setPosition(0.5); joints[3].setPosition(-2.4)
        for _ in range(100): robot.step(timestep)
        # 3. Grab
        for f in fingers: f.setPosition(0.012)
        for _ in range(50): robot.step(timestep)
        # 4. Lift
        joints[1].setPosition(0.0); joints[3].setPosition(-1.5)
    elif cmd == "RESET":
        for i, pos in enumerate([0, -0.7, 0, -2.3, 0, 1.6, 0.7]):
            joints[i].setPosition(pos)

    # Let physics catch up
    for _ in range(60): robot.step(timestep)
Understanding the AI Controller Code
Let's break down this code to understand how it transforms natural language into robotic actions:
Imports and Setup (Lines 148-171)
The code begins by importing necessary libraries:
tkinterfor creating a simple dialog interface to receive user commandsgoogle.genaifor accessing the Gemini AI modelcontroller.Supervisorwhich gives us advanced control over the robot and world state
The setup section initializes:
- The Gemini API client using your API key from environment variables
- The robot as a
Supervisor(which allows us to access world objects, not just the robot itself) - All 7 joint motors and 2 finger grippers
- Position sensors for each joint to track the robot's current state
Status Helper Function (Lines 174-188)
The get_robot_status() function serves as the robot's "awareness" system:
- It searches for objects in the scene (like a wooden block) by trying multiple possible names
- If found, it reports the object's 3D position (X, Y, Z coordinates)
- It reads all joint angles from the position sensors
- Returns both a formatted status message and block information that will be sent to the AI
The AI Brain (Lines 191-215)
The get_ai_instruction() function is where the magic happens:
- It first gathers the current robot status (joint positions and object locations)
- Constructs a system prompt that tells Gemini it's controlling a robot, provides context about the environment, and specifies the exact output format required
- Sends the user's natural language command to Gemini with a low temperature (0.1) for consistent, deterministic responses
- Parses the AI's response, which should be in the format
COMMAND|VALUE(e.g., "LEFT|0.52" or "PICK|0") - Returns the command and value, or handles errors gracefully
Main Control Loop (Lines 218-254)
The main loop is the execution engine:
- Creates a hidden tkinter window for the input dialog
- Continuously runs the simulation step-by-step
- Prompts the user for a command via a dialog box
- Sends the command to the AI and receives back a parsed command and value
- Executes the appropriate movement based on the command:
- LEFT/RIGHT: Rotates the base joint (joint 0) left or right
- UP/DOWN: Adjusts multiple joints (1 and 3) to move the arm vertically
- PICK: Performs a complex multi-step sequence:
- Opens the gripper
- Reaches forward and down
- Closes the gripper to grab
- Lifts the object up
- RESET: Returns all joints to their default positions
- Allows physics to settle by running multiple simulation steps after each movement
This architecture creates a feedback loop: the AI receives context about the robot's state, interprets natural language, and the robot executes the resulting commands, creating an interactive AI-powered robotic system.
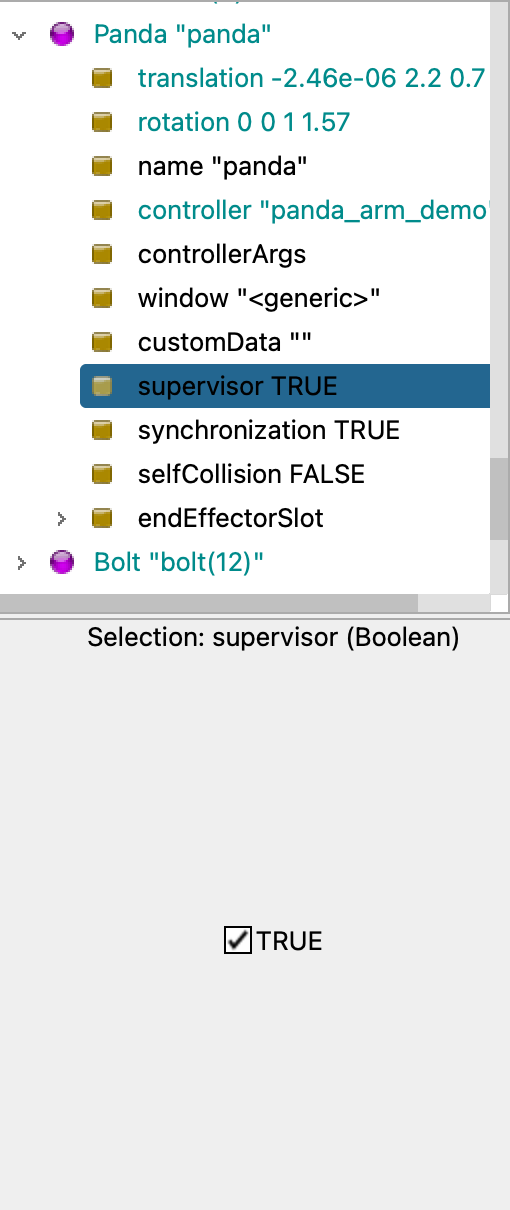
Enabling Supervisor Mode
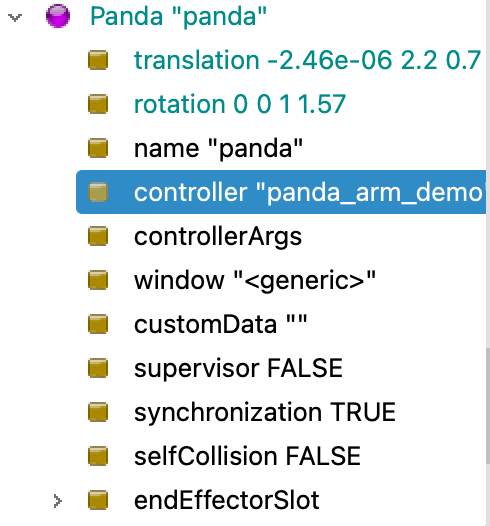
In the Webots Scene Tree, select the Panda robot. Find the field supervisor and change it from FALSE to TRUE. Save the world and reload the simulation.
Selecting the Controller
Select controller choice to llm_robot_planner.
Testing Your AI-Powered Robot
Now enter your instruction of what you want the robot to do:
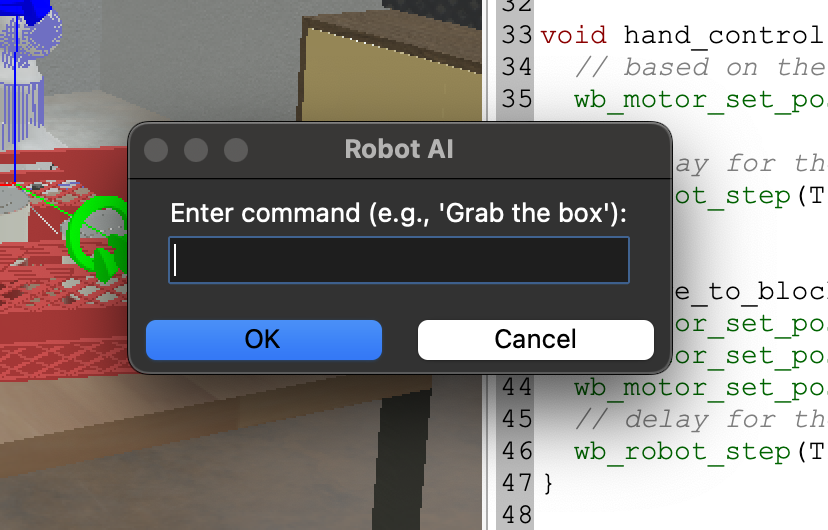
Enter a command like: "Pick up the WOODEN_BOX and lift it up"
Summary
In this tutorial, we've successfully bridged the gap between natural language and robotic control by:
- Setting up Webots with the Franka Emika Panda robot simulation
- Creating a custom controller that integrates with Webots' Python API
- Integrating Gemini AI to interpret natural language commands
- Implementing movement commands that translate AI instructions into precise robotic actions
This foundation opens up endless possibilities for AI-powered robotics applications. You can extend this system to handle more complex commands, integrate computer vision for object detection, or add more sophisticated planning algorithms—perfect for AI hackathon projects that require rapid prototyping and innovative solutions.
Frequently Asked Questions
How can I use AI-powered robotics in an AI hackathon?
AI-powered robotics is ideal for AI hackathons because it allows you to build interactive systems that respond to natural language commands. You can create projects like voice-controlled robots, autonomous navigation systems, or human-robot collaboration tools. The Gemini AI integration makes it easy to prototype these concepts quickly, which is essential for time-limited hackathon environments.
Is this tutorial suitable for beginners in AI hackathons?
Yes, this tutorial is beginner-friendly and perfect for AI hackathons for beginners. It provides step-by-step instructions for setting up the environment, integrating AI models, and controlling robots. Basic Python knowledge is helpful, but the tutorial explains each concept clearly, making it accessible for developers new to both AI and robotics.
What are some AI hackathon project ideas using AI-powered robotics?
Some popular AI hackathon project ideas include: building a voice-controlled robot assistant that helps with daily tasks, creating an autonomous delivery robot for indoor environments, developing a robot that can sort objects using computer vision, or building a collaborative robot that works alongside humans in shared spaces. These projects showcase the intersection of AI and robotics, which is highly valued in AI hackathons.
How long does it take to learn AI-powered robotics for an AI hackathon?
With this tutorial, you can get a working AI-powered robot system running in 2-3 hours. For AI hackathons, this is perfect timing—you'll have enough time to build a functional prototype and add custom features. The tutorial covers all the essential concepts, so you can start building your hackathon project immediately after completing it.
Are there any limitations when using AI-powered robotics in time-limited hackathons?
The main limitation is hardware access—you'll need a computer capable of running Webots simulator. However, the simulation environment eliminates the need for physical robots, making this approach ideal for online AI hackathons where participants work remotely. The Gemini AI integration is fast enough for real-time interactions, so latency shouldn't be an issue during your hackathon presentation.


