Gemini 3 Pro Video Capabilities: Build Anything for AI Hackathons
How Gemini 3 Pro's Video Capabilities Give You the Words to Build Anything
We've tried a lot of AI workflows. Cursor. Copilot. ChatGPT with screenshots. Claude with code snippets. They all hit the same wall.
This video-to-code workflow is particularly valuable for AI hackathons, where developers need to rapidly prototype applications and translate visual designs into working code within tight timeframes. Whether you're participating in online AI hackathons or virtual AI hackathons, understanding how to use Gemini 3 Pro's video capabilities can dramatically accelerate your development process. If you're looking for upcoming AI hackathons to apply these skills, explore LabLab.ai's global AI hackathons.
You find a website you want to build. Animated dots that react to the mouse. Cards that stack on scroll. Smooth transitions everywhere. You want to recreate it.
But you can't describe it.
You don't know if the dots are Canvas or WebGL. Don't know the animation library. Don't know the scroll technique. You can't even Google it because you don't have the words. And if you can't describe it, you can't prompt it.
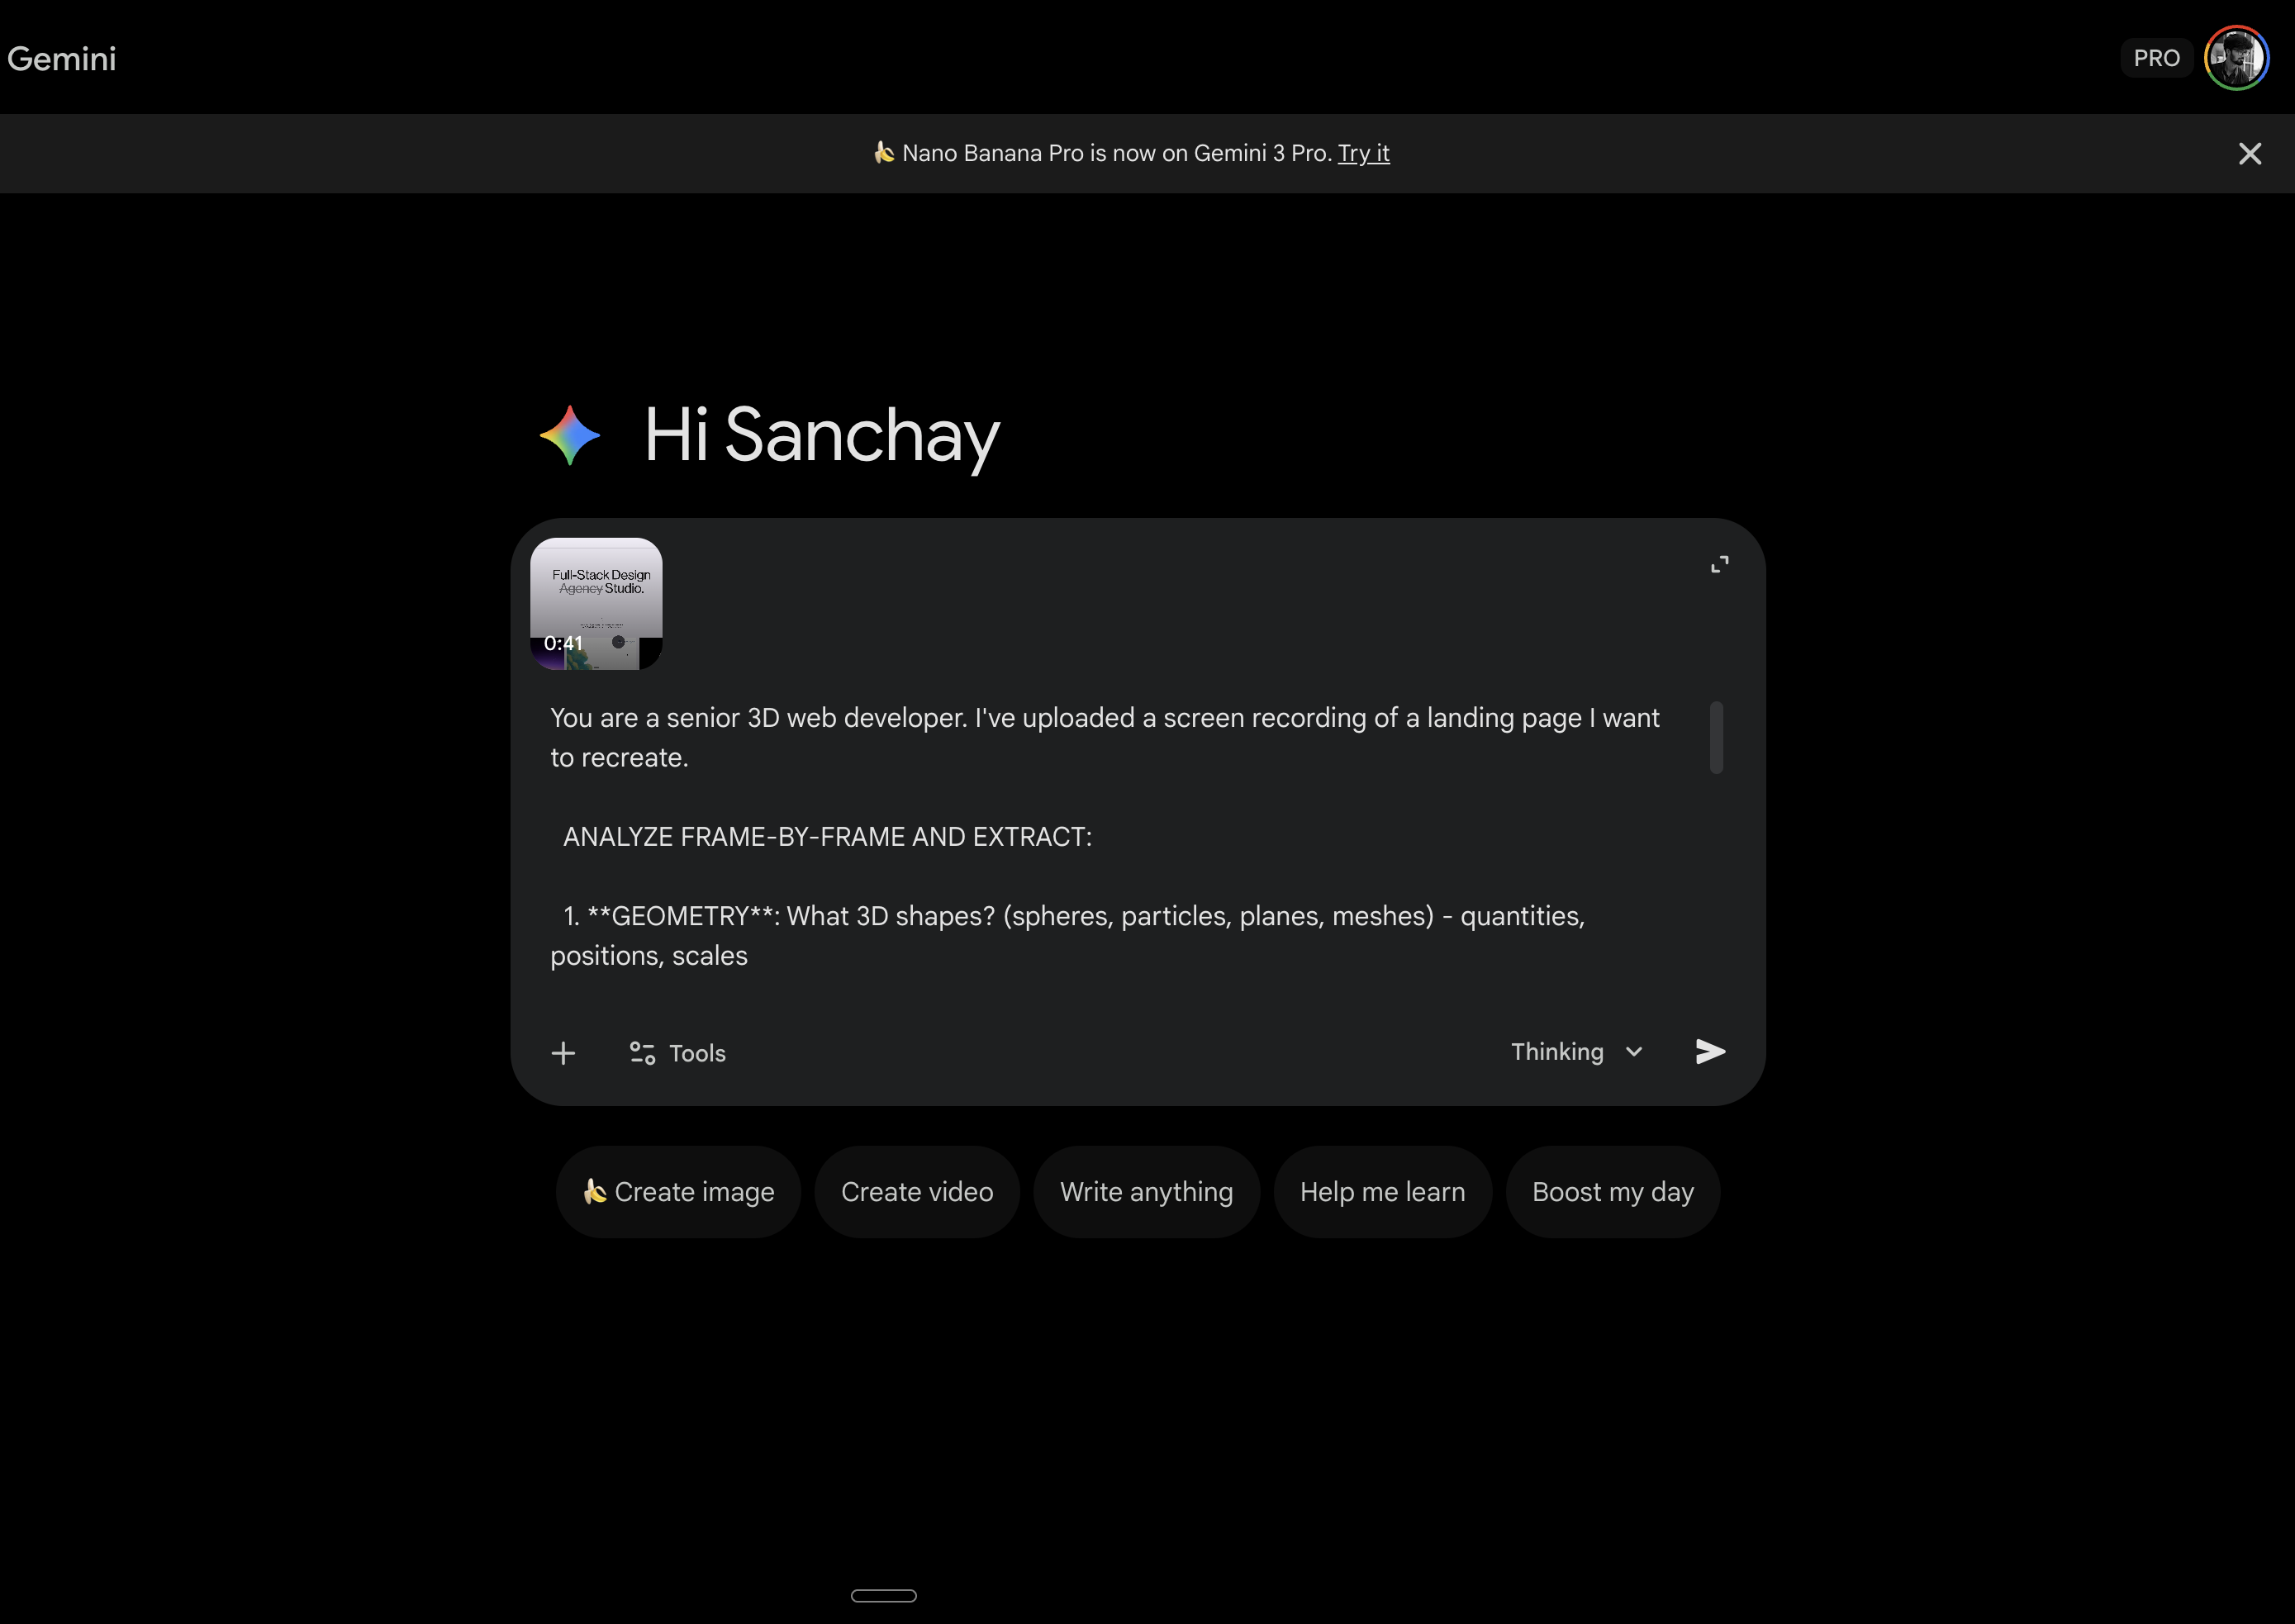
We tried everything. Then we tried recording a 45 second video and uploading it to Gemini 3 Pro.
That changed everything.
Gemini watched the video and told us exactly what we were looking at. The libraries. The techniques. The exact parameter values. Suddenly we had the vocabulary. We fed that to Antigravity and let the agents build it.
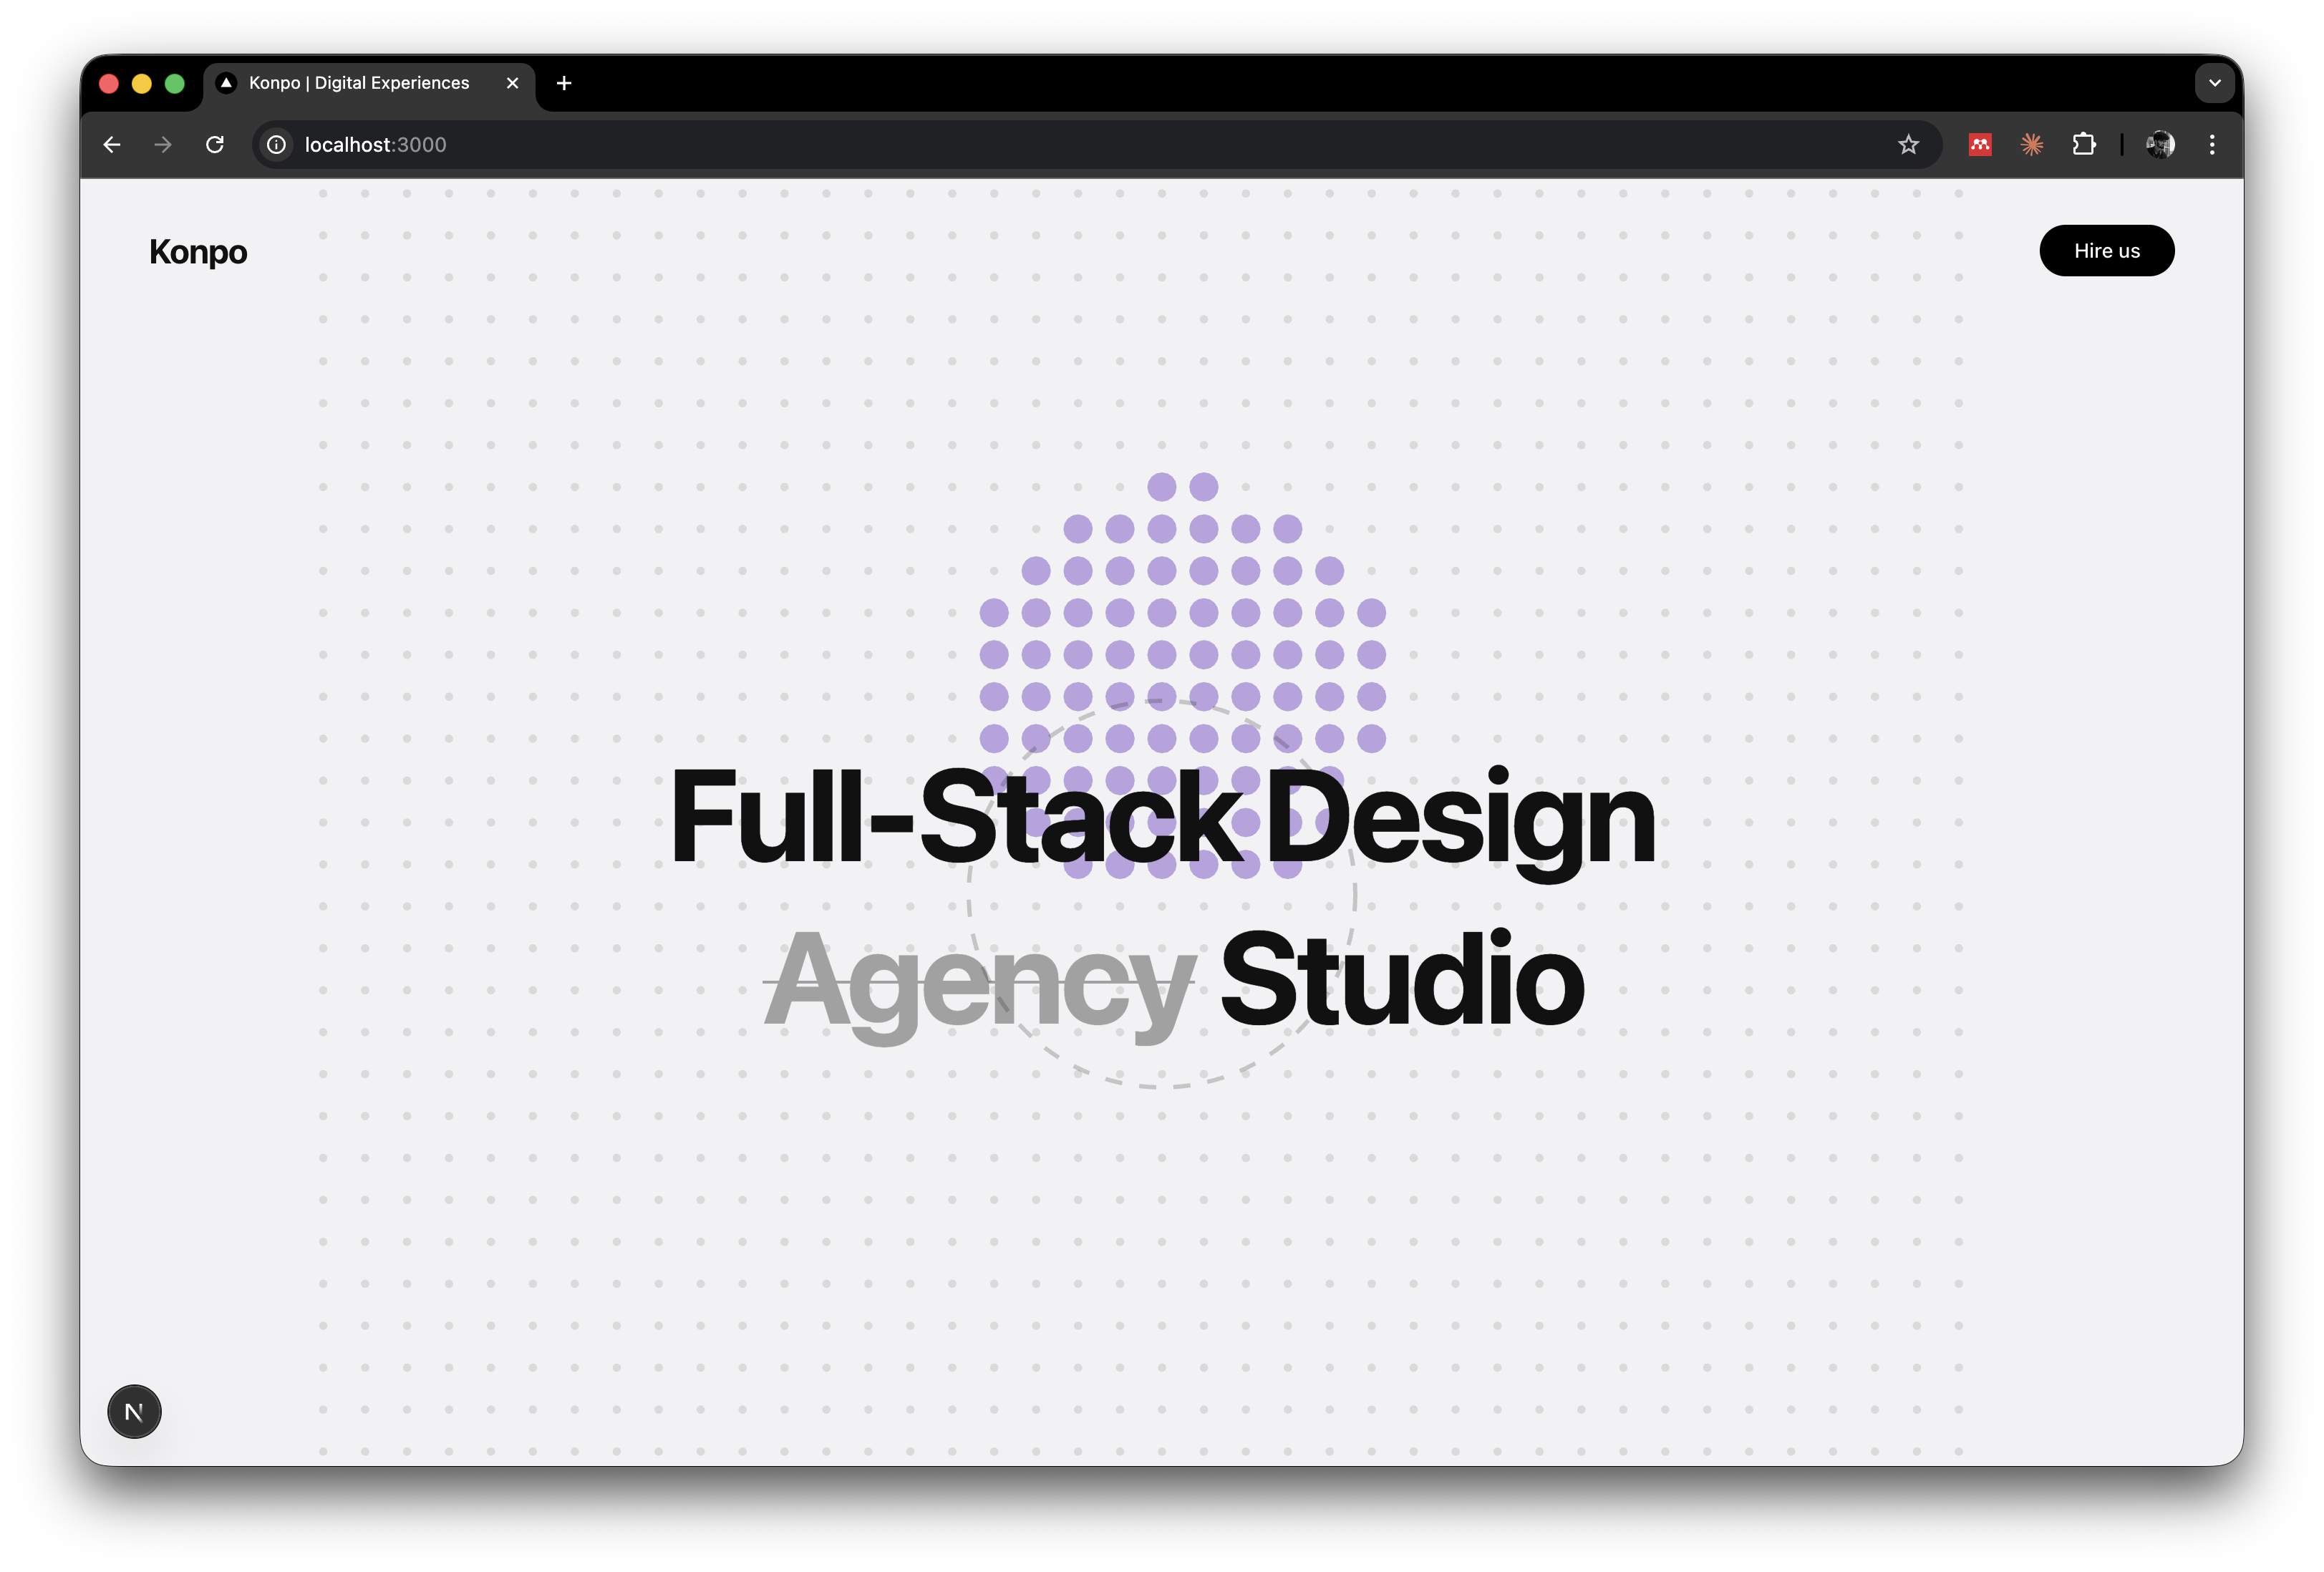
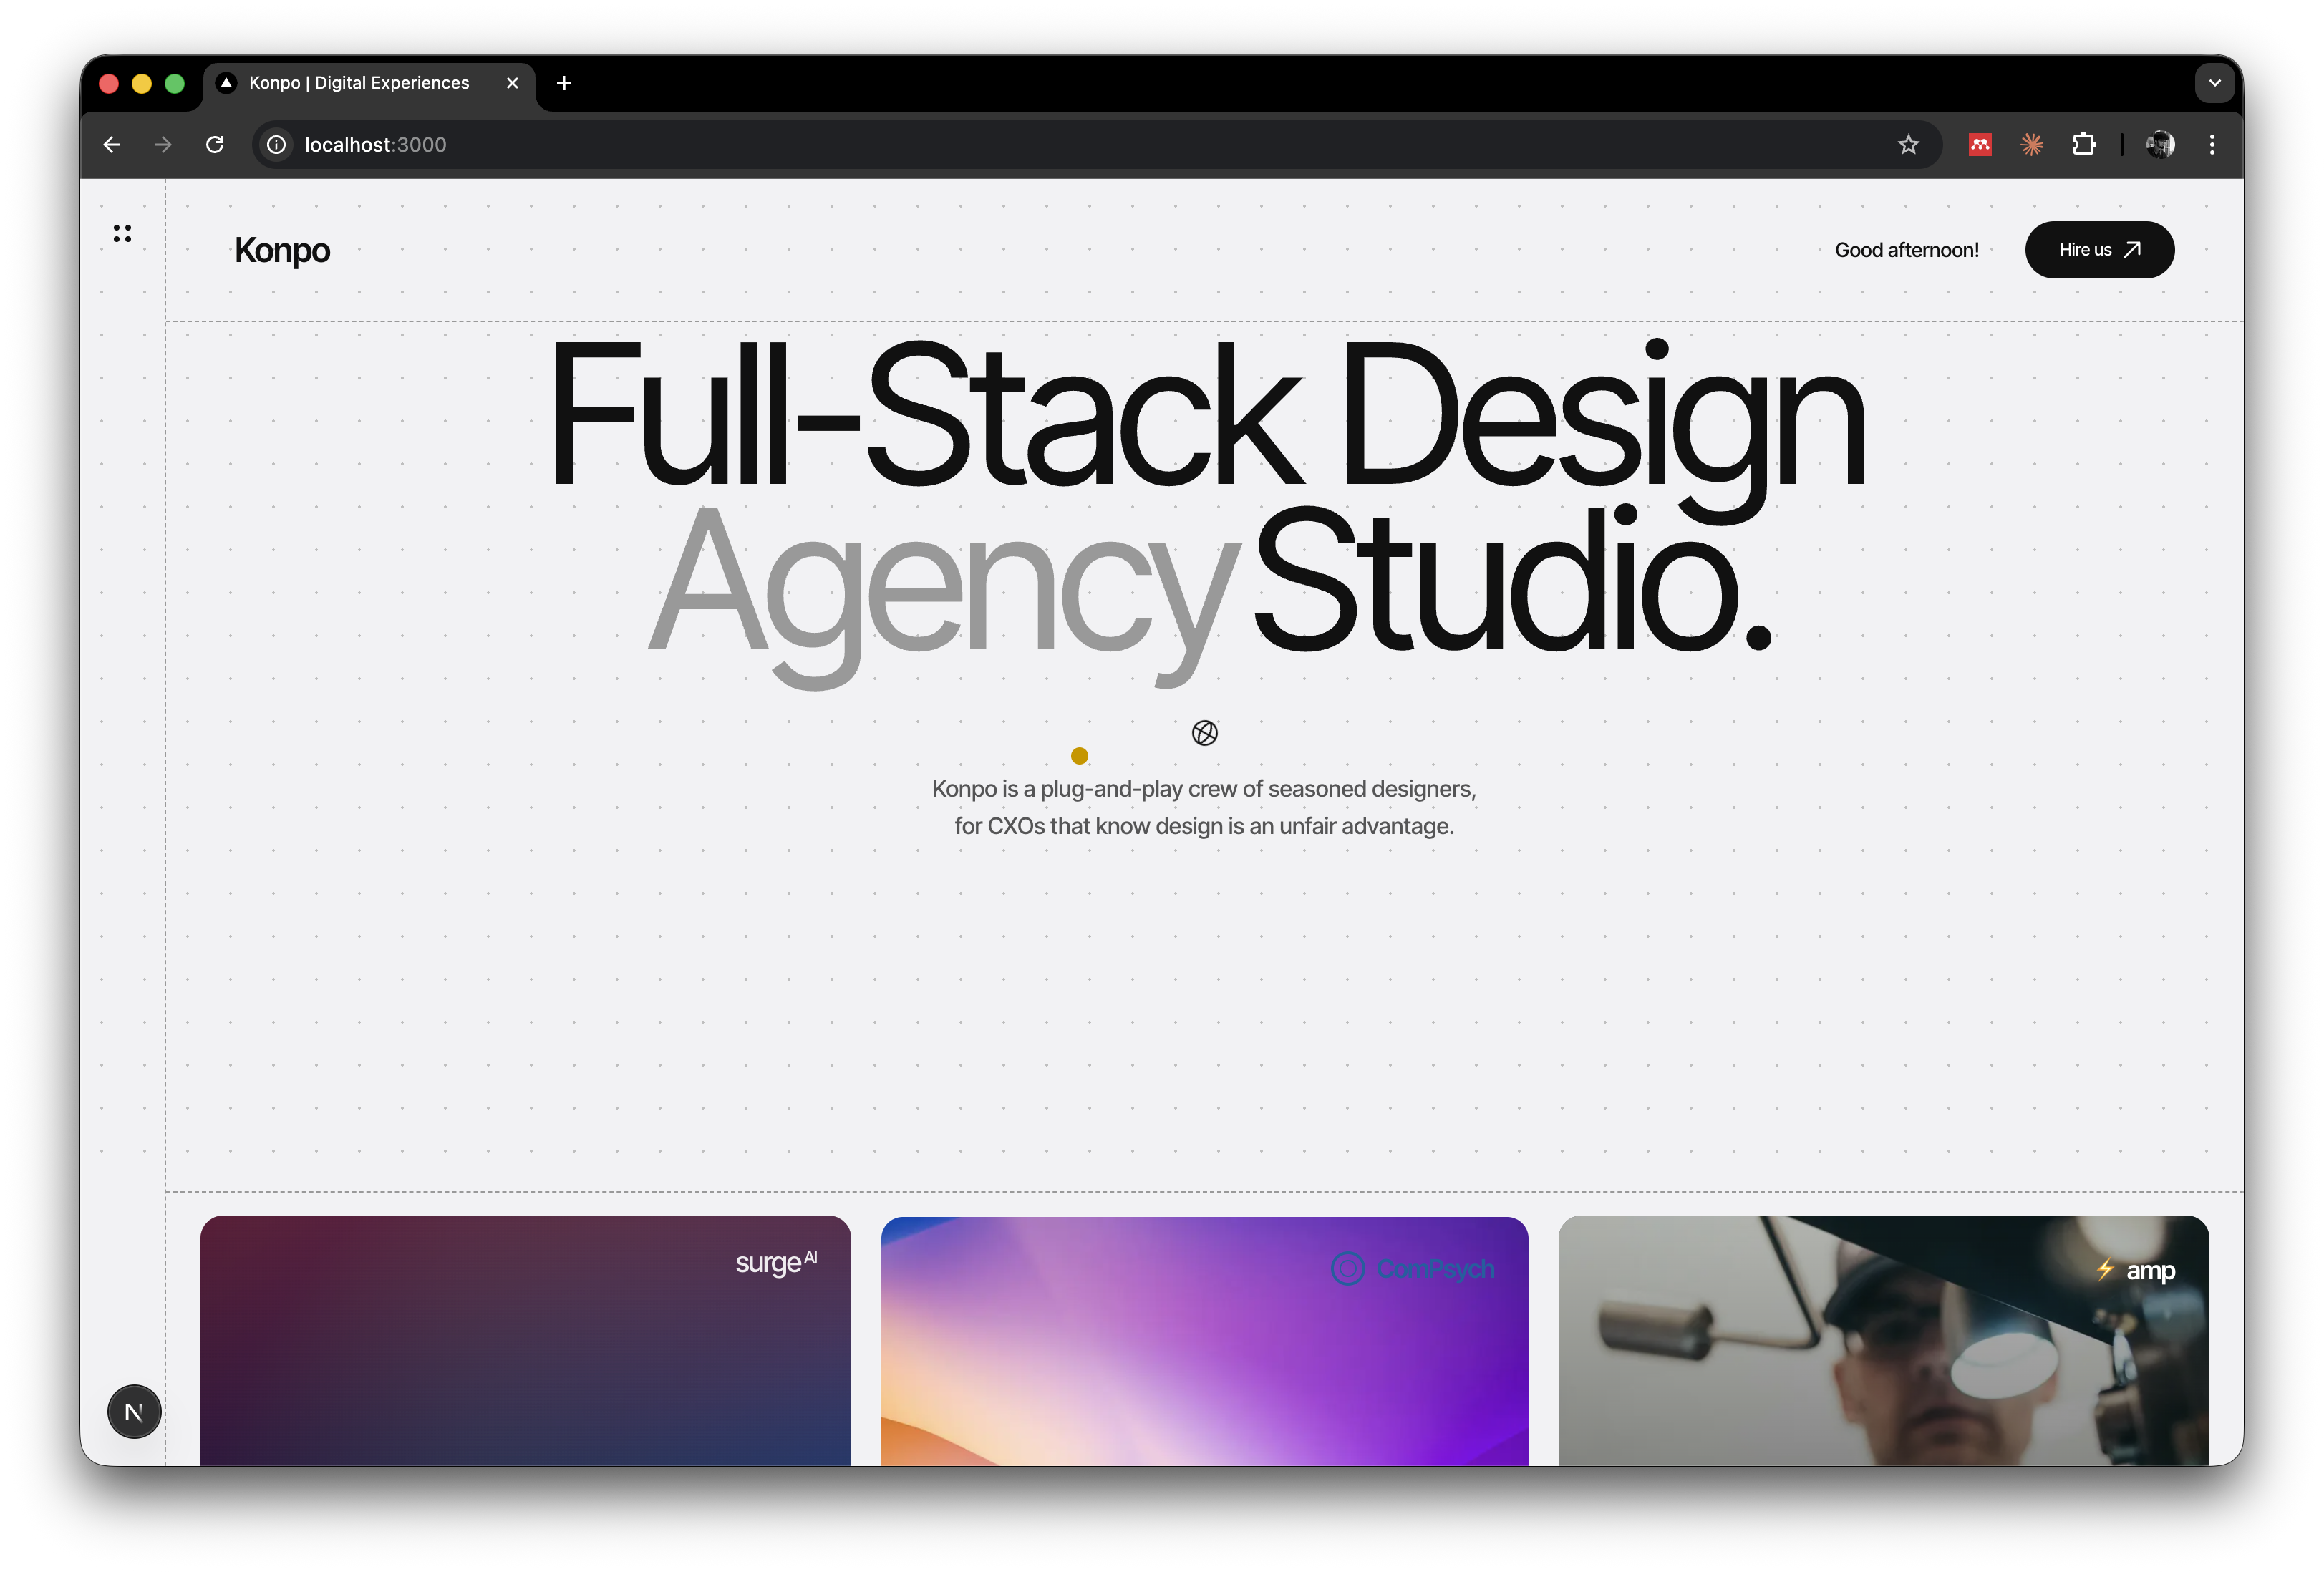
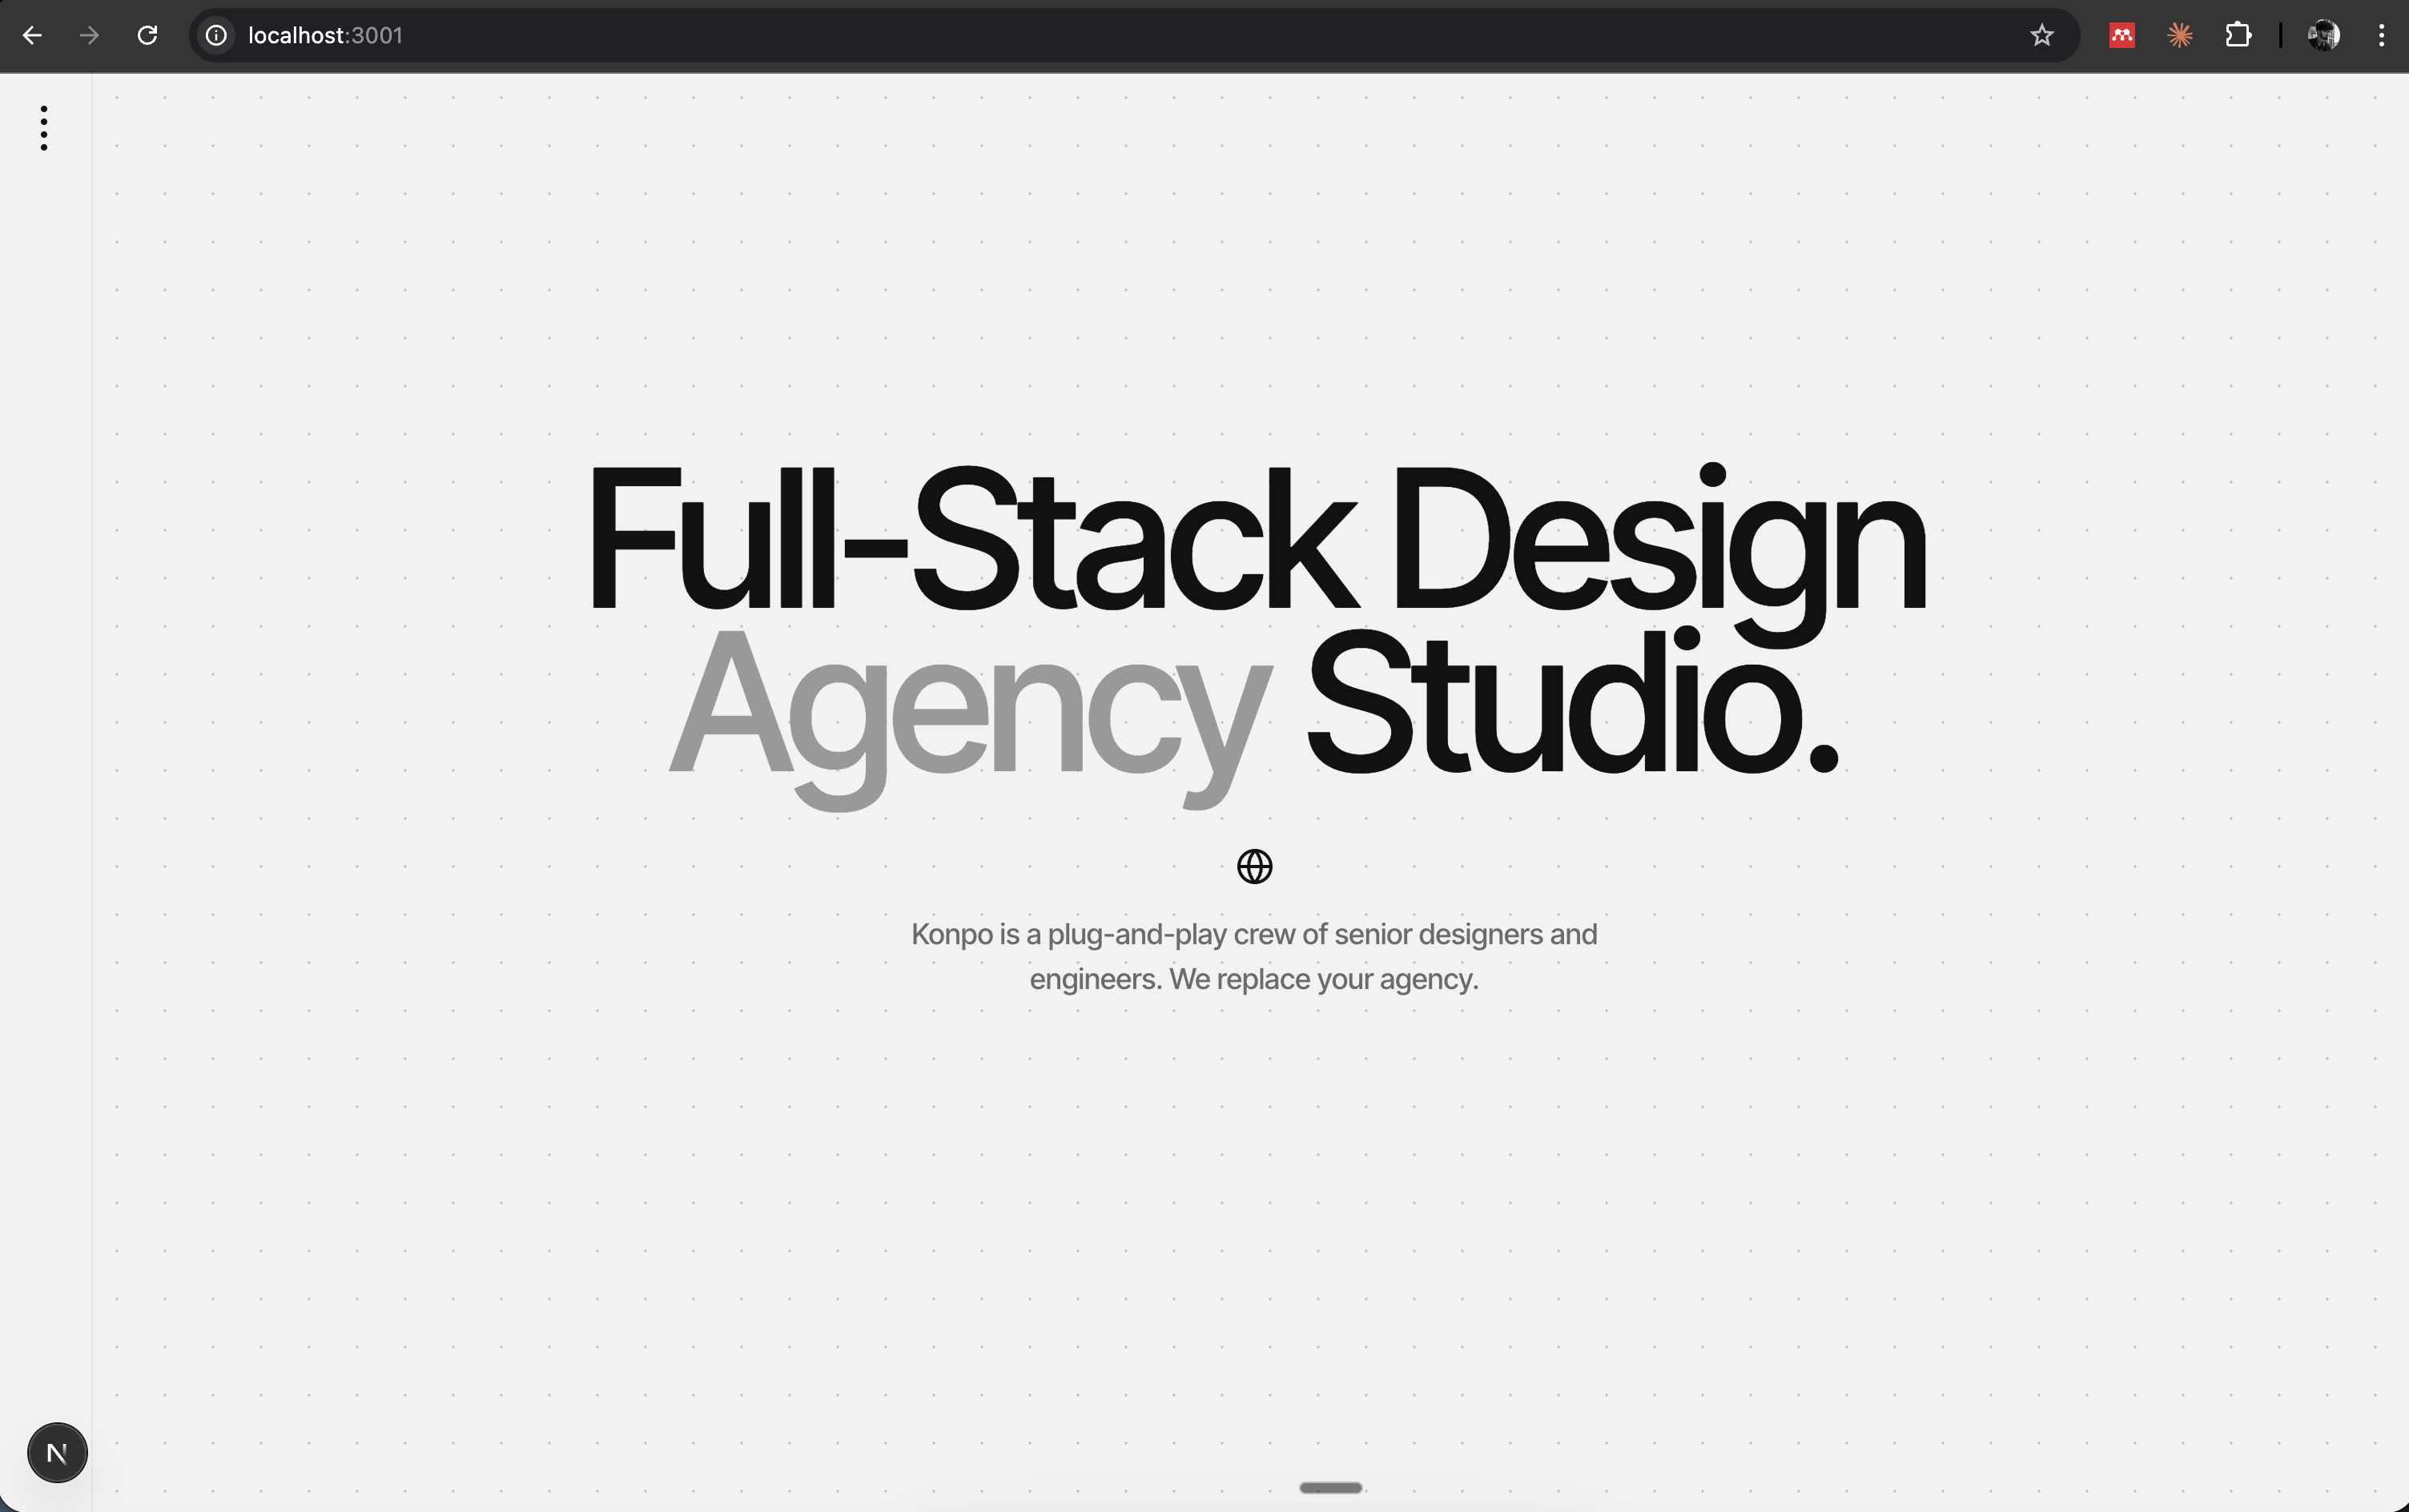
See it live: konpo-yw1p.vercel.app
This is the workflow we've been looking for. This is how we did it.
Why Video, Not Screenshots
We tried screenshots first. Took a bunch, pasted them into ChatGPT, asked "how do I build this?"
It didn't work.
A screenshot is frozen. It shows what something looks like at one instant. But the site we found wasn't magic because of how it looked. It was magic because of how it moved. The timing. The easing. The way elements responded to each other.
You can screenshot the dot grid all day. You'll never know the dots scale from 1.0 to 1.8 based on mouse proximity with a 3 unit radius of influence. That detail only exists in motion.
So we recorded a video instead. 45 seconds of scrolling, hovering, letting animations play out.
What Gemini Told Us
We uploaded the video to Gemini 3 Pro. It watches video natively, frame by frame, so it sees motion the way we see it.
And it told us exactly what we were looking at.
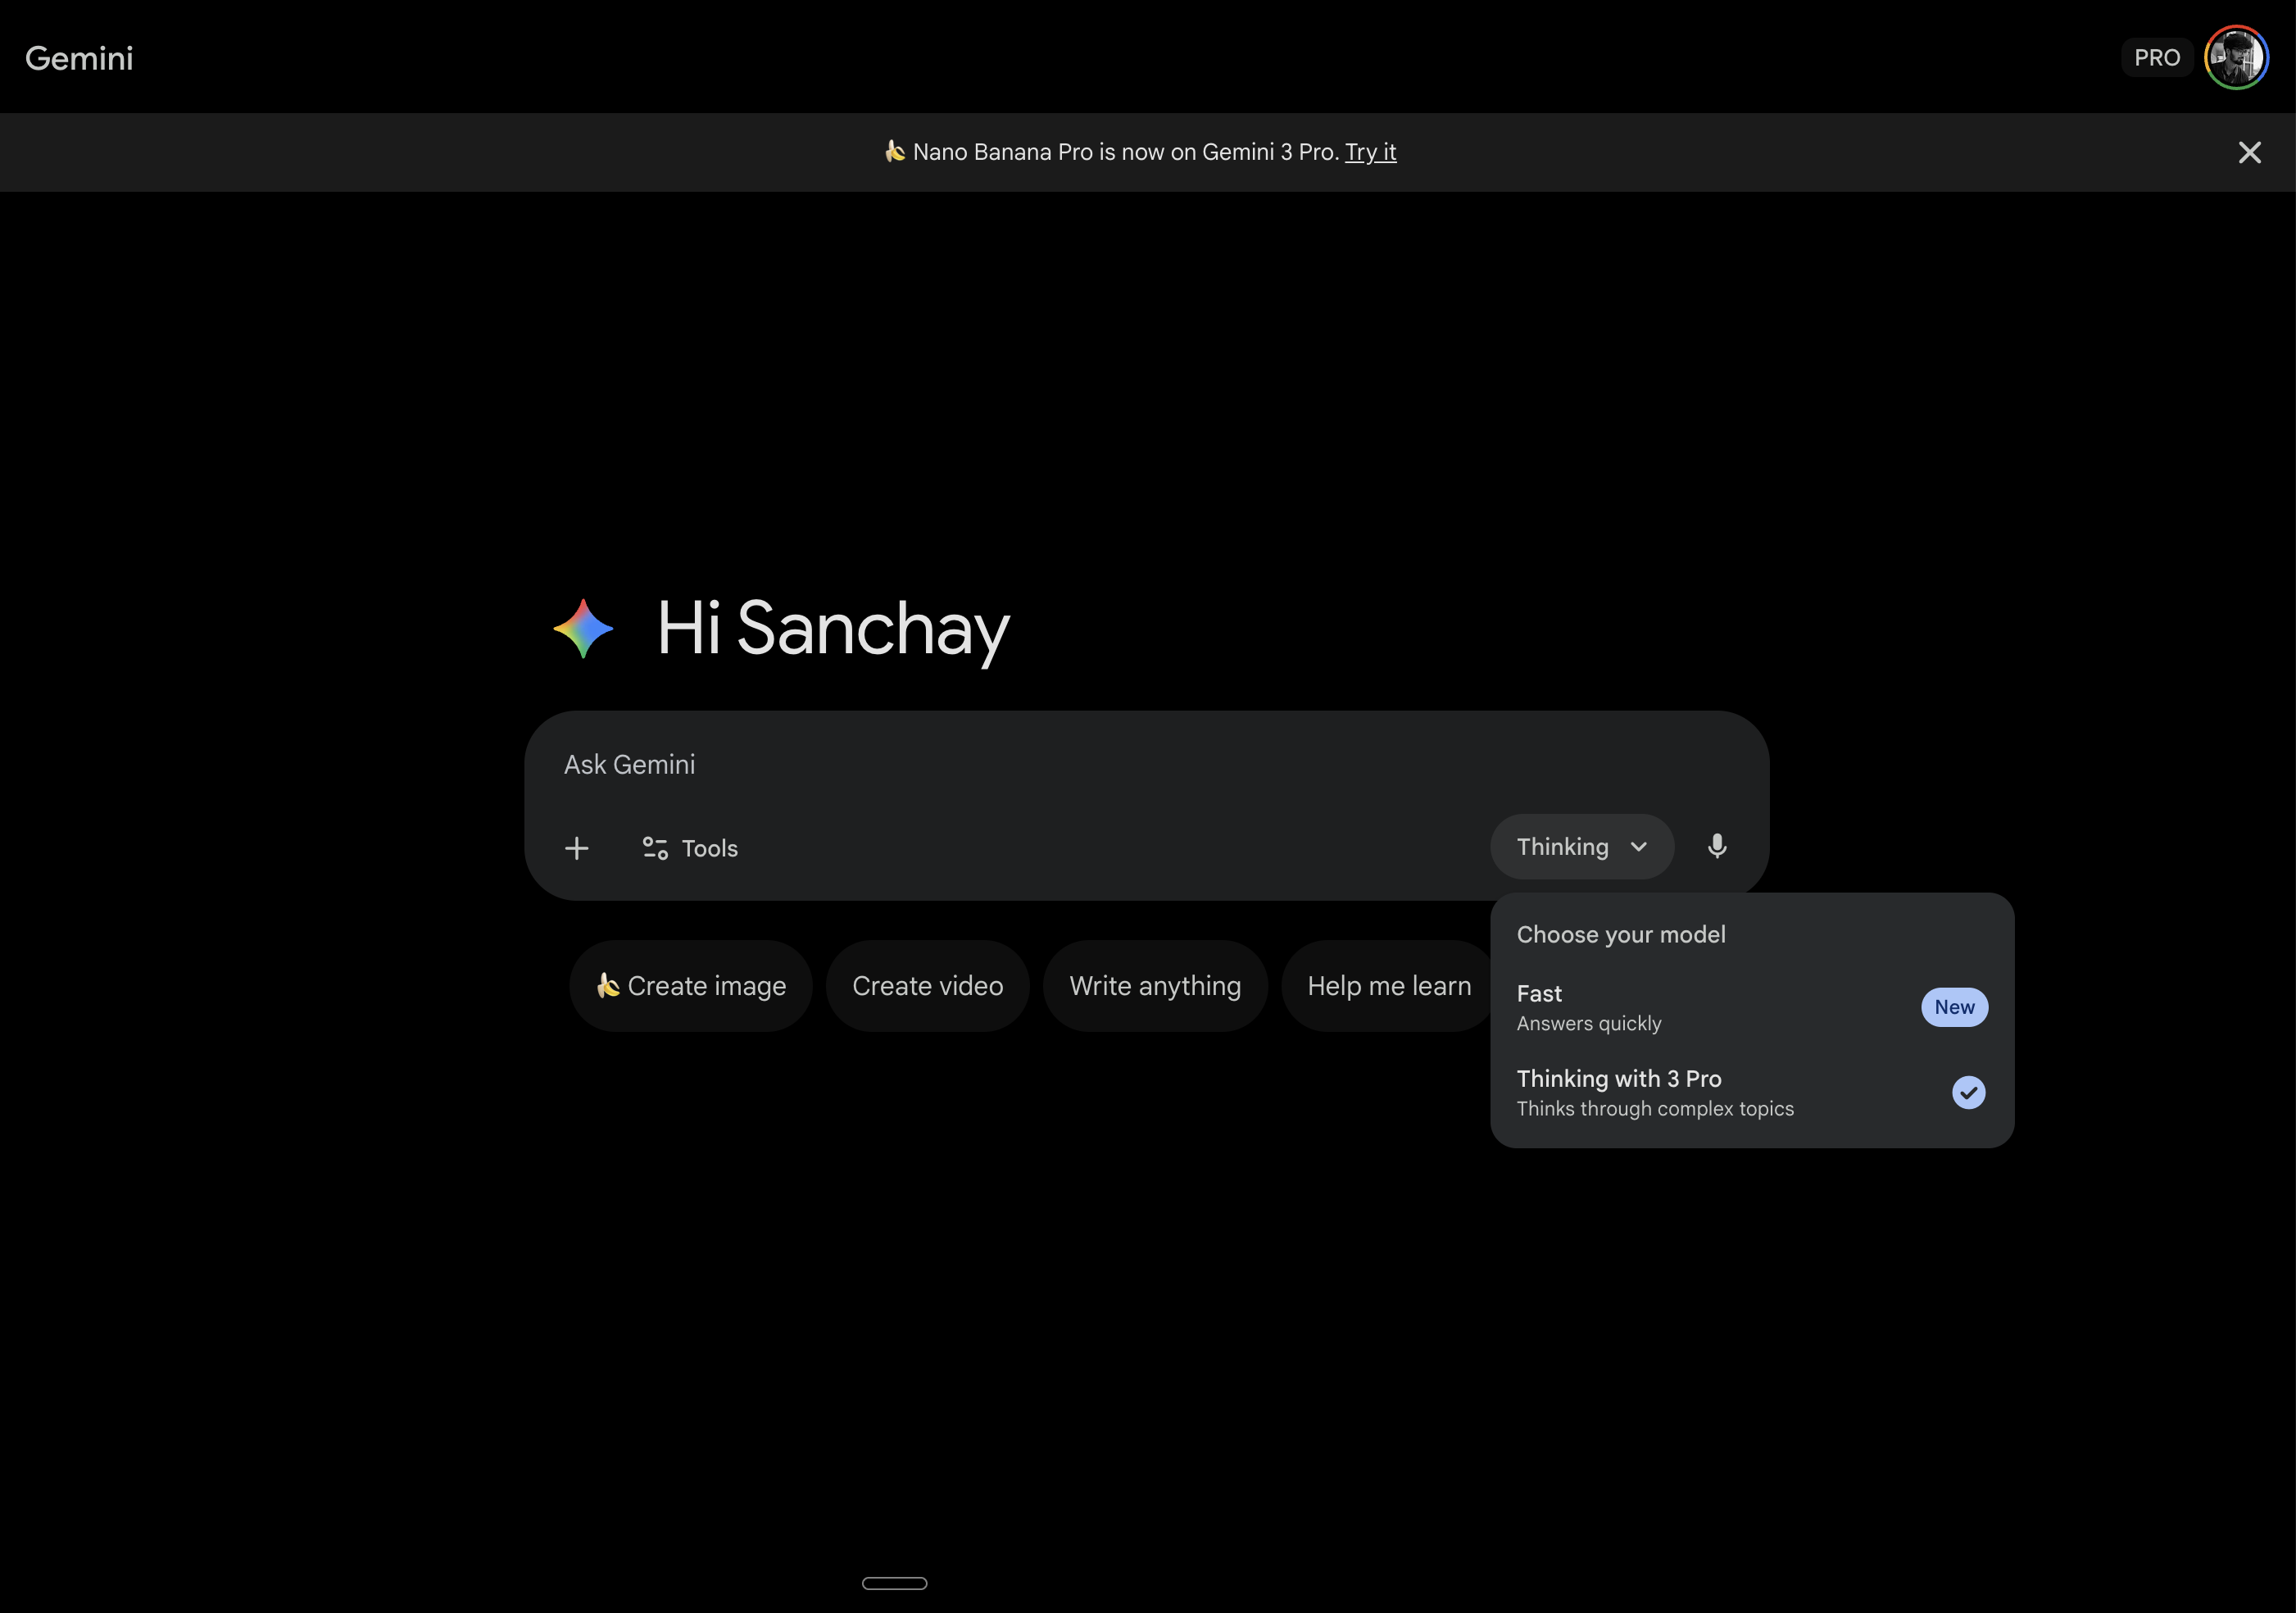
Not vague descriptions. Specific technical details:
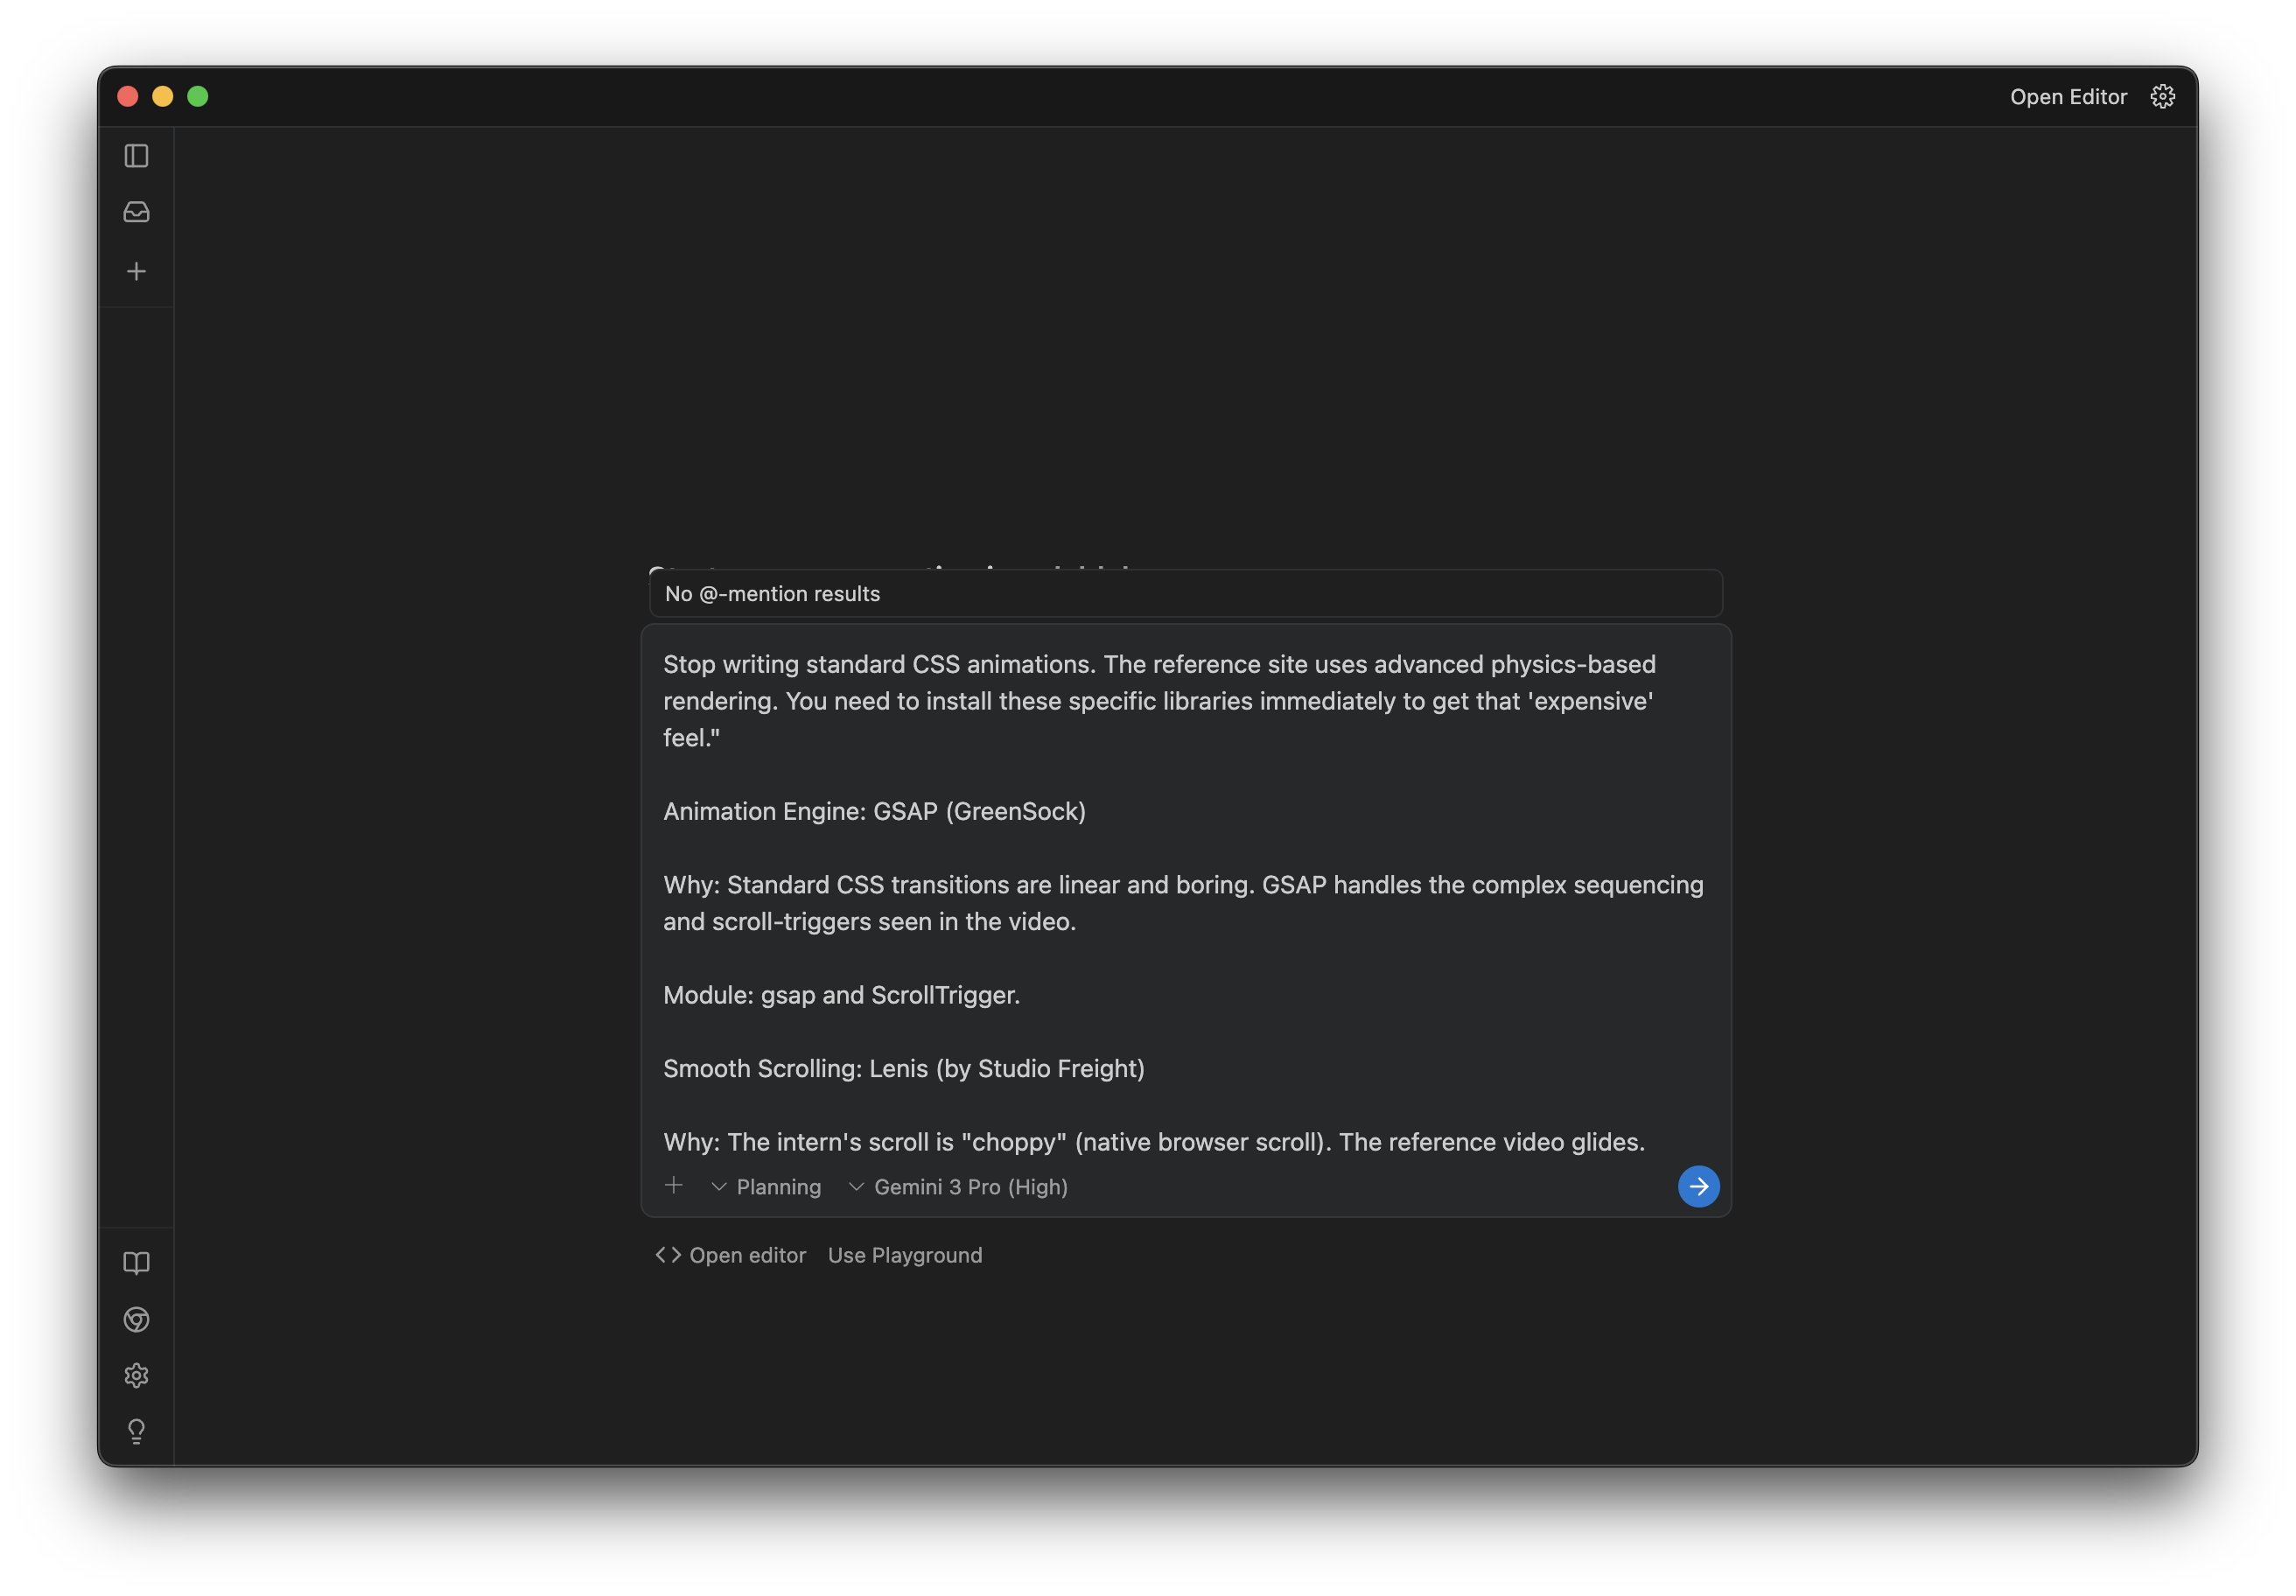
"12x12 dot grid using InstancedMesh. Scale ranges from 1.0 to 1.8 based on mouse proximity. Color lerps from #E5E5E7 to #6366f1. Radius of influence: 3 units."
"GSAP ScrollTrigger with scrub. Cards use sticky positioning at top: 15vh. Scale animates from 1 to 0.95 as next card approaches."
"Lenis for smooth scrolling. Lerp: 0.1, duration: 1.5."
Suddenly we had the vocabulary. InstancedMesh. ScrollTrigger. Lenis. These weren't words we knew before. Now we could actually ask for what we wanted.
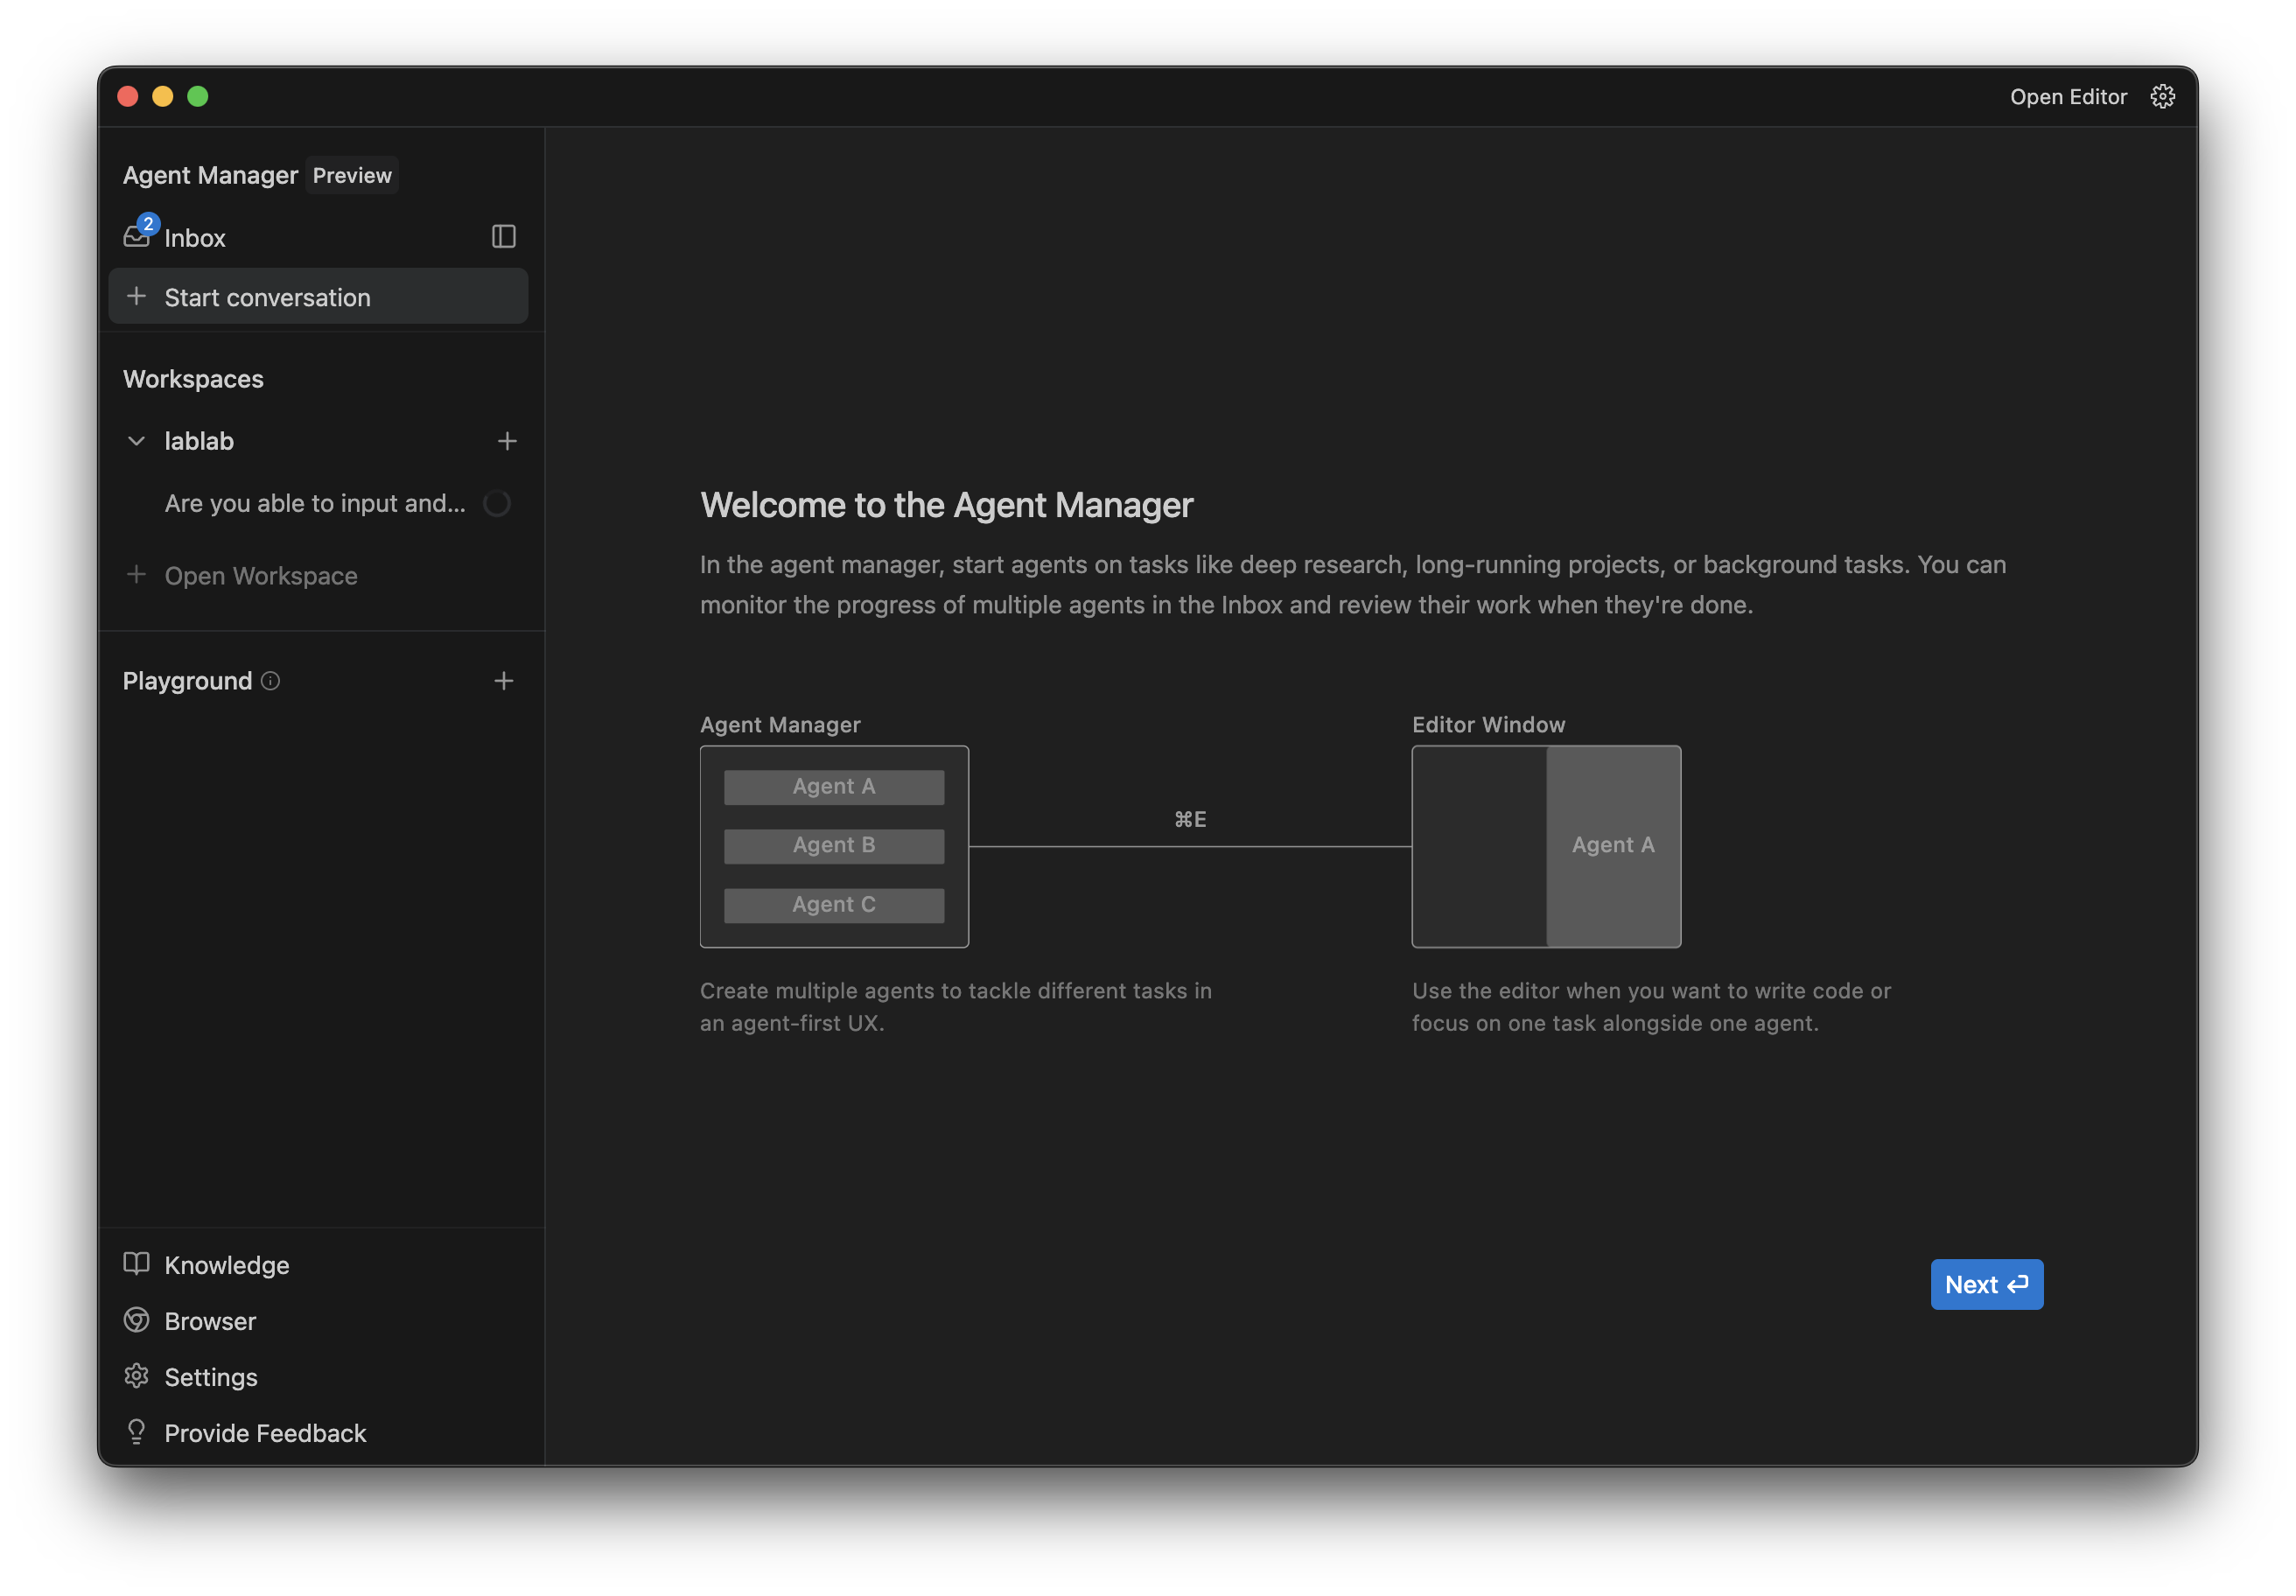
Feeding It to Antigravity
Antigravity is where the building happens. It's an IDE where AI agents control your editor, terminal, and browser simultaneously. You describe what you want, they build it, you review.
We pasted Gemini's entire analysis into the Agent Manager and told it to build a Next.js portfolio with these exact specs.
The Full Analysis
Gemini gave us everything. Tech stack, layout structure, component logic, animation patterns.
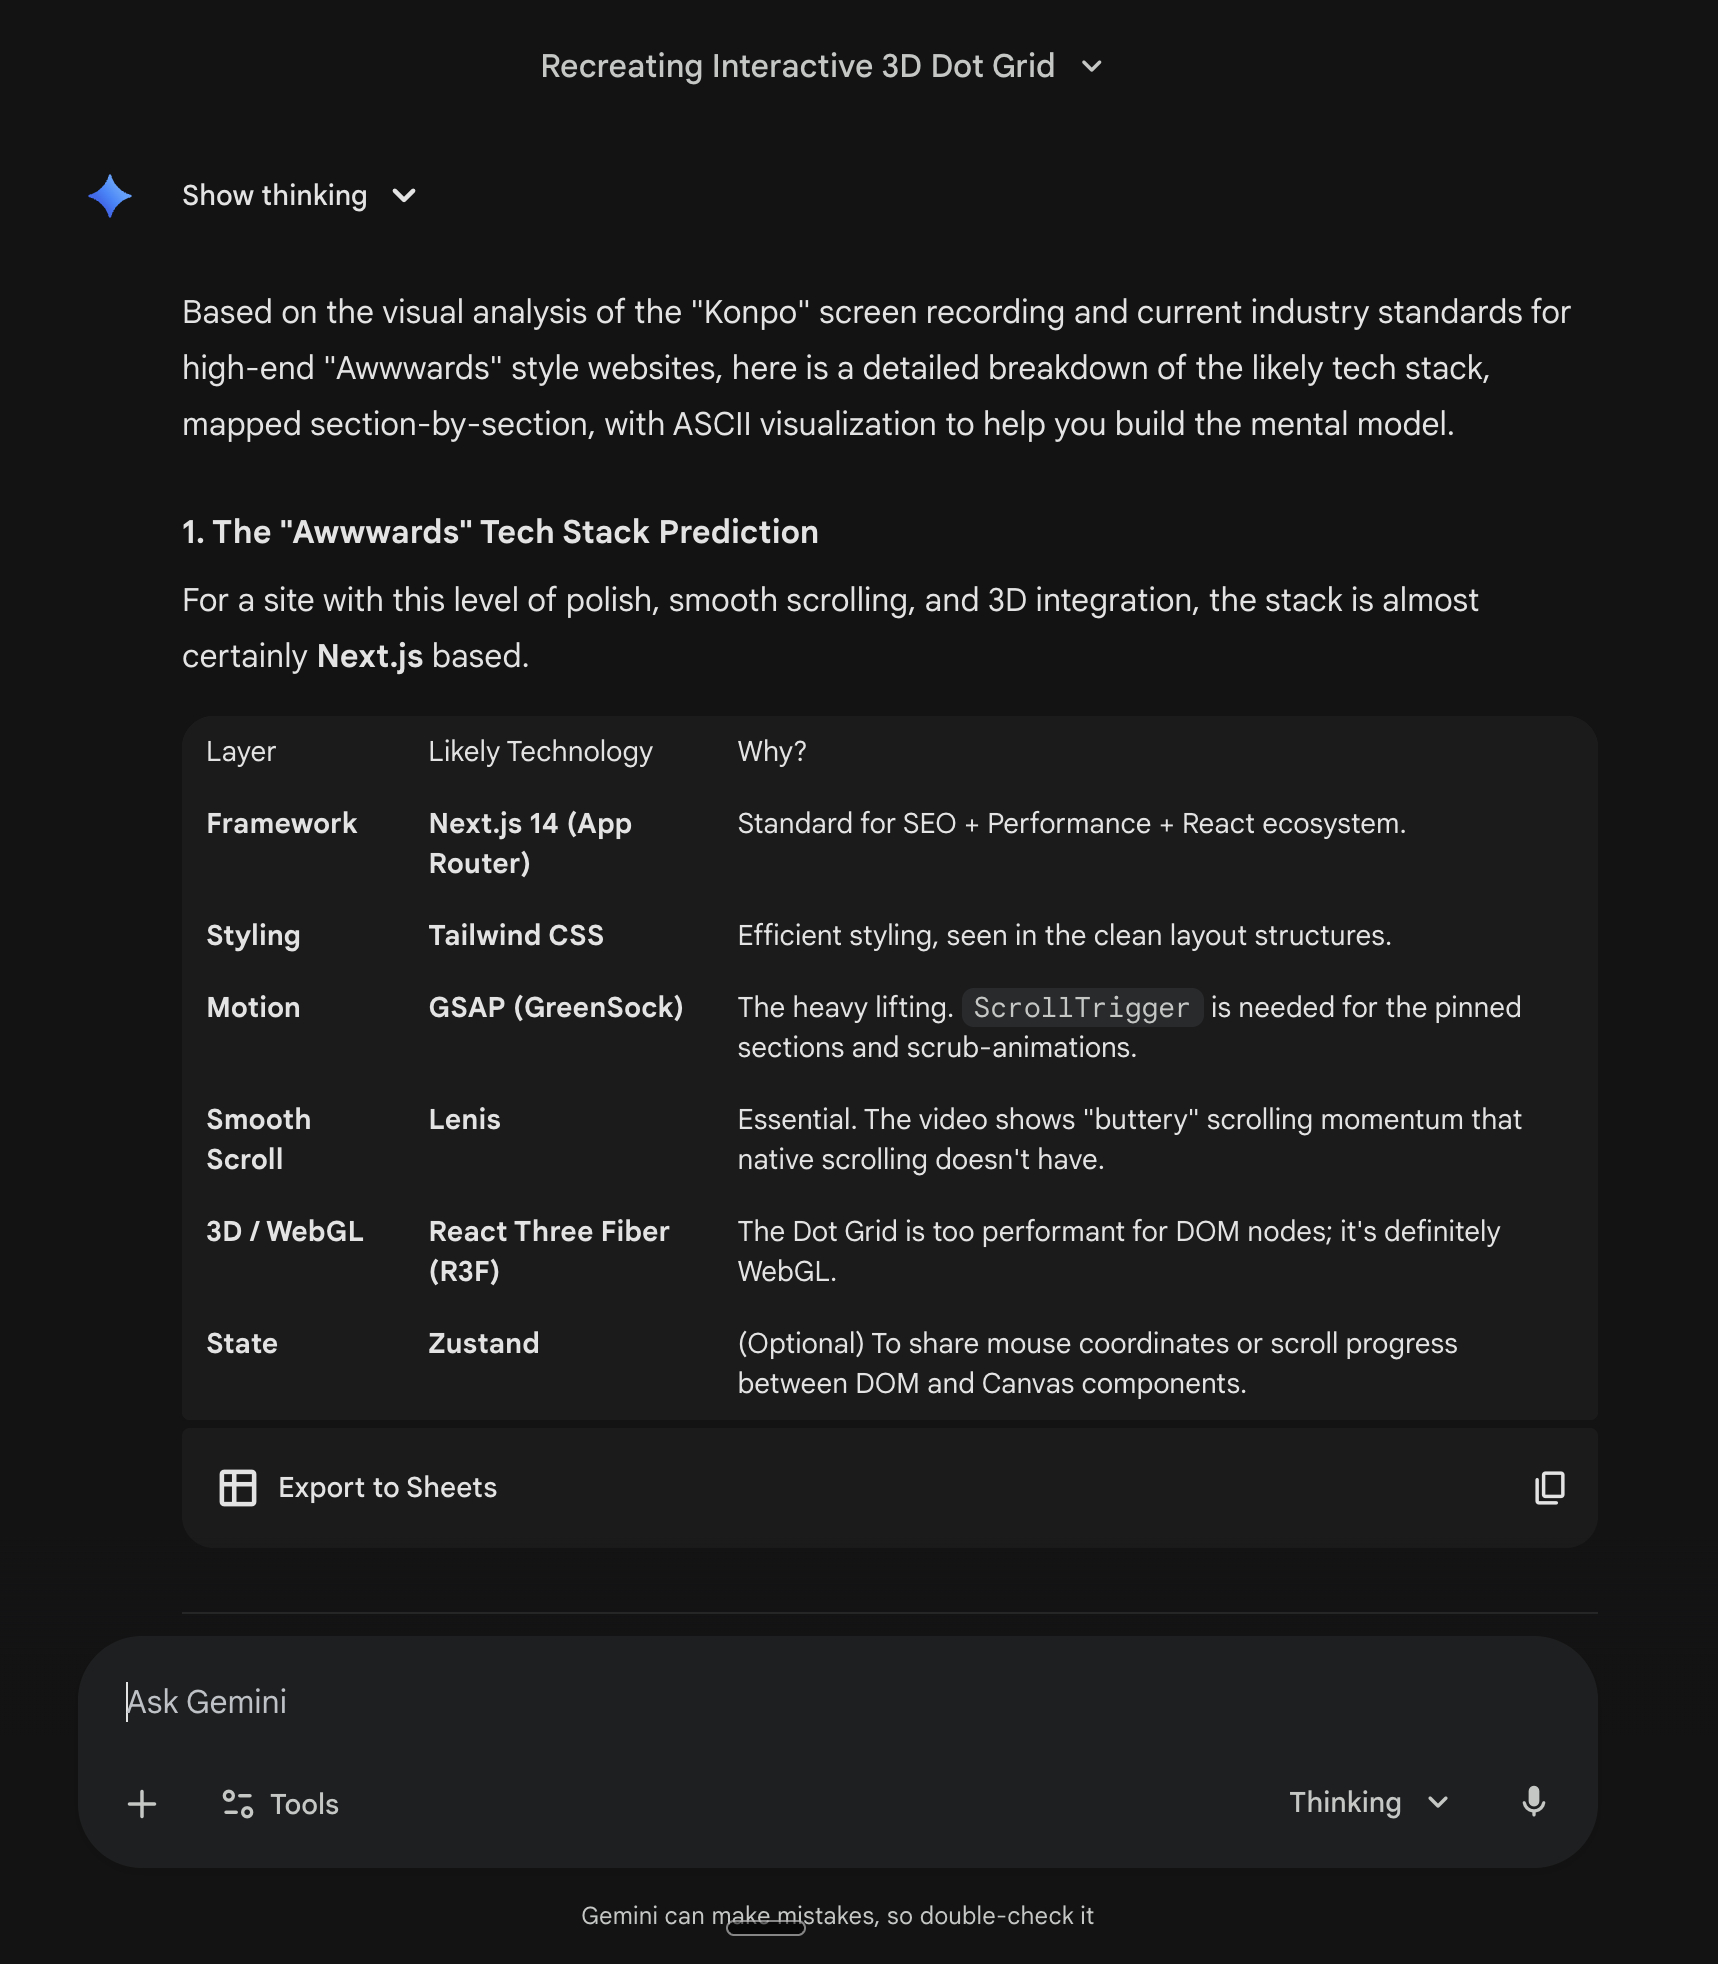
It identified every library: Next.js 14 with App Router, Tailwind, GSAP with ScrollTrigger, Lenis, React Three Fiber, Zustand. It drew the z-index structure as ASCII so we understood how layers stacked.
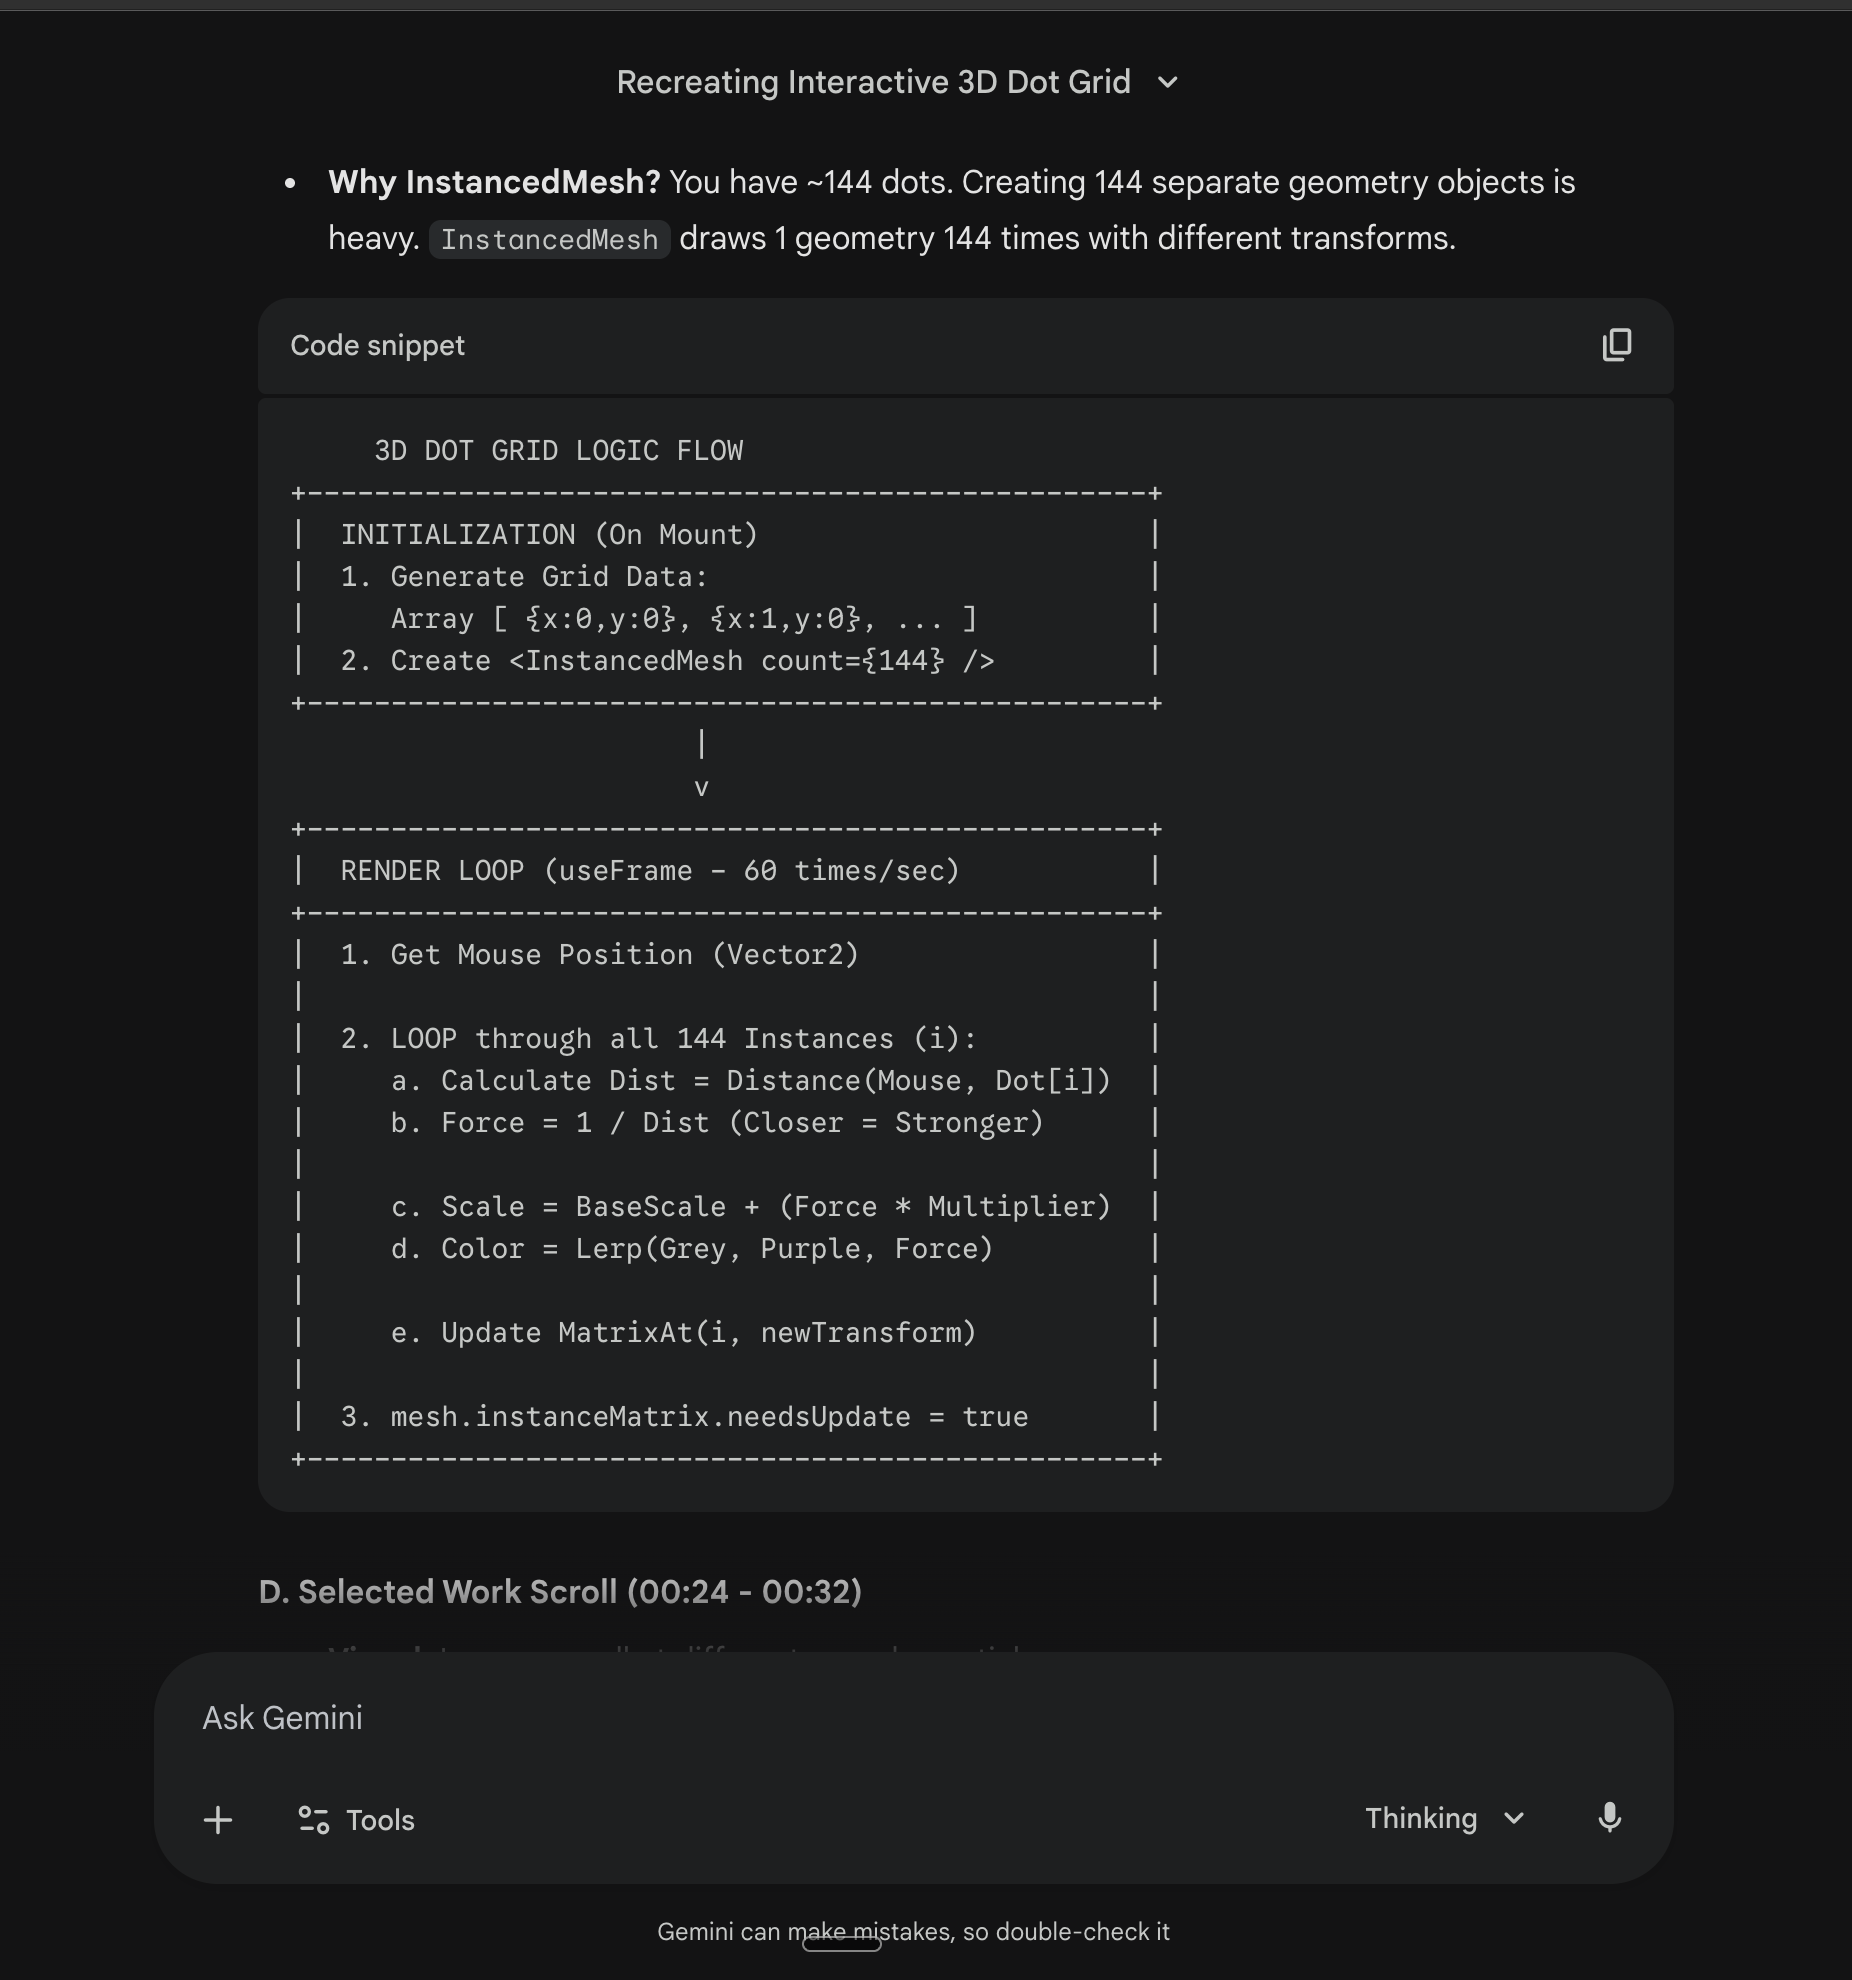
For the dot grid specifically, it explained the whole pipeline. 12x12 grid using InstancedMesh (one draw call instead of 144). Scale from 1.0 to 1.8 based on mouse proximity. Color lerping from grey to purple. Radius of influence: 3 units.
This level of detail is what we needed. Not "animated dots" but the actual implementation.
The Build
We pasted the entire Gemini analysis into Antigravity. No editing, no summarizing. We were tempted to clean it up but resisted. The agent is better at deciding what matters than we are.
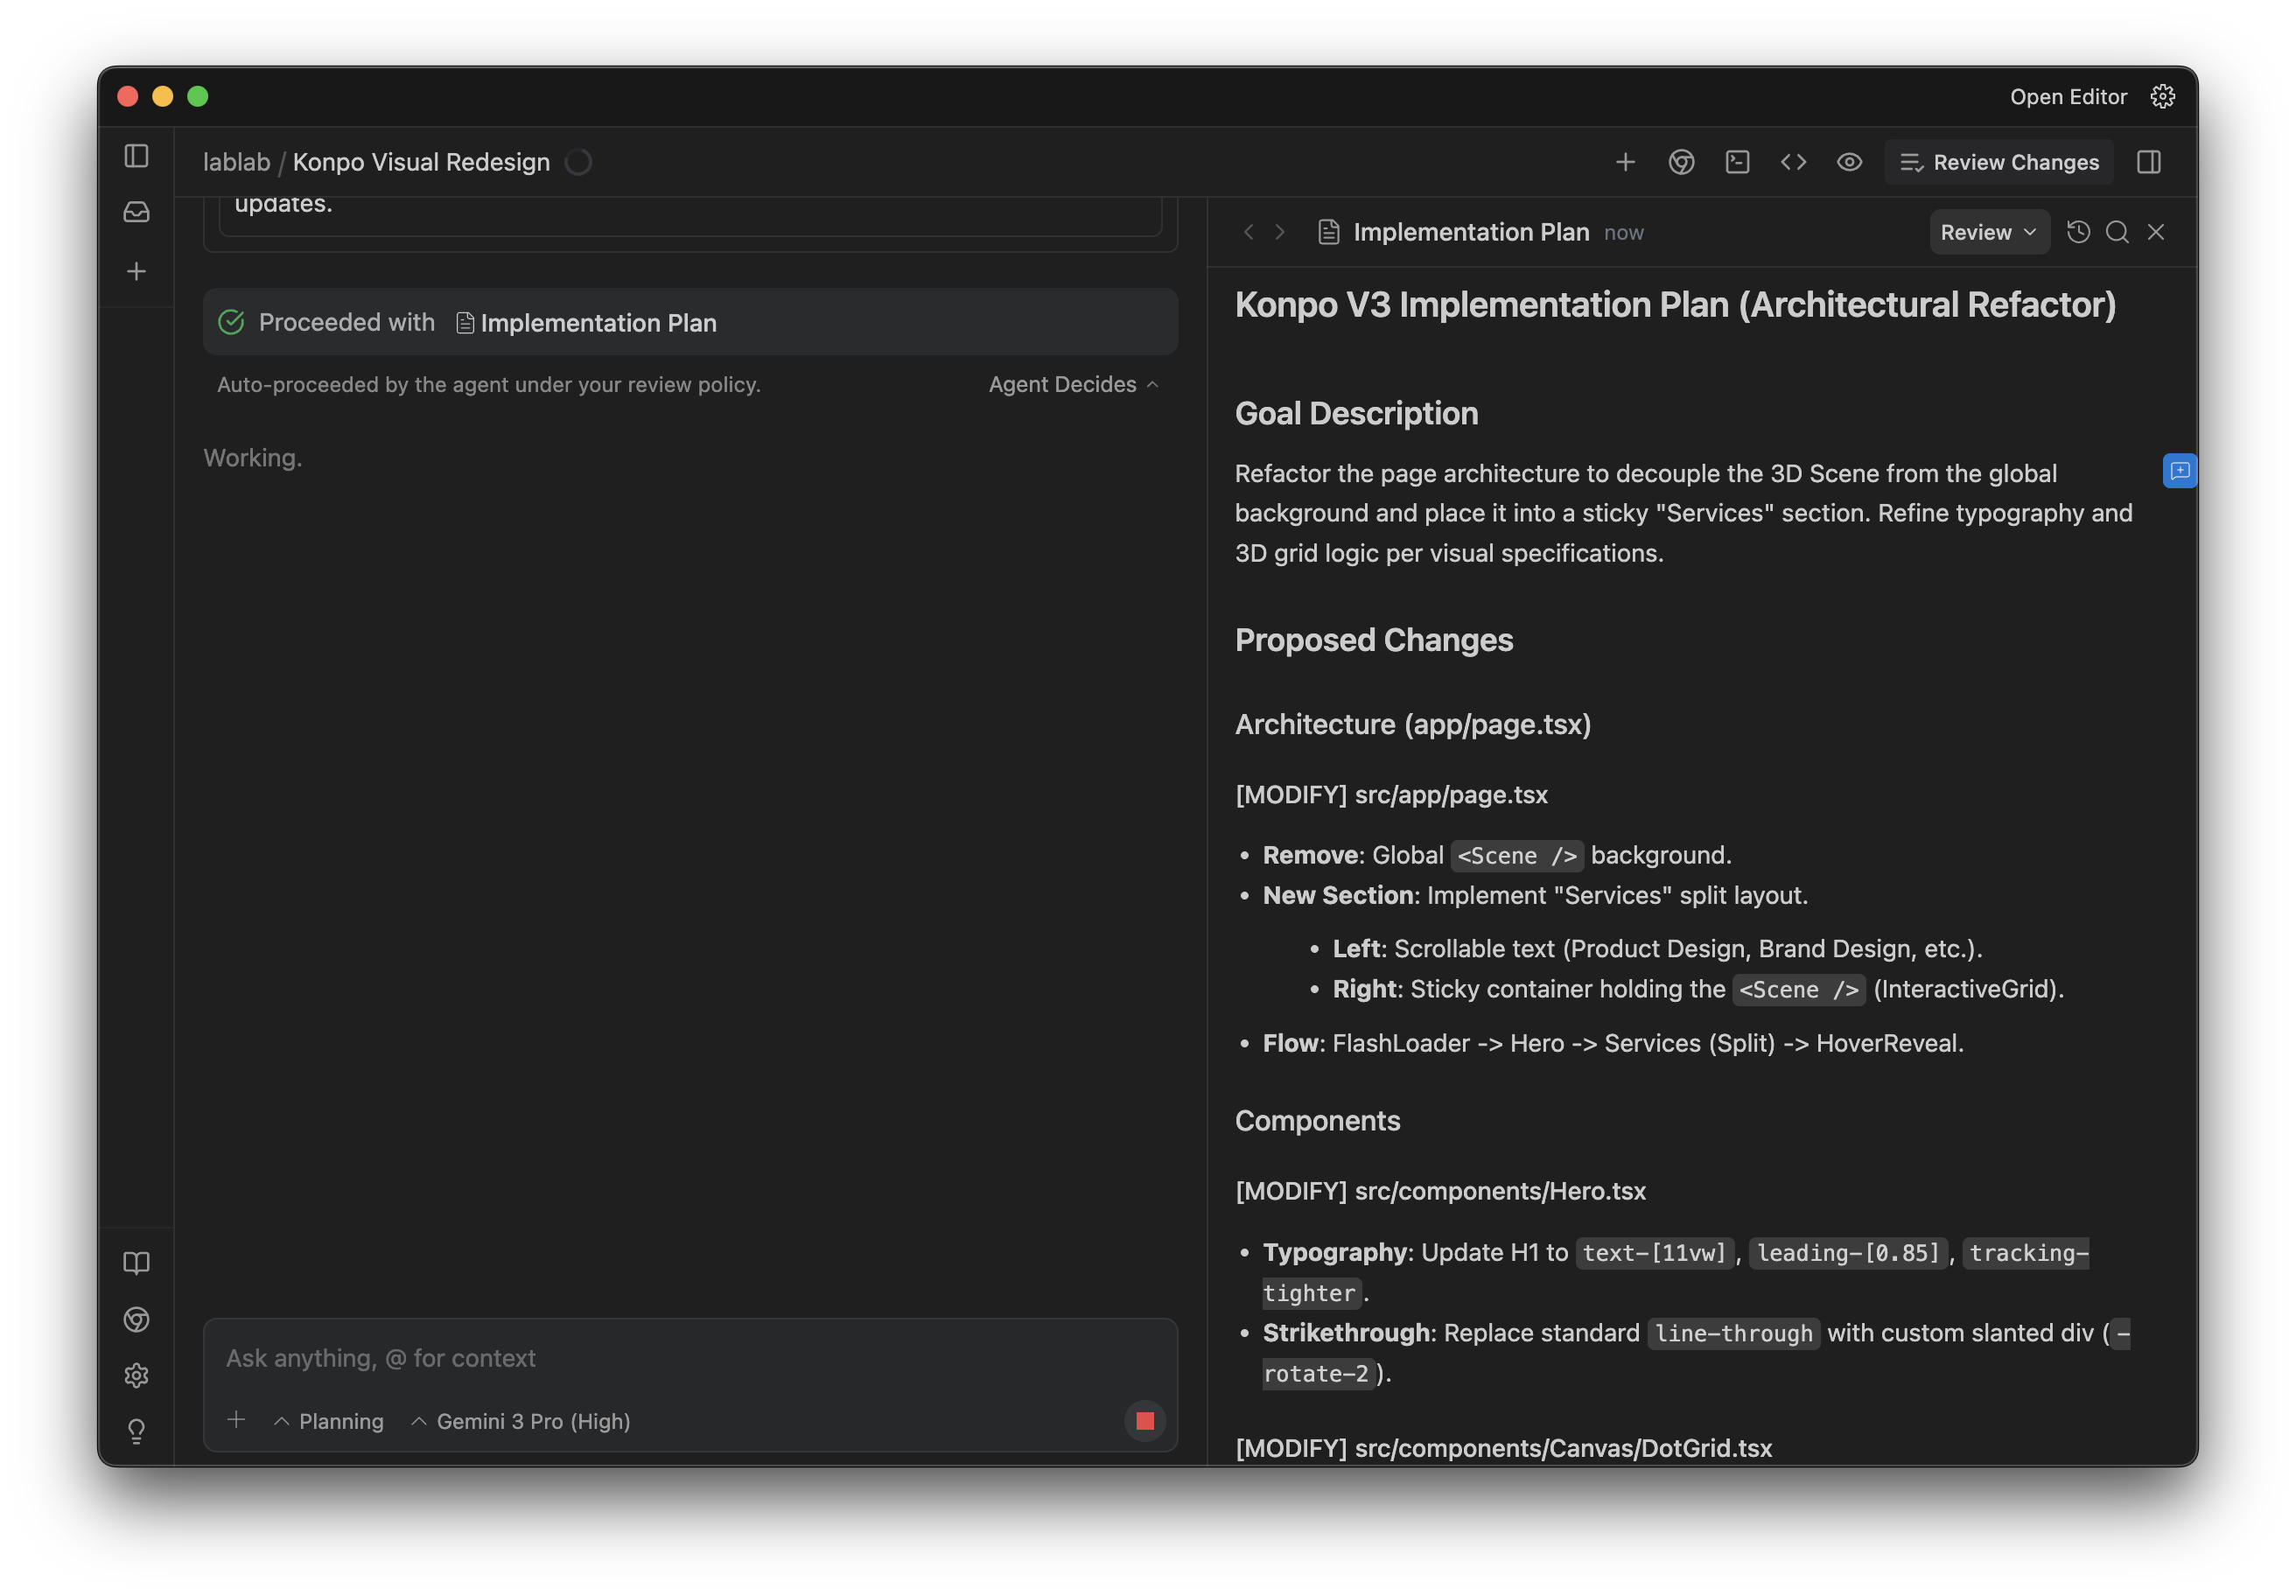
The agent came back with a plan. Project setup, dependencies, component structure, the 3D dot grid, GSAP animations, Lenis config. All broken down into steps.
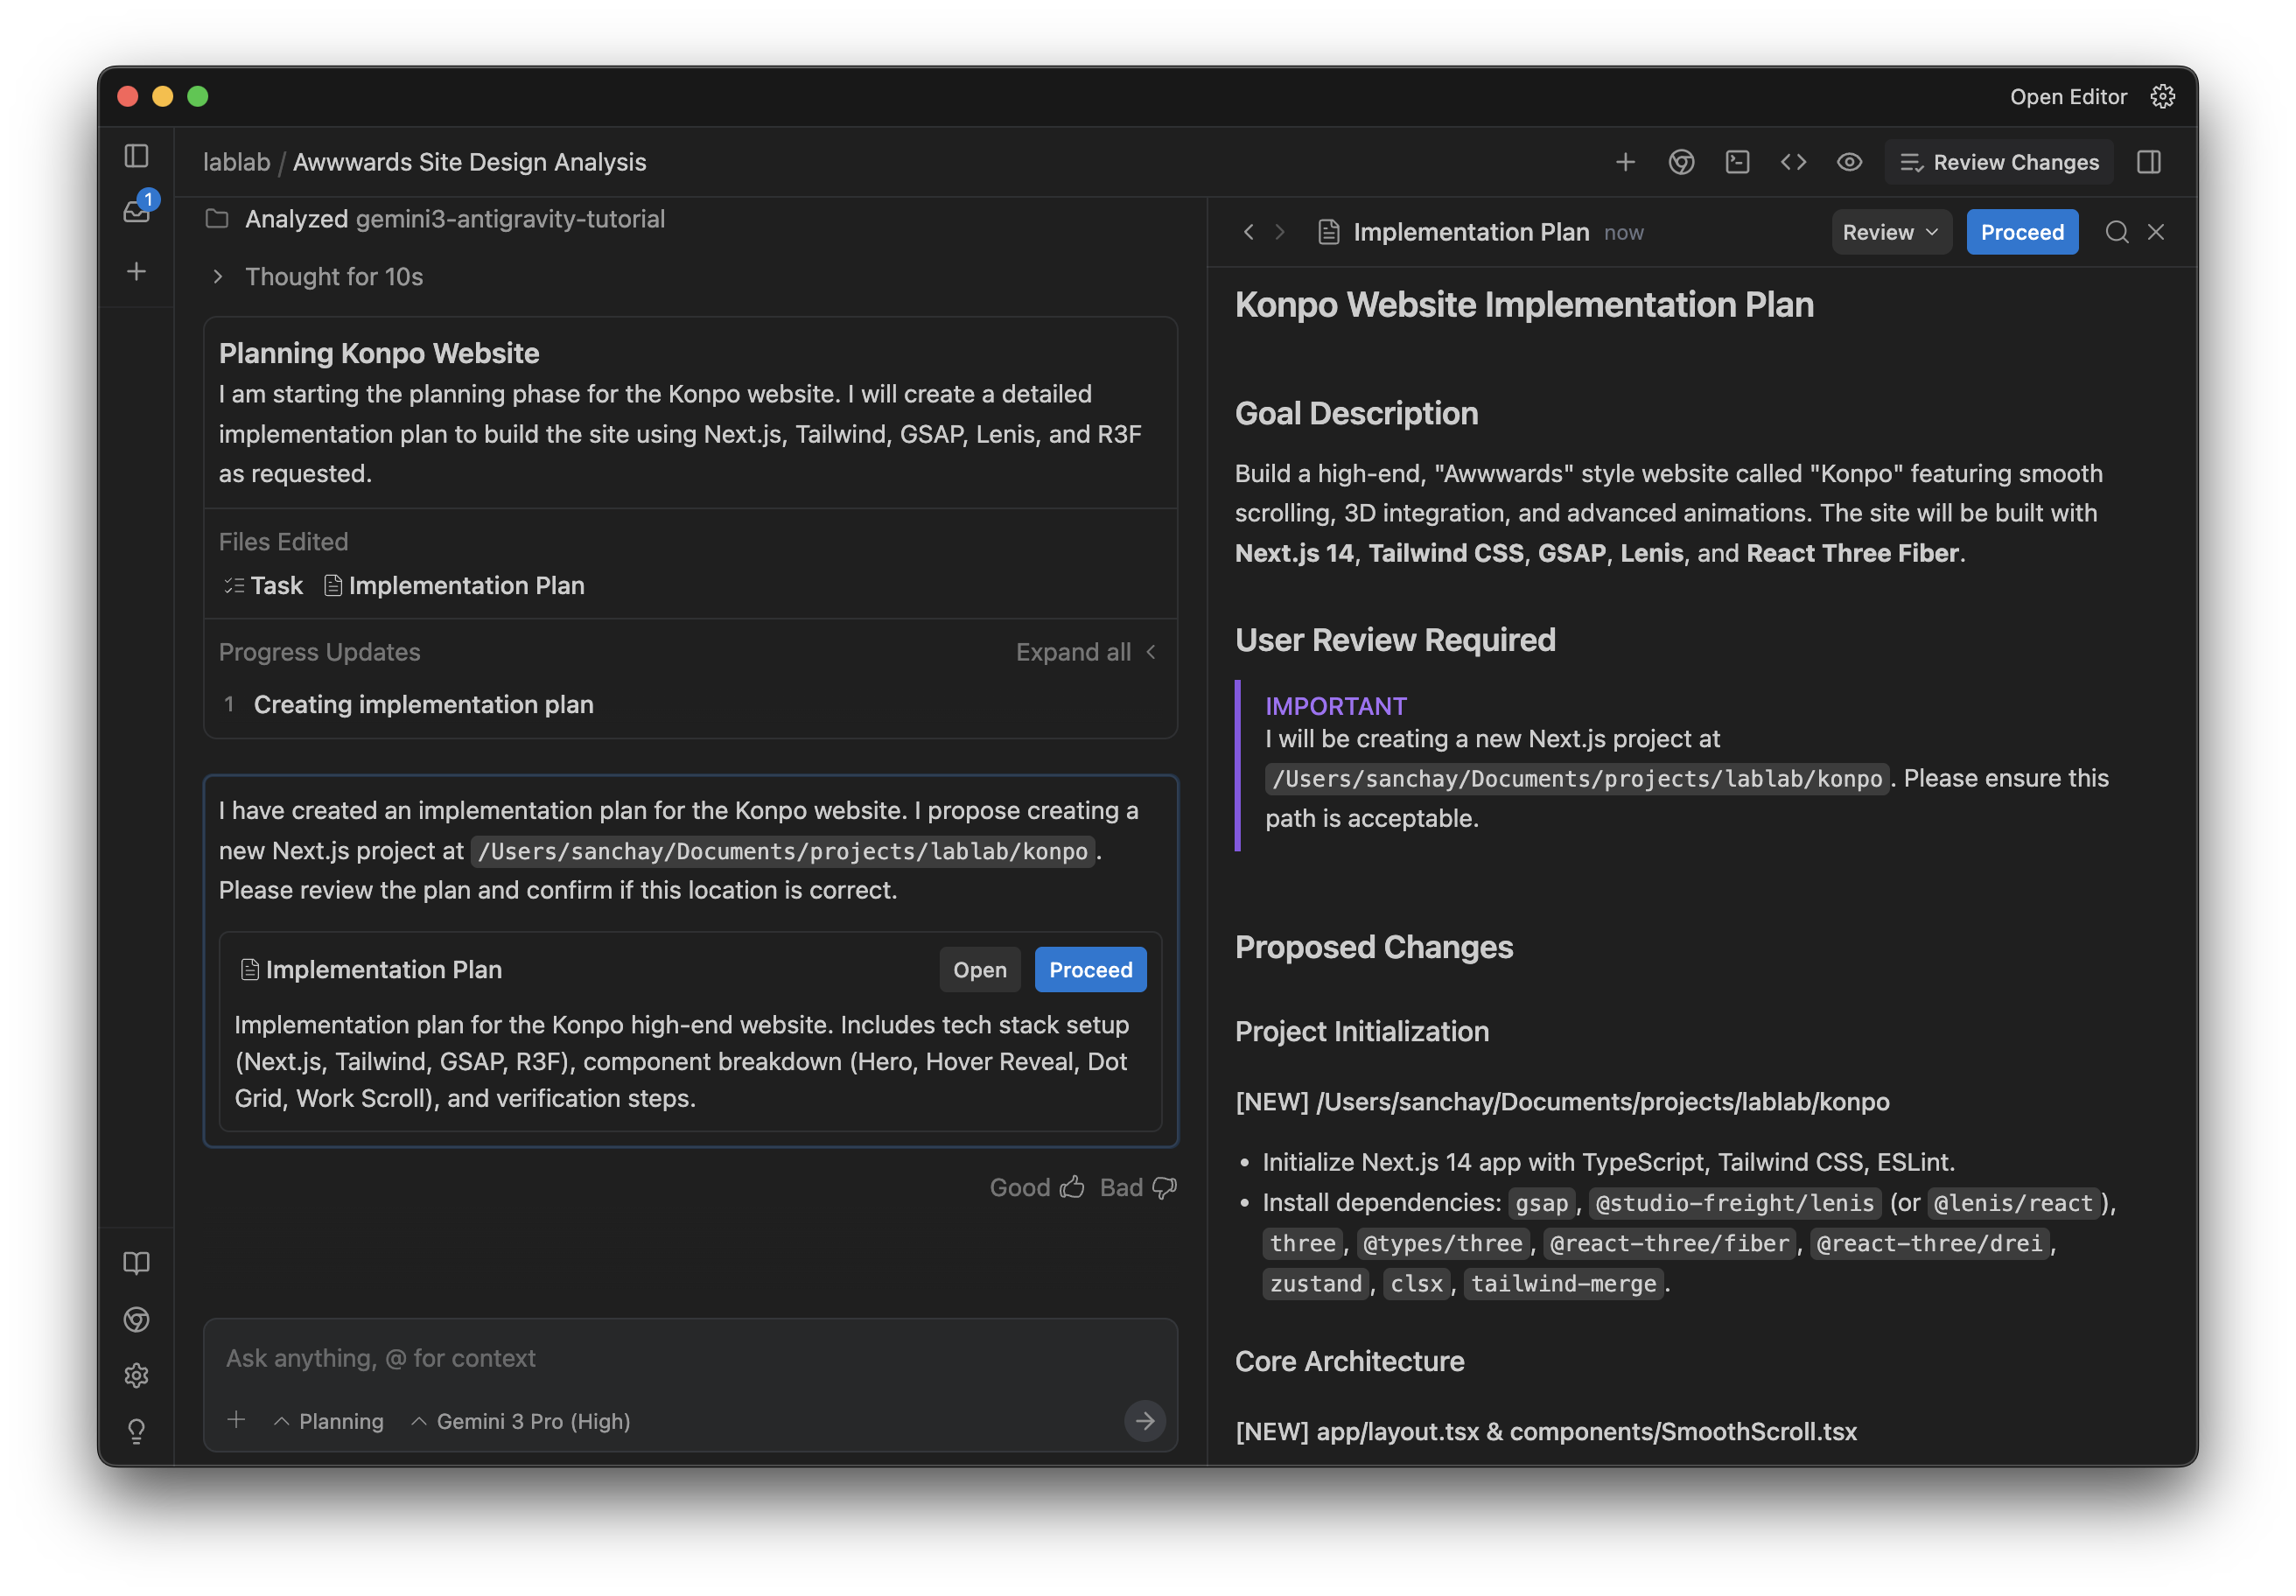
We didn't write this plan. The agent created it from Gemini's analysis. This is important. Ask for a plan first. Review it. Then approve. Cheaper to fix a plan than fix code.
We set the agent to "Agent assisted" mode. It runs safe commands automatically but asks before anything destructive. Not full autopilot but not babysitting either.
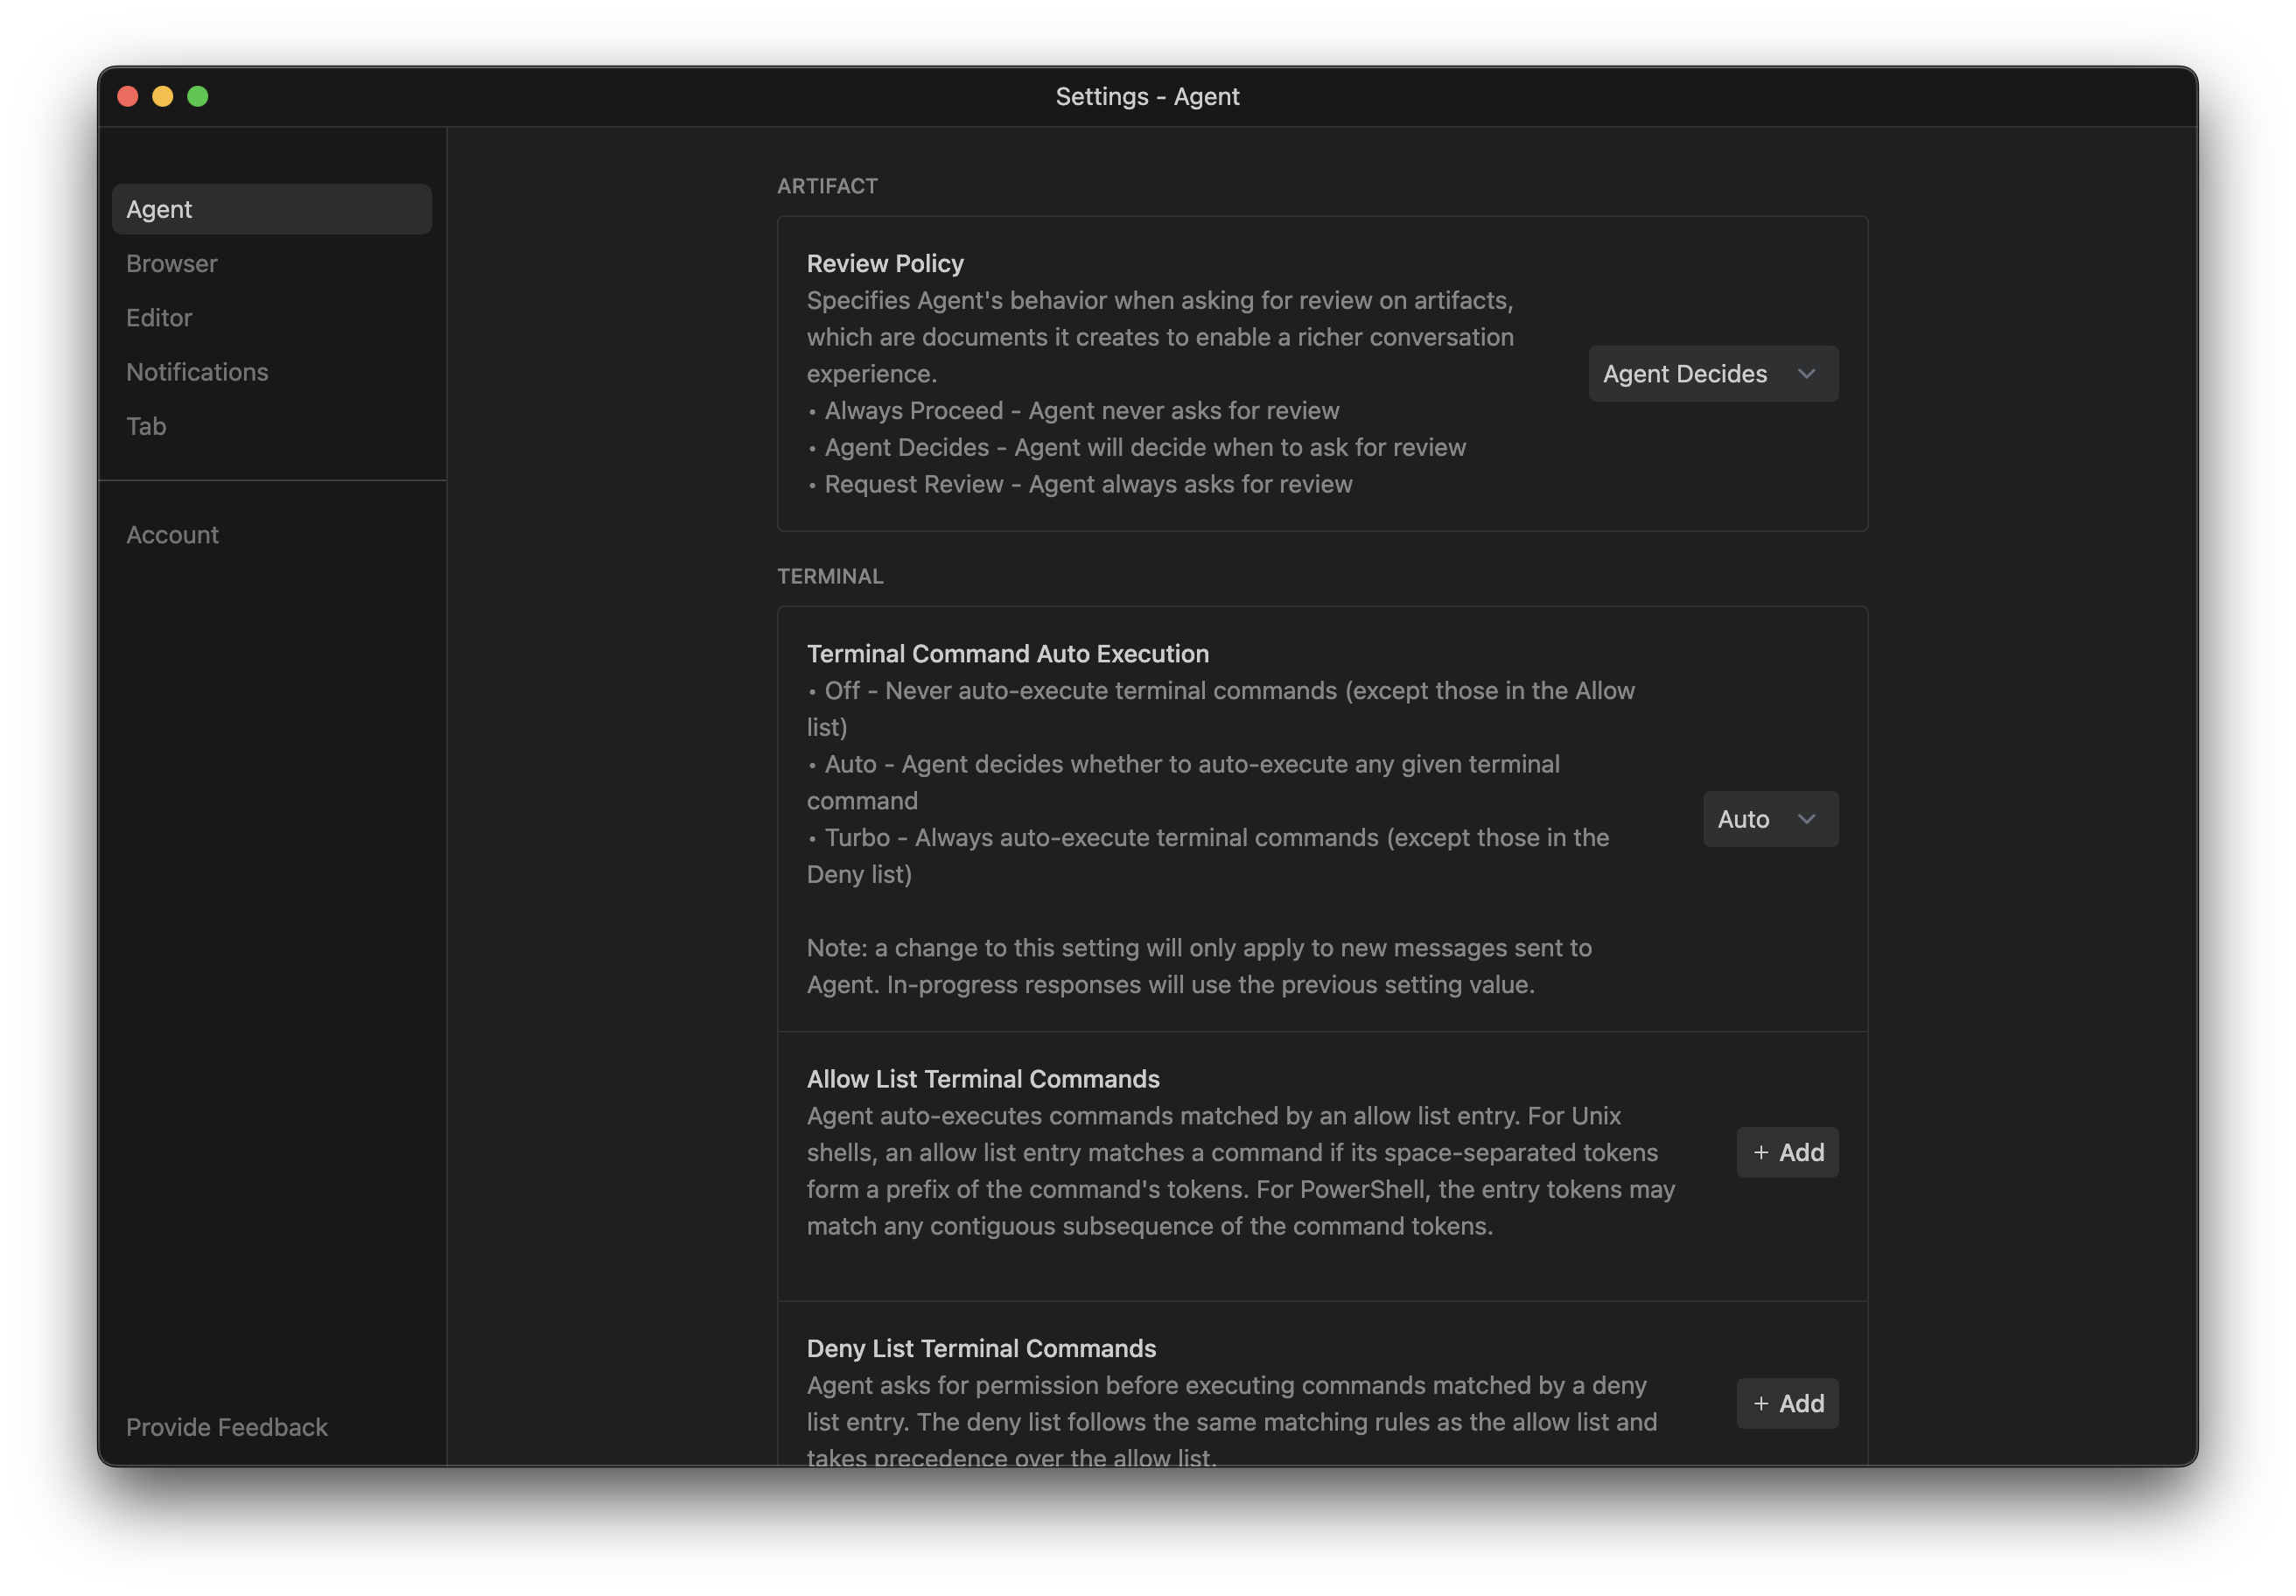
As it worked, we reviewed changes. Every few files it pauses, shows a diff, you approve or reject.
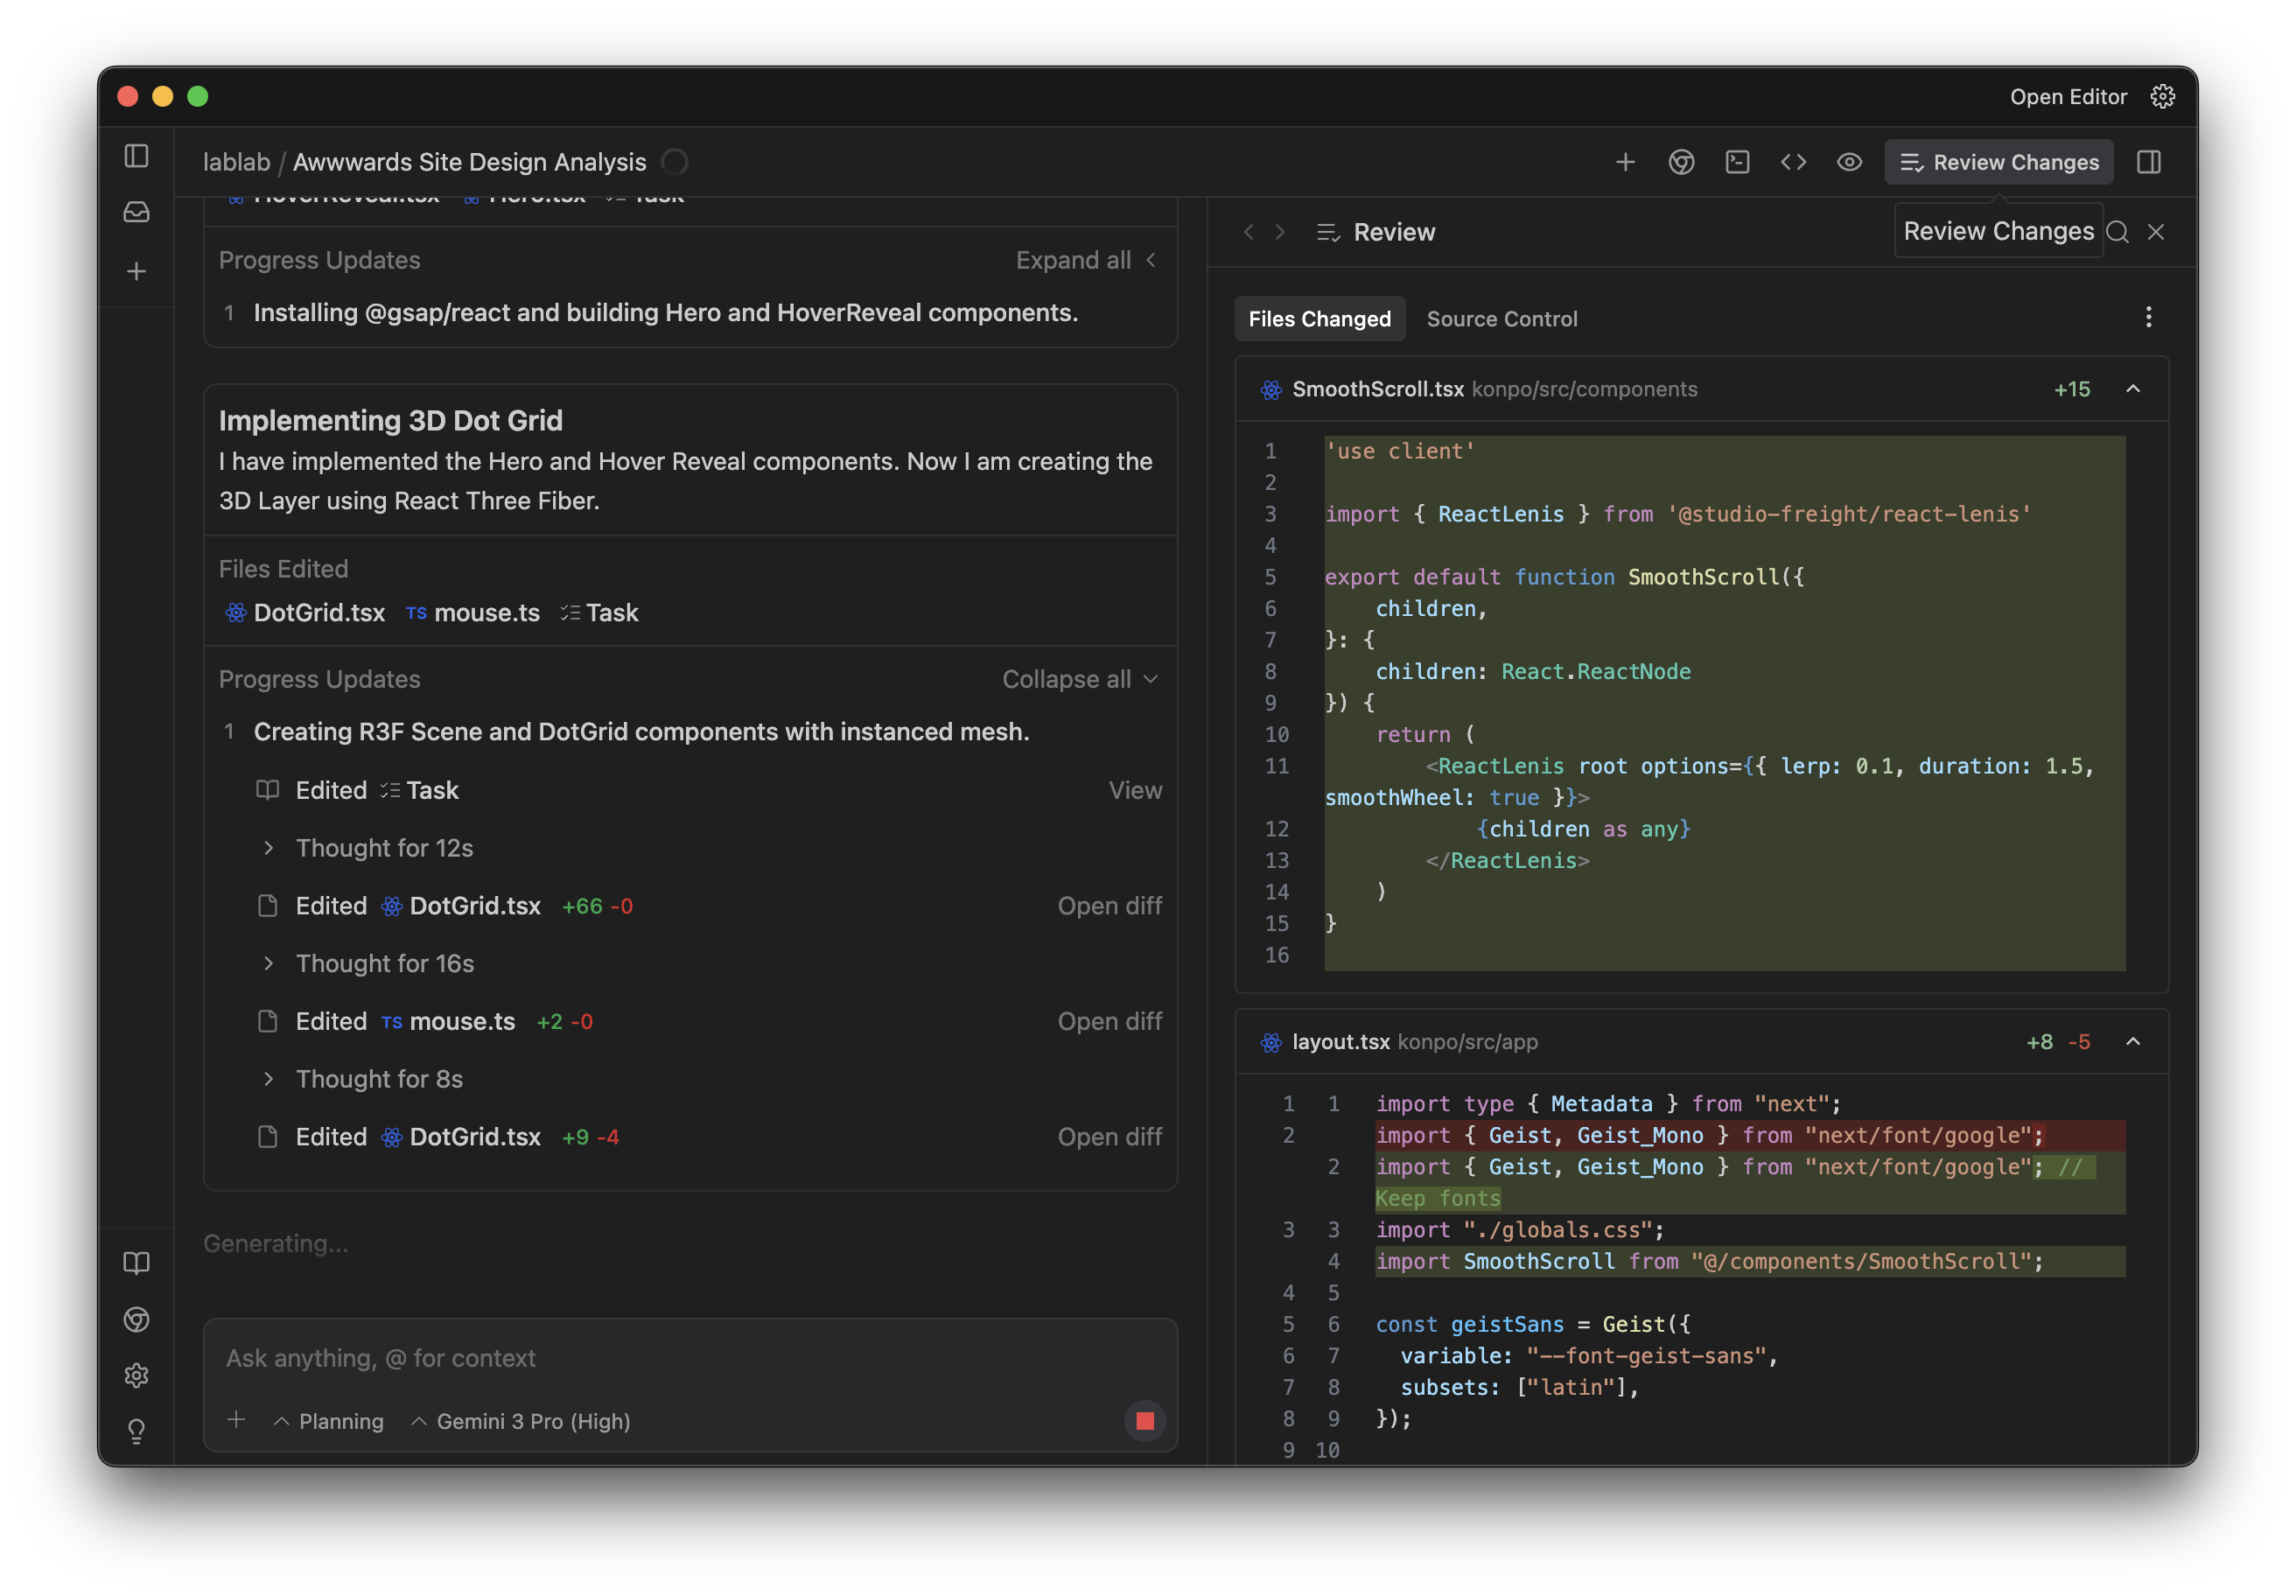
We didn't write any of this code. We gave it Gemini's parameters (lerp: 0.1, duration: 1.5) and it figured out the implementation. You're not writing code anymore. You're reviewing code.
Then we asked it to run the dev server.
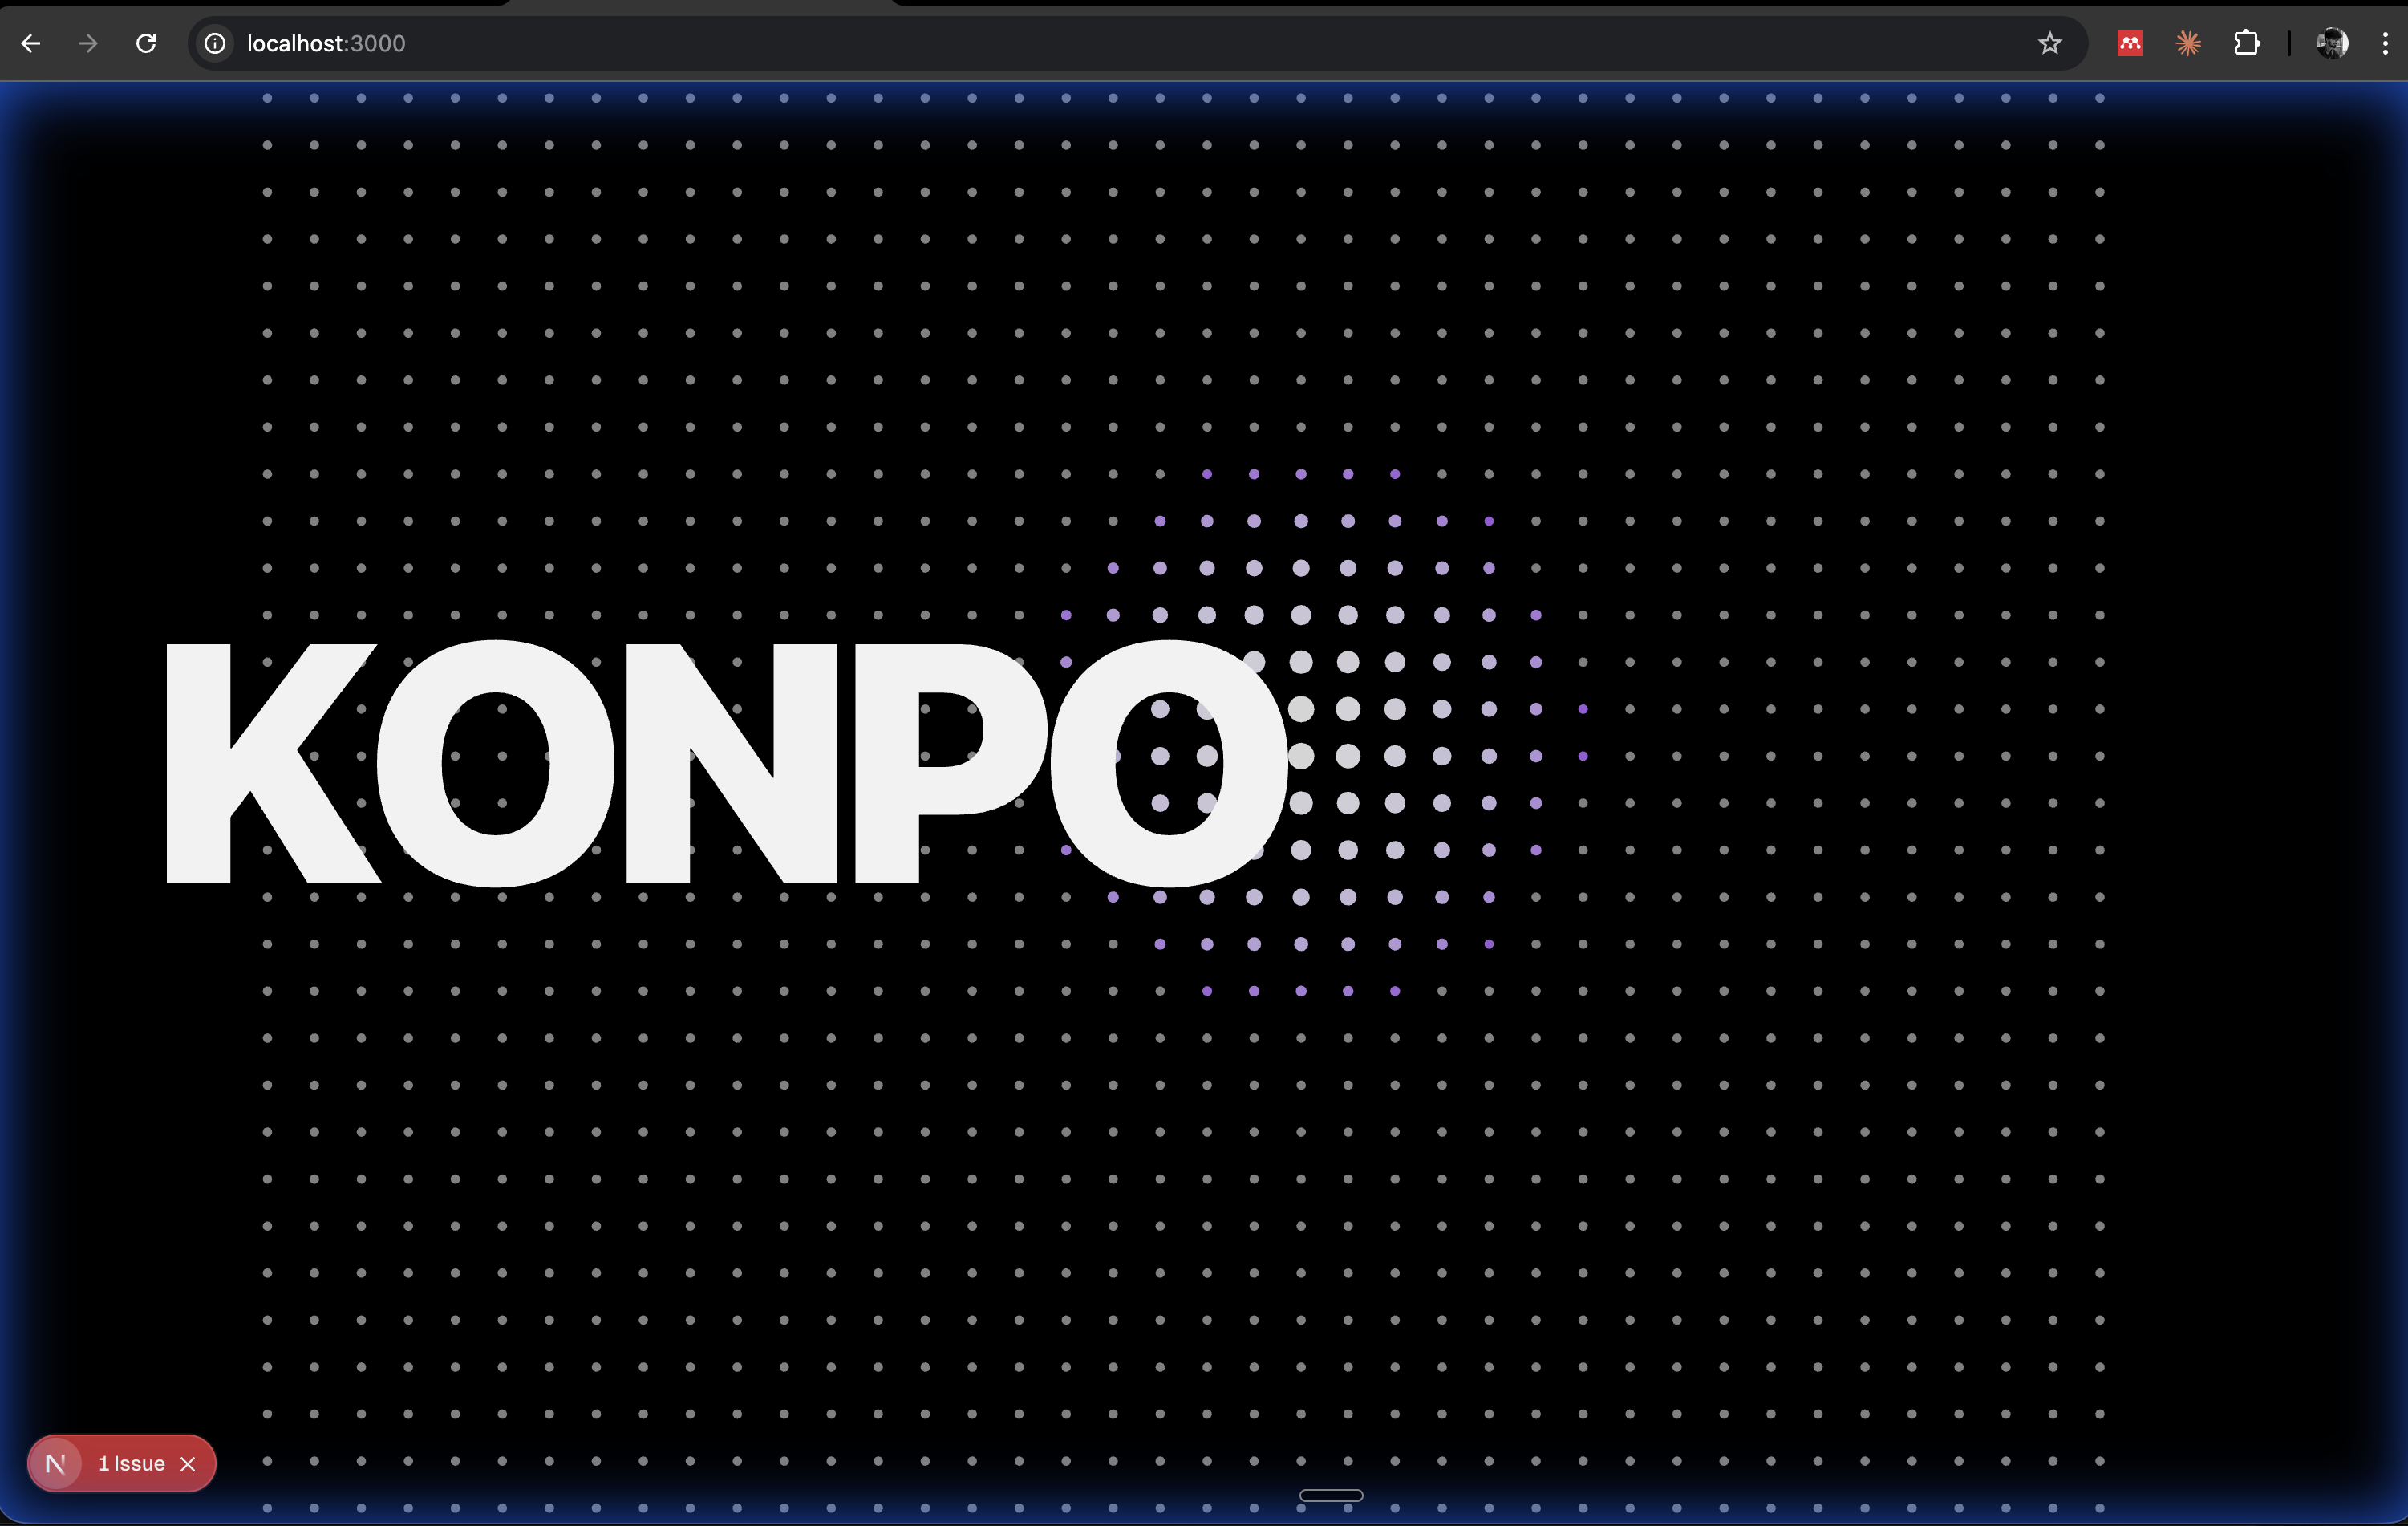
It worked. The dots responded to the mouse. They scaled and changed color. Maybe 15 minutes in and we had a working 3D interactive hero.
But it was dark. We wanted light.
Iteration
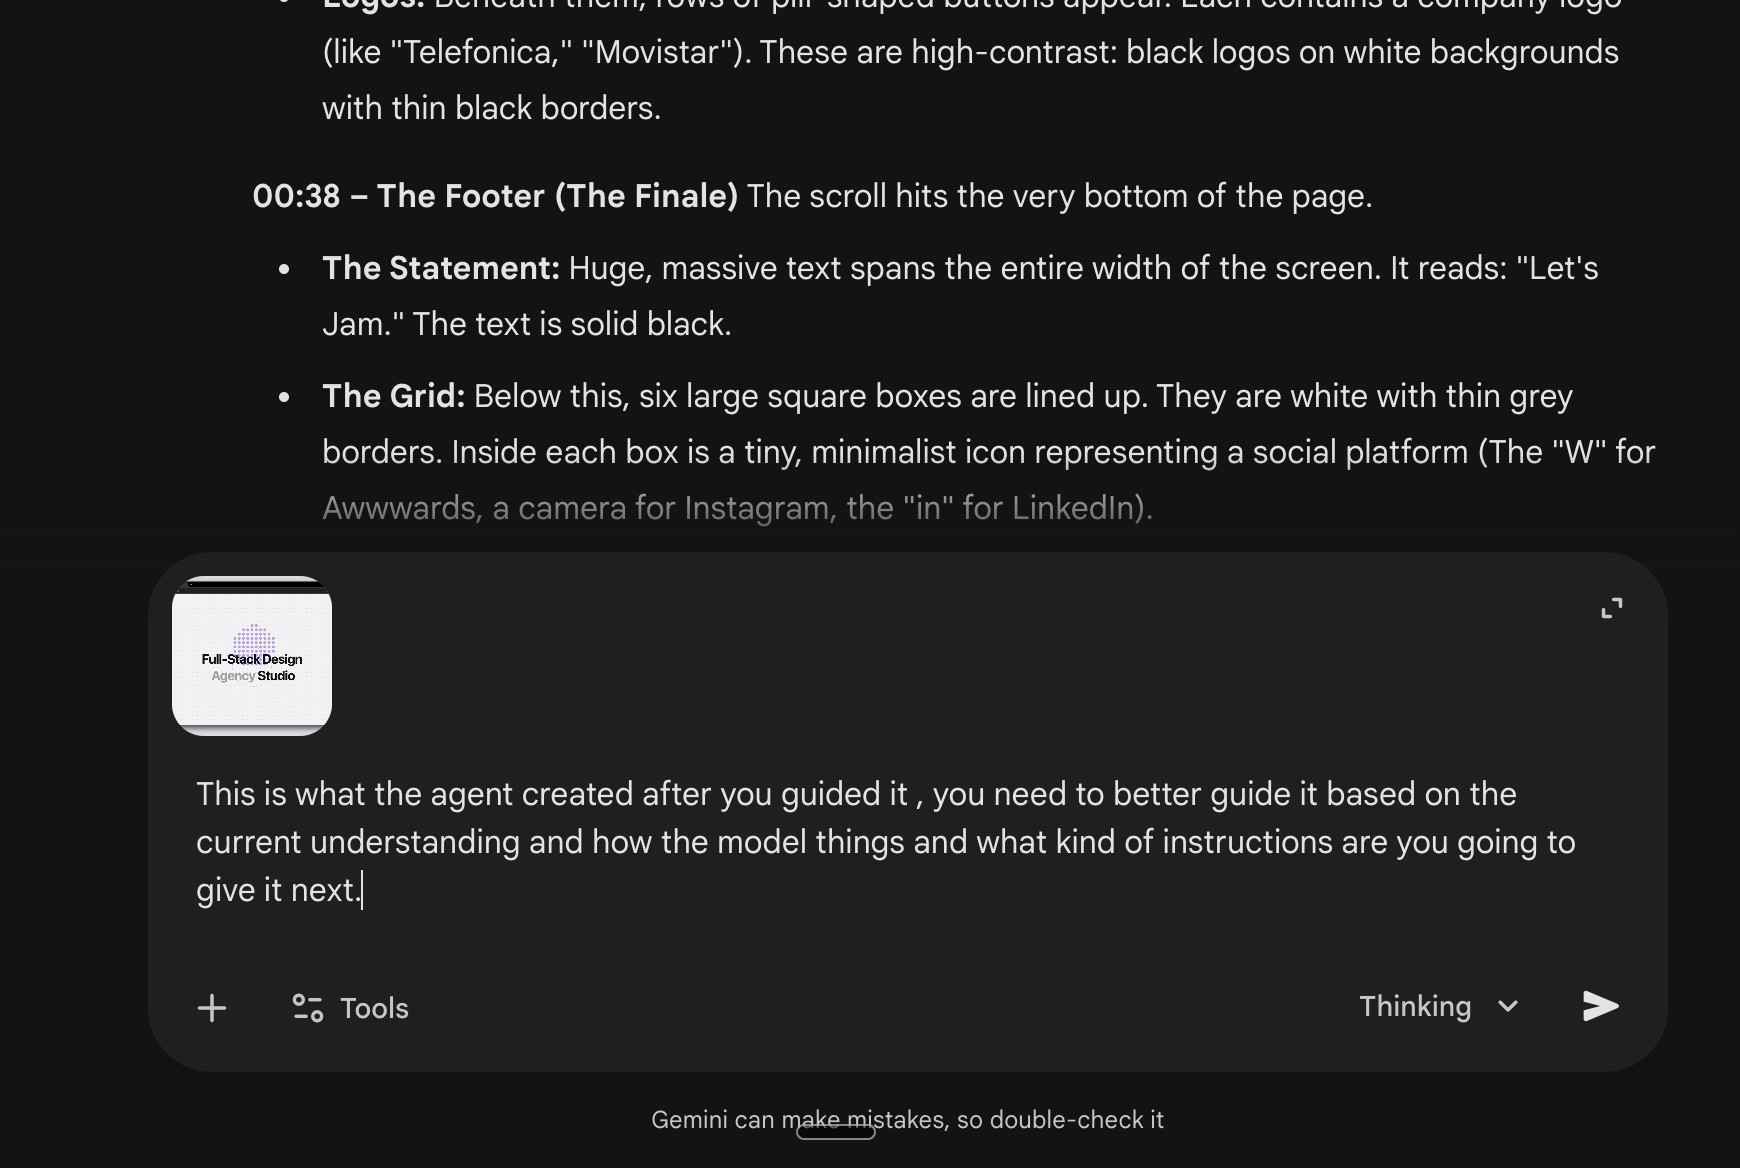
This is where most people give up. The first result isn't perfect. They think the tool is broken. They try a different approach. They waste hours.
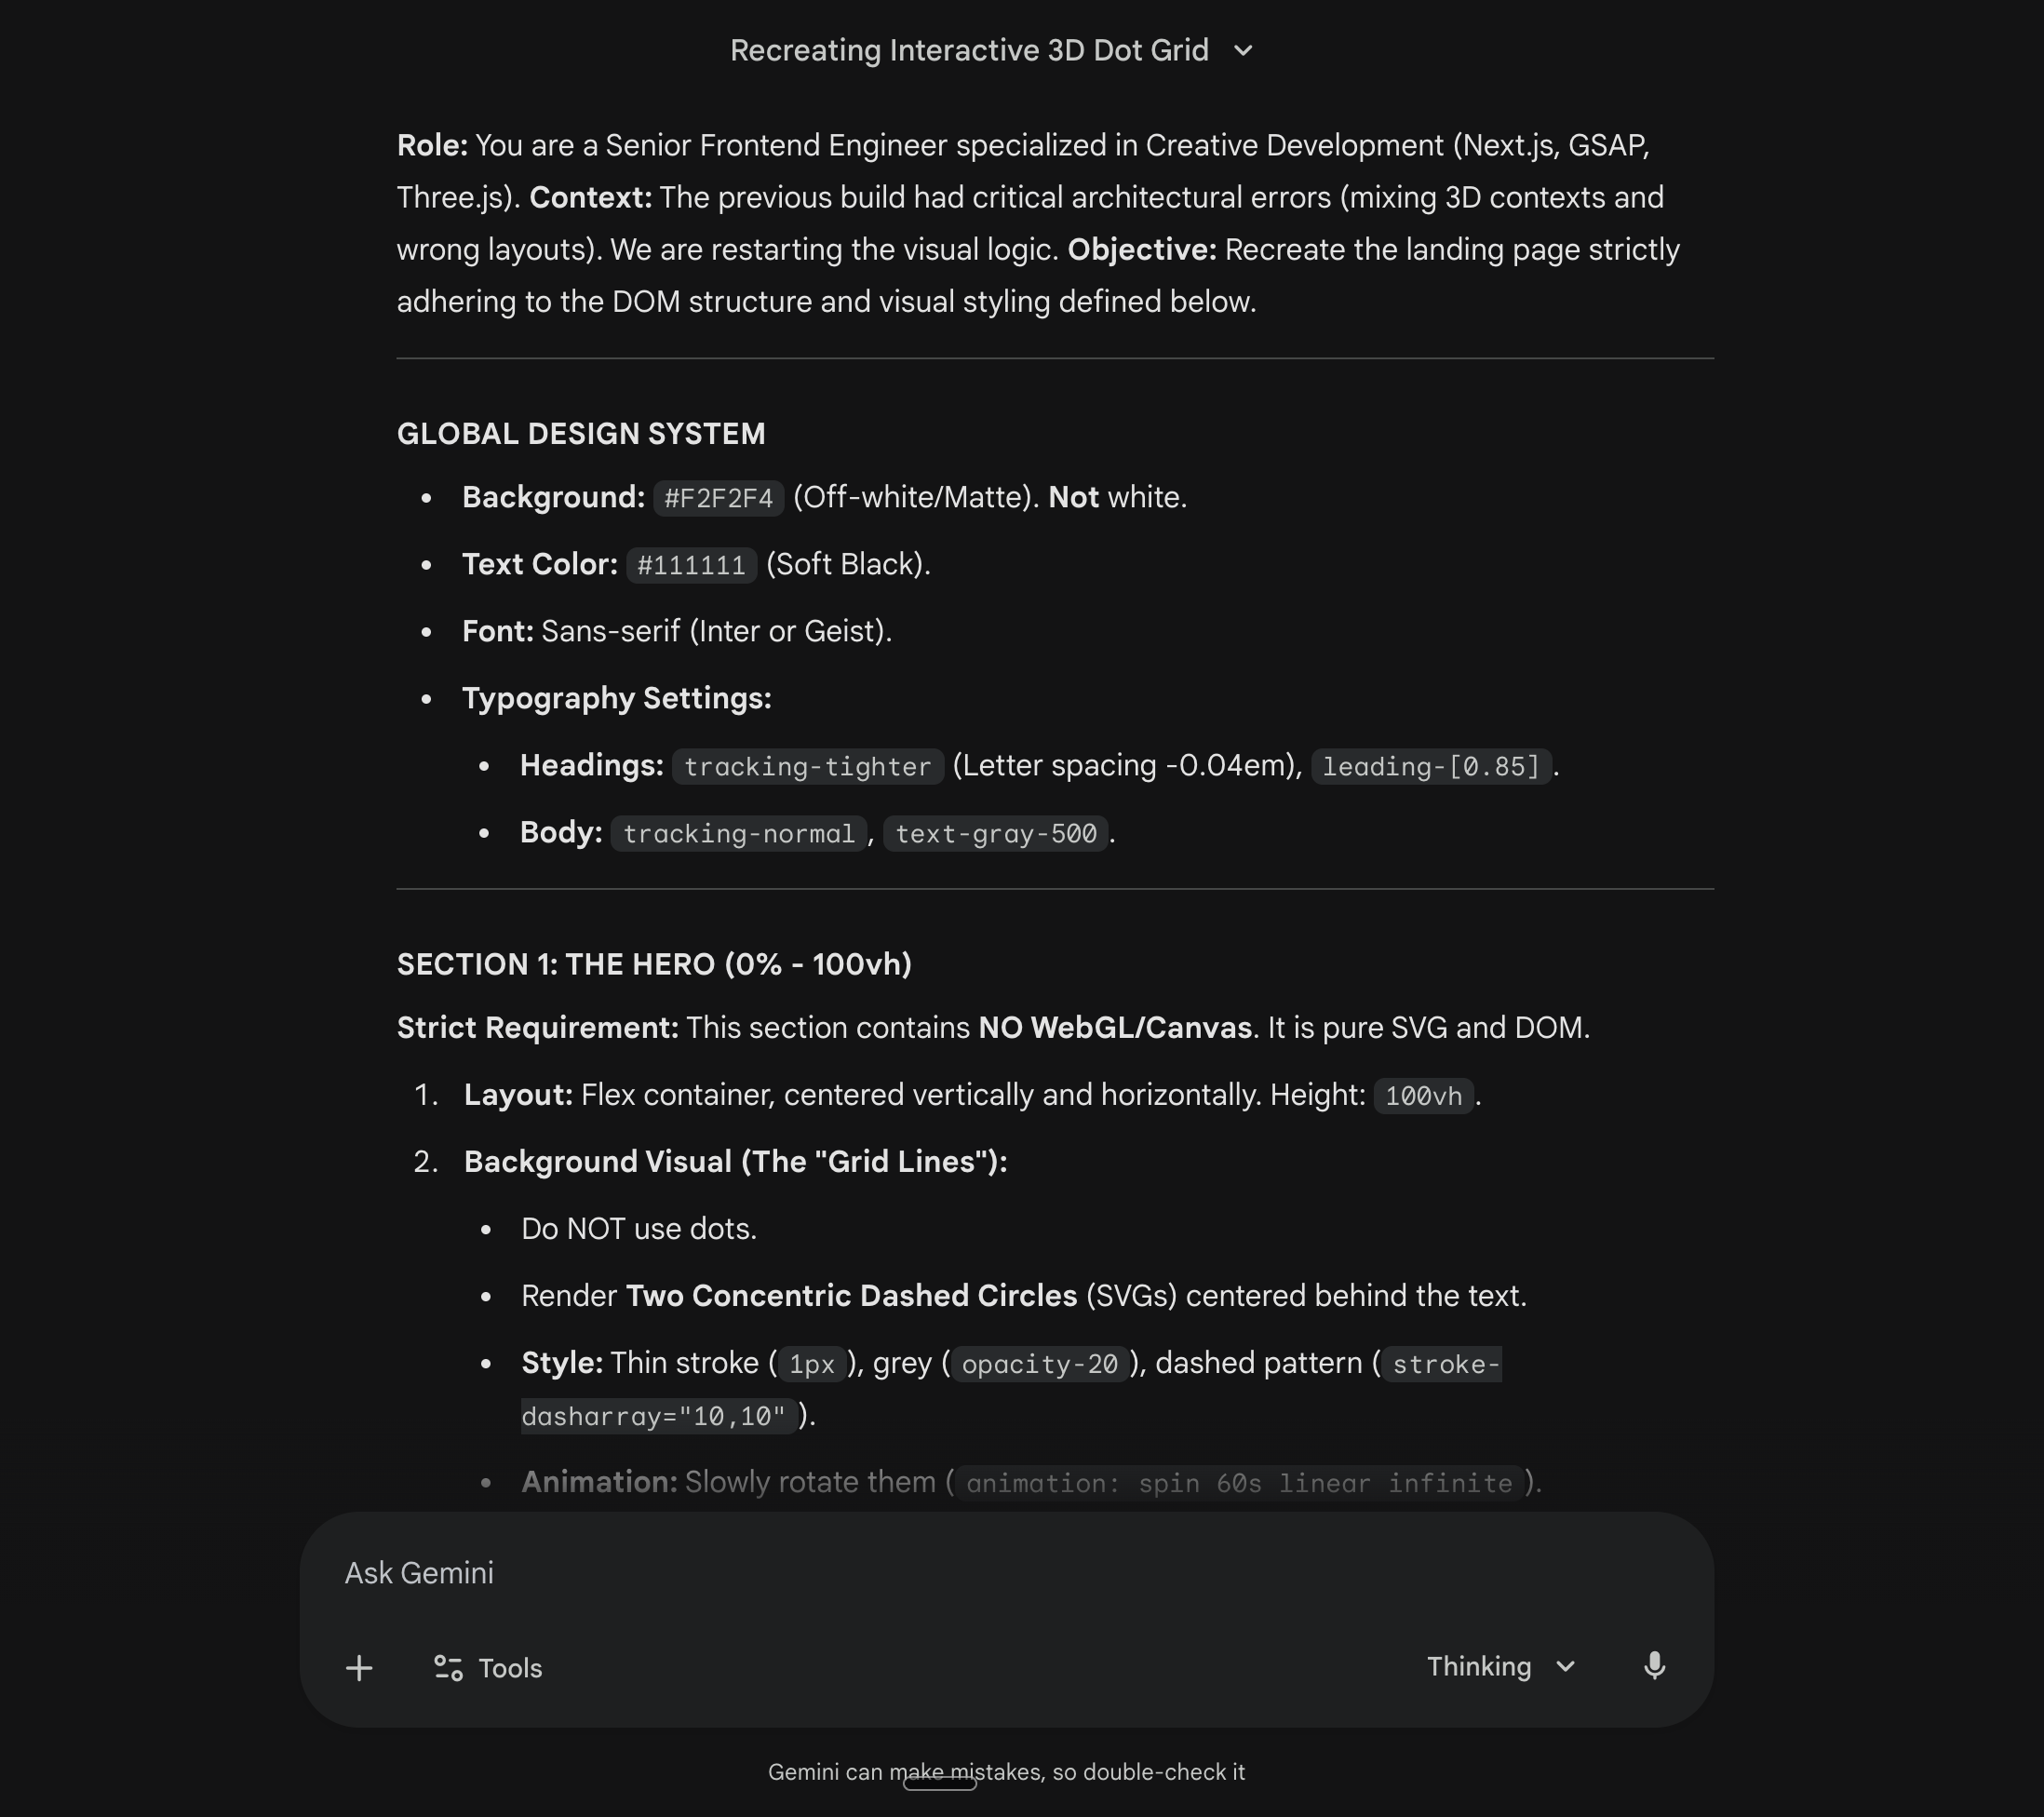
The first version was dark. We wanted light. Our instinct was to start over with a better prompt. That would have been a mistake. The agent has context now. It knows the codebase it built. It knows the structure. Starting over throws all that away. Instead, describe what's wrong.
We recorded another quick video. Just the reference site's light theme. Uploaded it to Gemini. Got the exact colors. Then we told the agent specifically what to change.
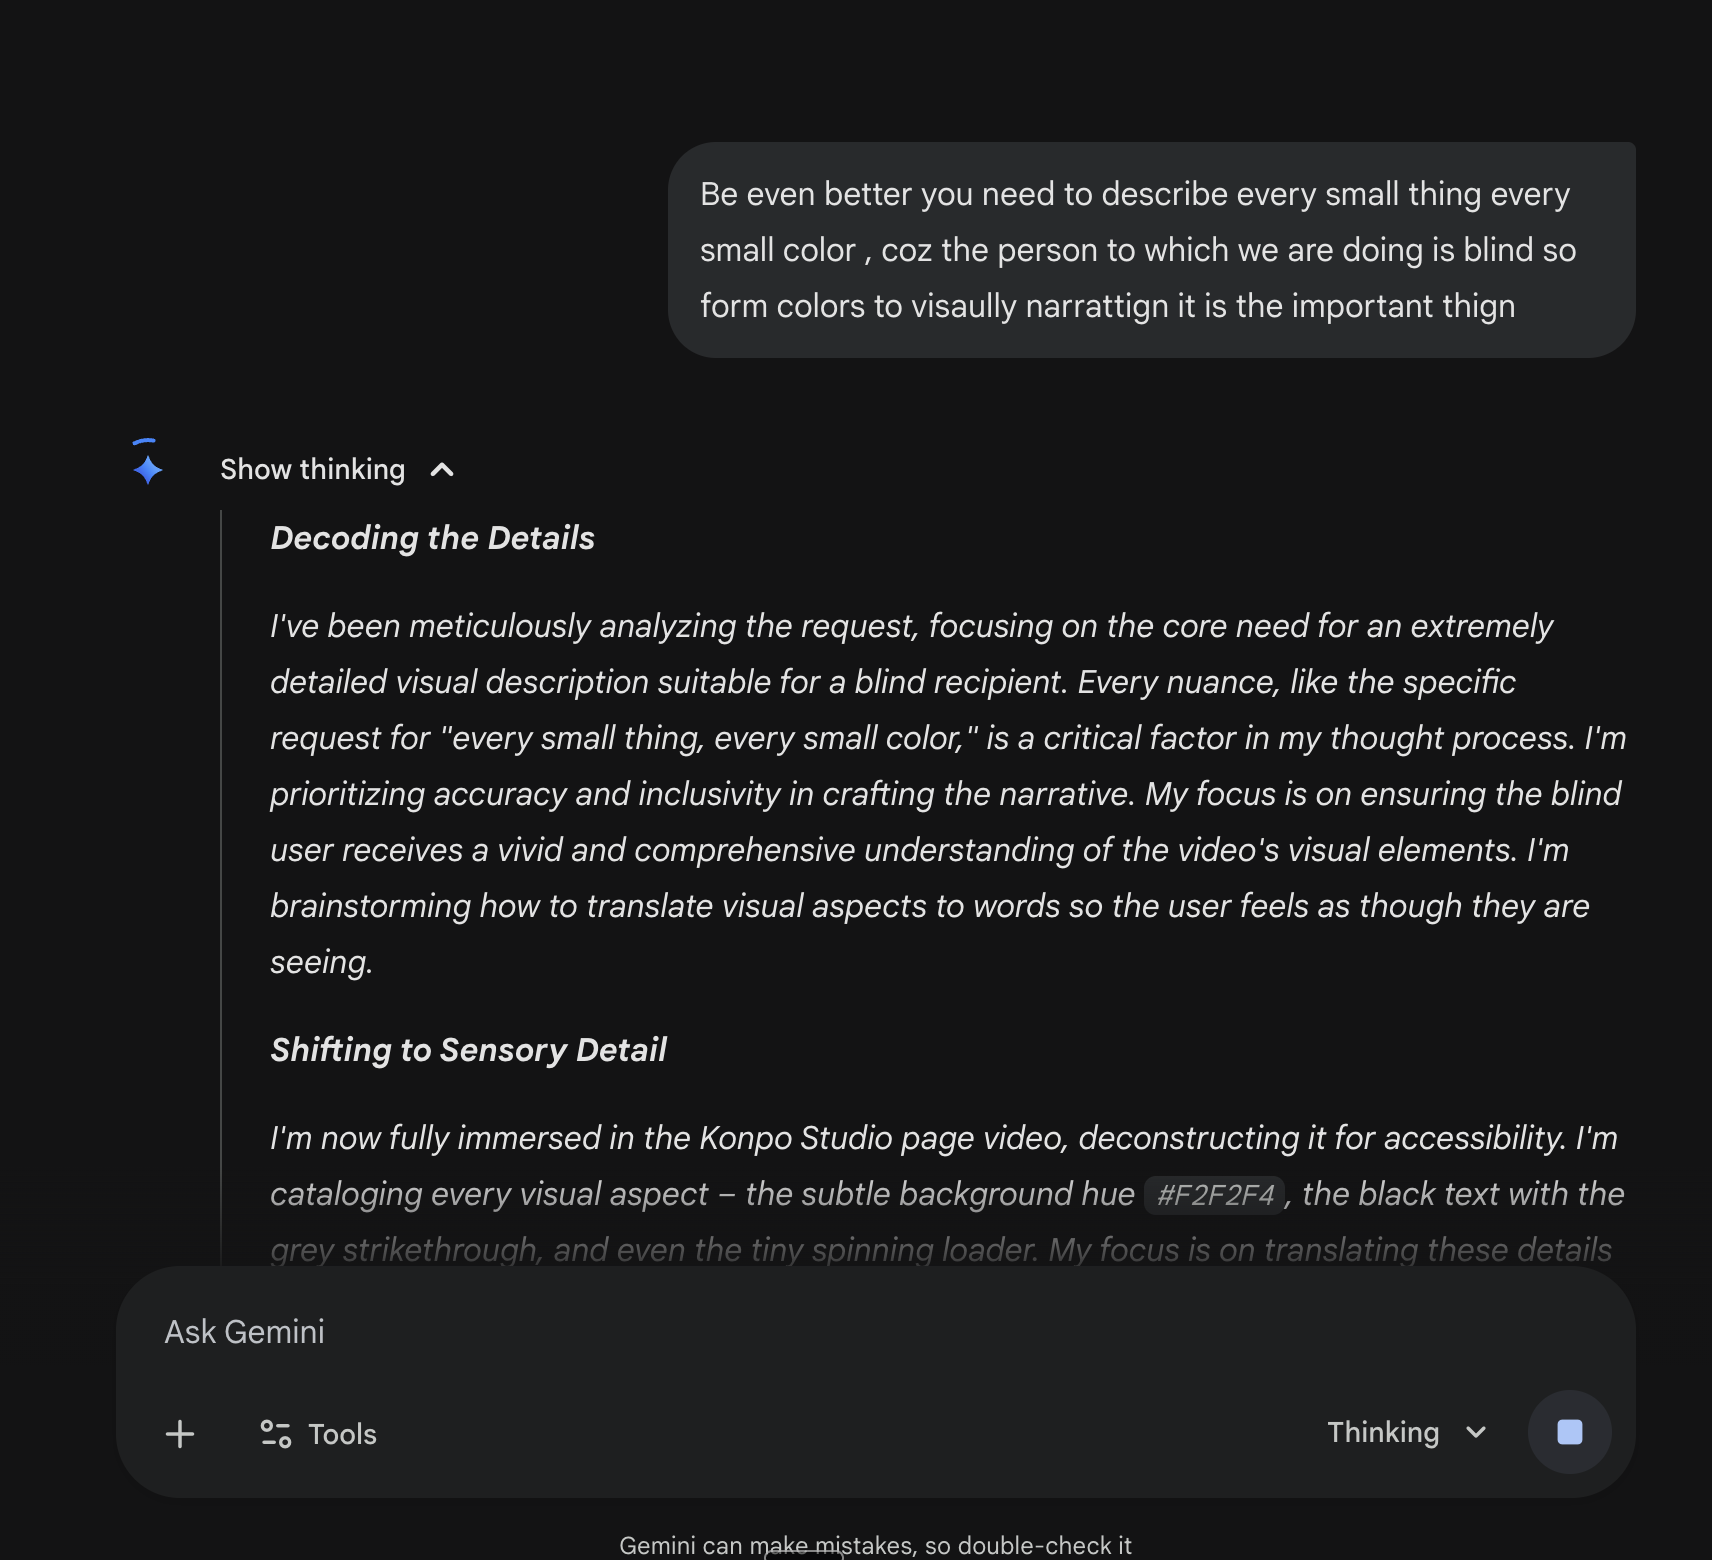
We learned early that vague feedback wastes cycles. "Make it lighter" gets you nowhere. "#F2F2F4 background, #111111 text, #6366f1 accents" gets you exactly what you want. The more specific you are, the fewer iterations you need.
After one round of feedback:
Better. The colors were right. But the layout was still off. The dots were in the wrong place. The typography didn't feel the same. We realized we were asking for too much at once. Trying to fix colors AND layout AND typography in one prompt confuses the agent. It doesn't know what to prioritize. So we separated them. Colors first. Then layout. Then polish.
This screenshot changed how we thought about feedback. We learned to frame requests as problems to solve, not code to write. Instead of "move the div 20px left" we'd say "the dots feel too close to the text, they need breathing room." Let the agent figure out the implementation. You hired an agent. Let it think. Your job is quality control, not micromanagement.
Some problems need more than iteration. The 3D scene was too coupled to the hero. We needed to decouple it so it could float behind multiple sections. This required structural changes. We went back to Gemini with the original video, asked specifically about the layer structure.
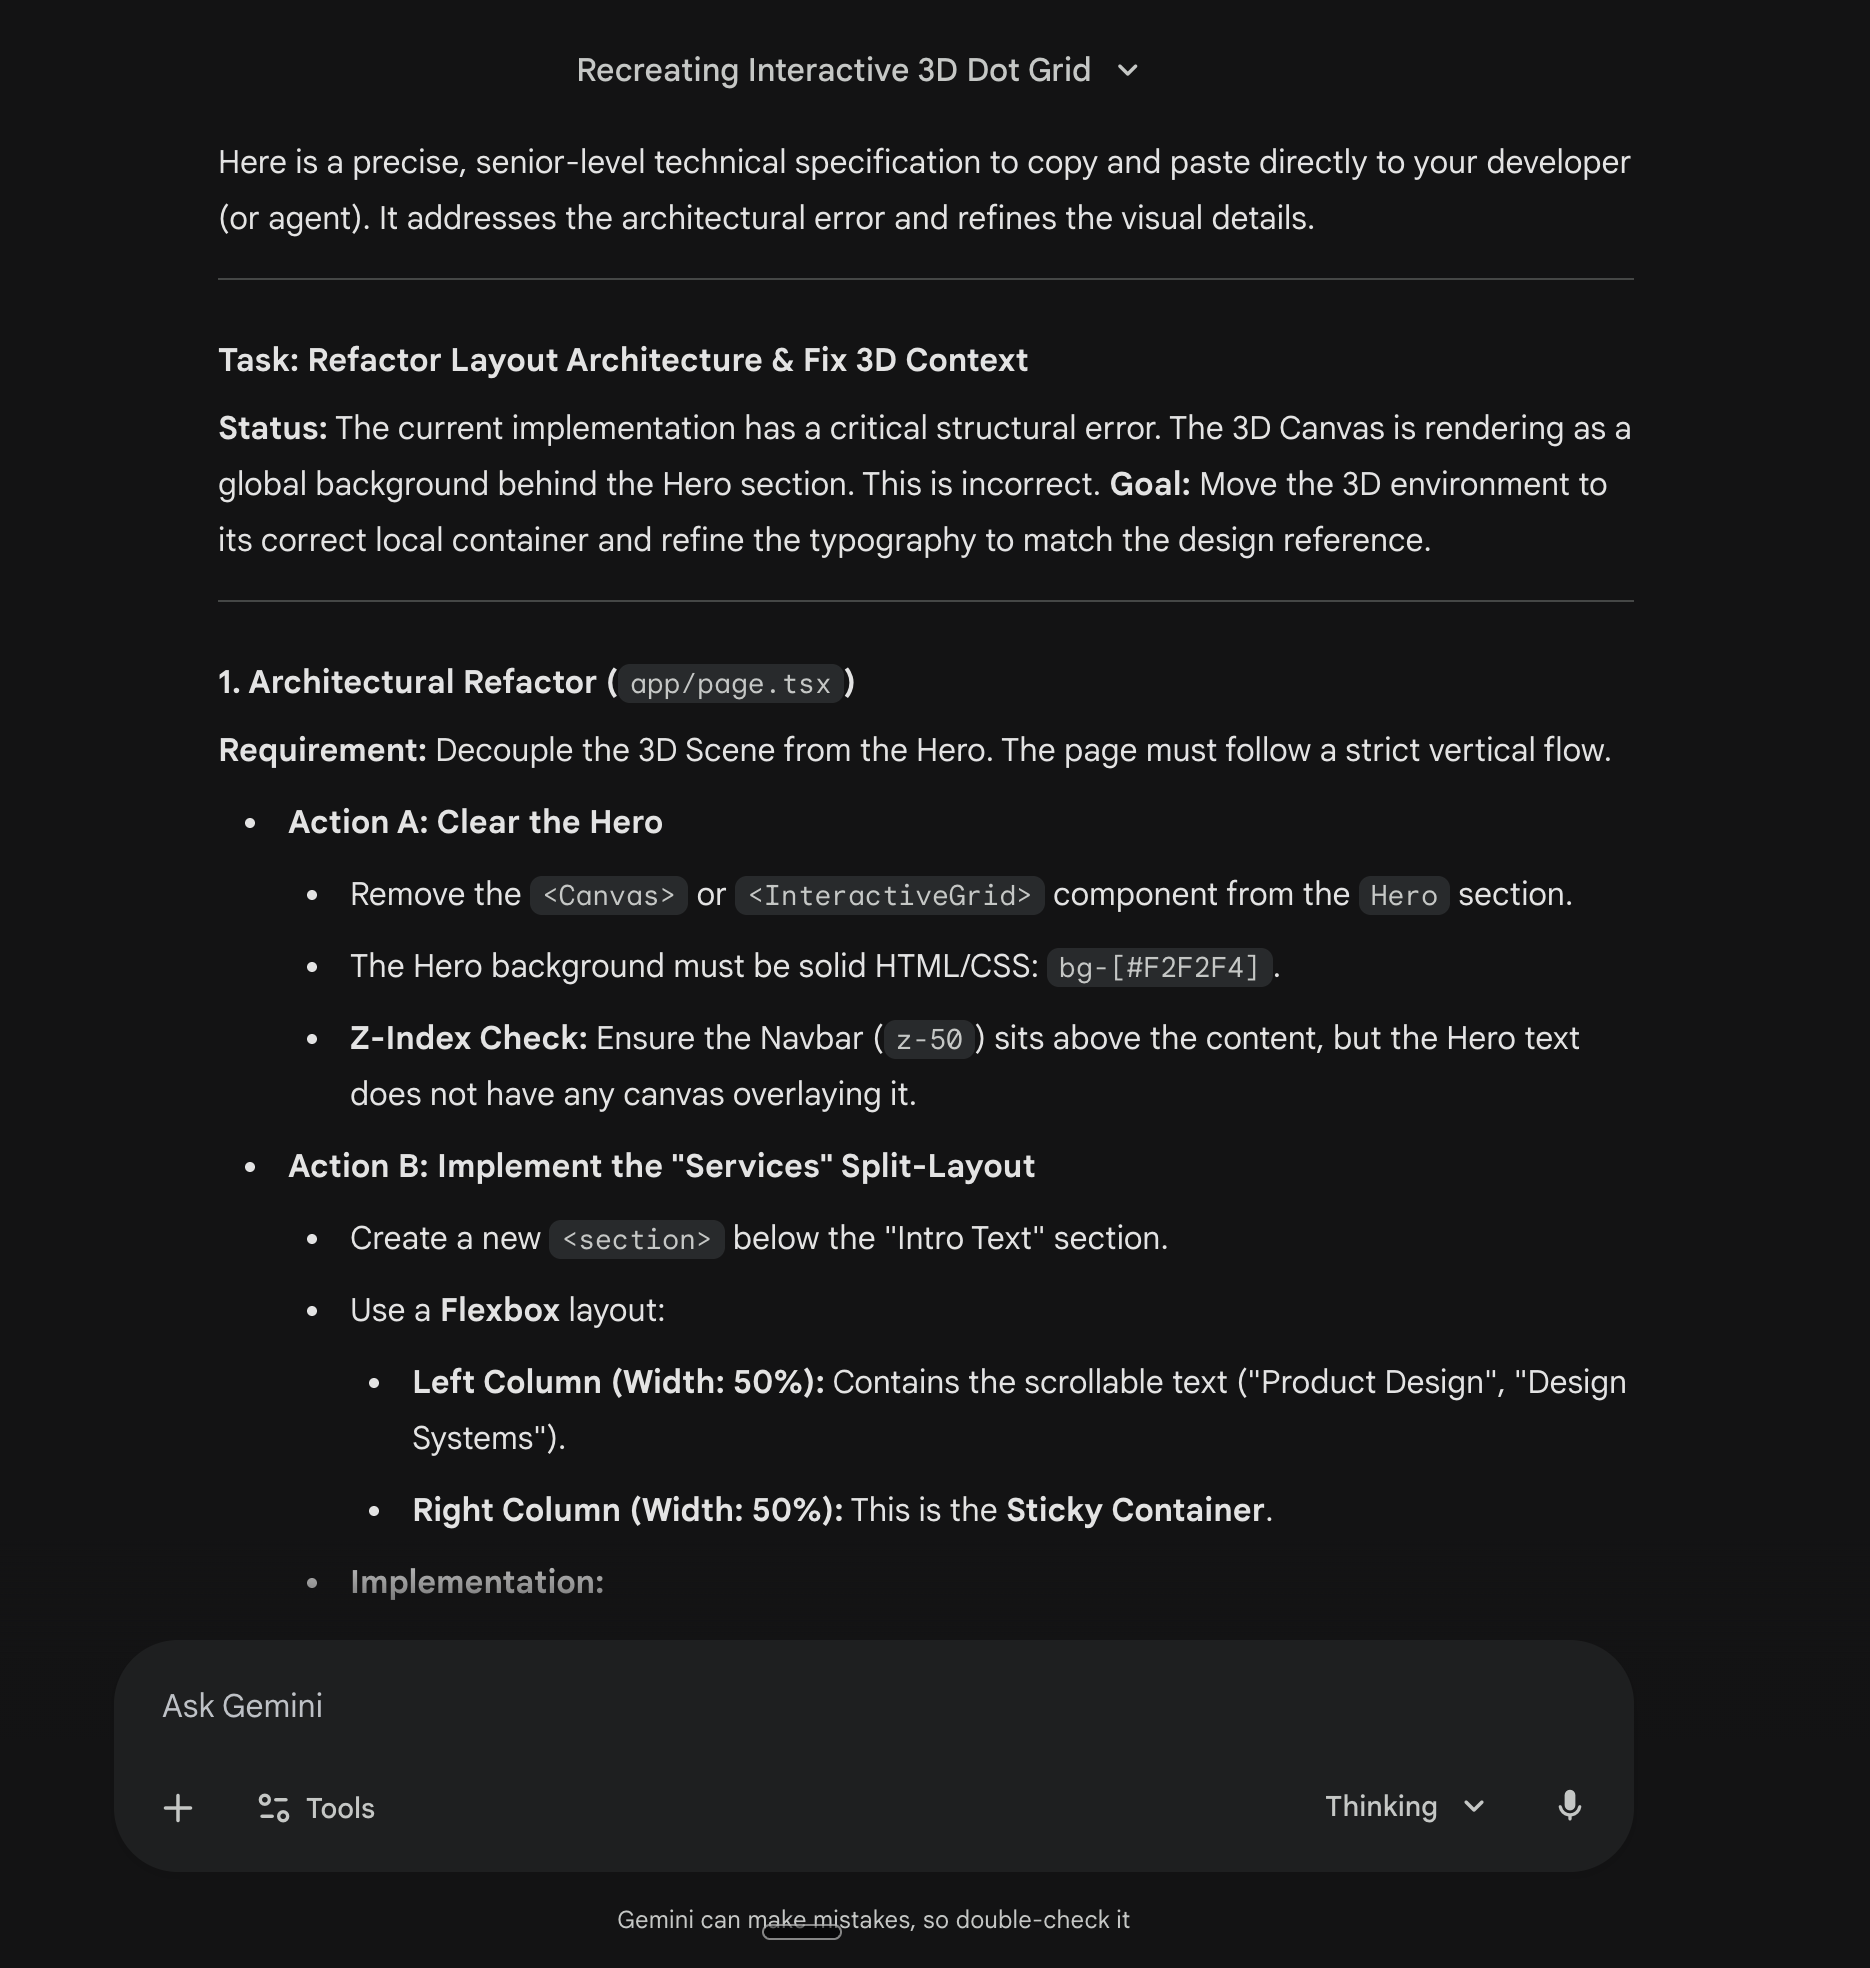
If you're on iteration 5 and it's still not right, the problem isn't the details. It's the structure. Go back to Gemini. Get more context. Give the agent a new plan.
Things started clicking. The stacked number cards:
A proper preloader:

The services section with the dot grid behind it:
Each of these took one or two iterations. Specific feedback. One thing at a time. Describe the problem, not the solution. That's the pattern.
Design System Polish
At this point we had something that worked. But it didn't feel cohesive. Colors were inconsistent across sections. Some animations were CSS, some were GSAP. The typography was close but not quite right.
We should have locked down our design system earlier. Create a single source of truth for colors, fonts, spacing. Tell the agent to use only those values. It prevents drift.
We went back to Gemini one more time. Asked it to extract every design token from the original site.
Then we created CSS variables and told the agent: these are the only colors you can use.
--background: #F2F2F4;
--text-primary: #111111;
--text-secondary: #999999;
--accent: #6366f1;
Here's something we learned the hard way: constraints help agents. More freedom doesn't mean better results. When you say "use any color that looks good," you get inconsistency. When you say "only these four colors," you get cohesion.
For the final polish, we asked Gemini to be extremely strict about matching the original.
This gave us pixel level feedback. "The gap between these elements should be 48px, not 32px." We fed each correction to the agent.
We noticed some animations felt off. Turns out the agent had used CSS transitions in some places, GSAP in others. They have different easing curves. Different timing.
Pick one animation library. GSAP or Framer Motion or CSS. Not all three. Tell the agent explicitly. Consistency matters more than variety.
Before moving on, we had the agent check the console.

No errors. No warnings. Clean.
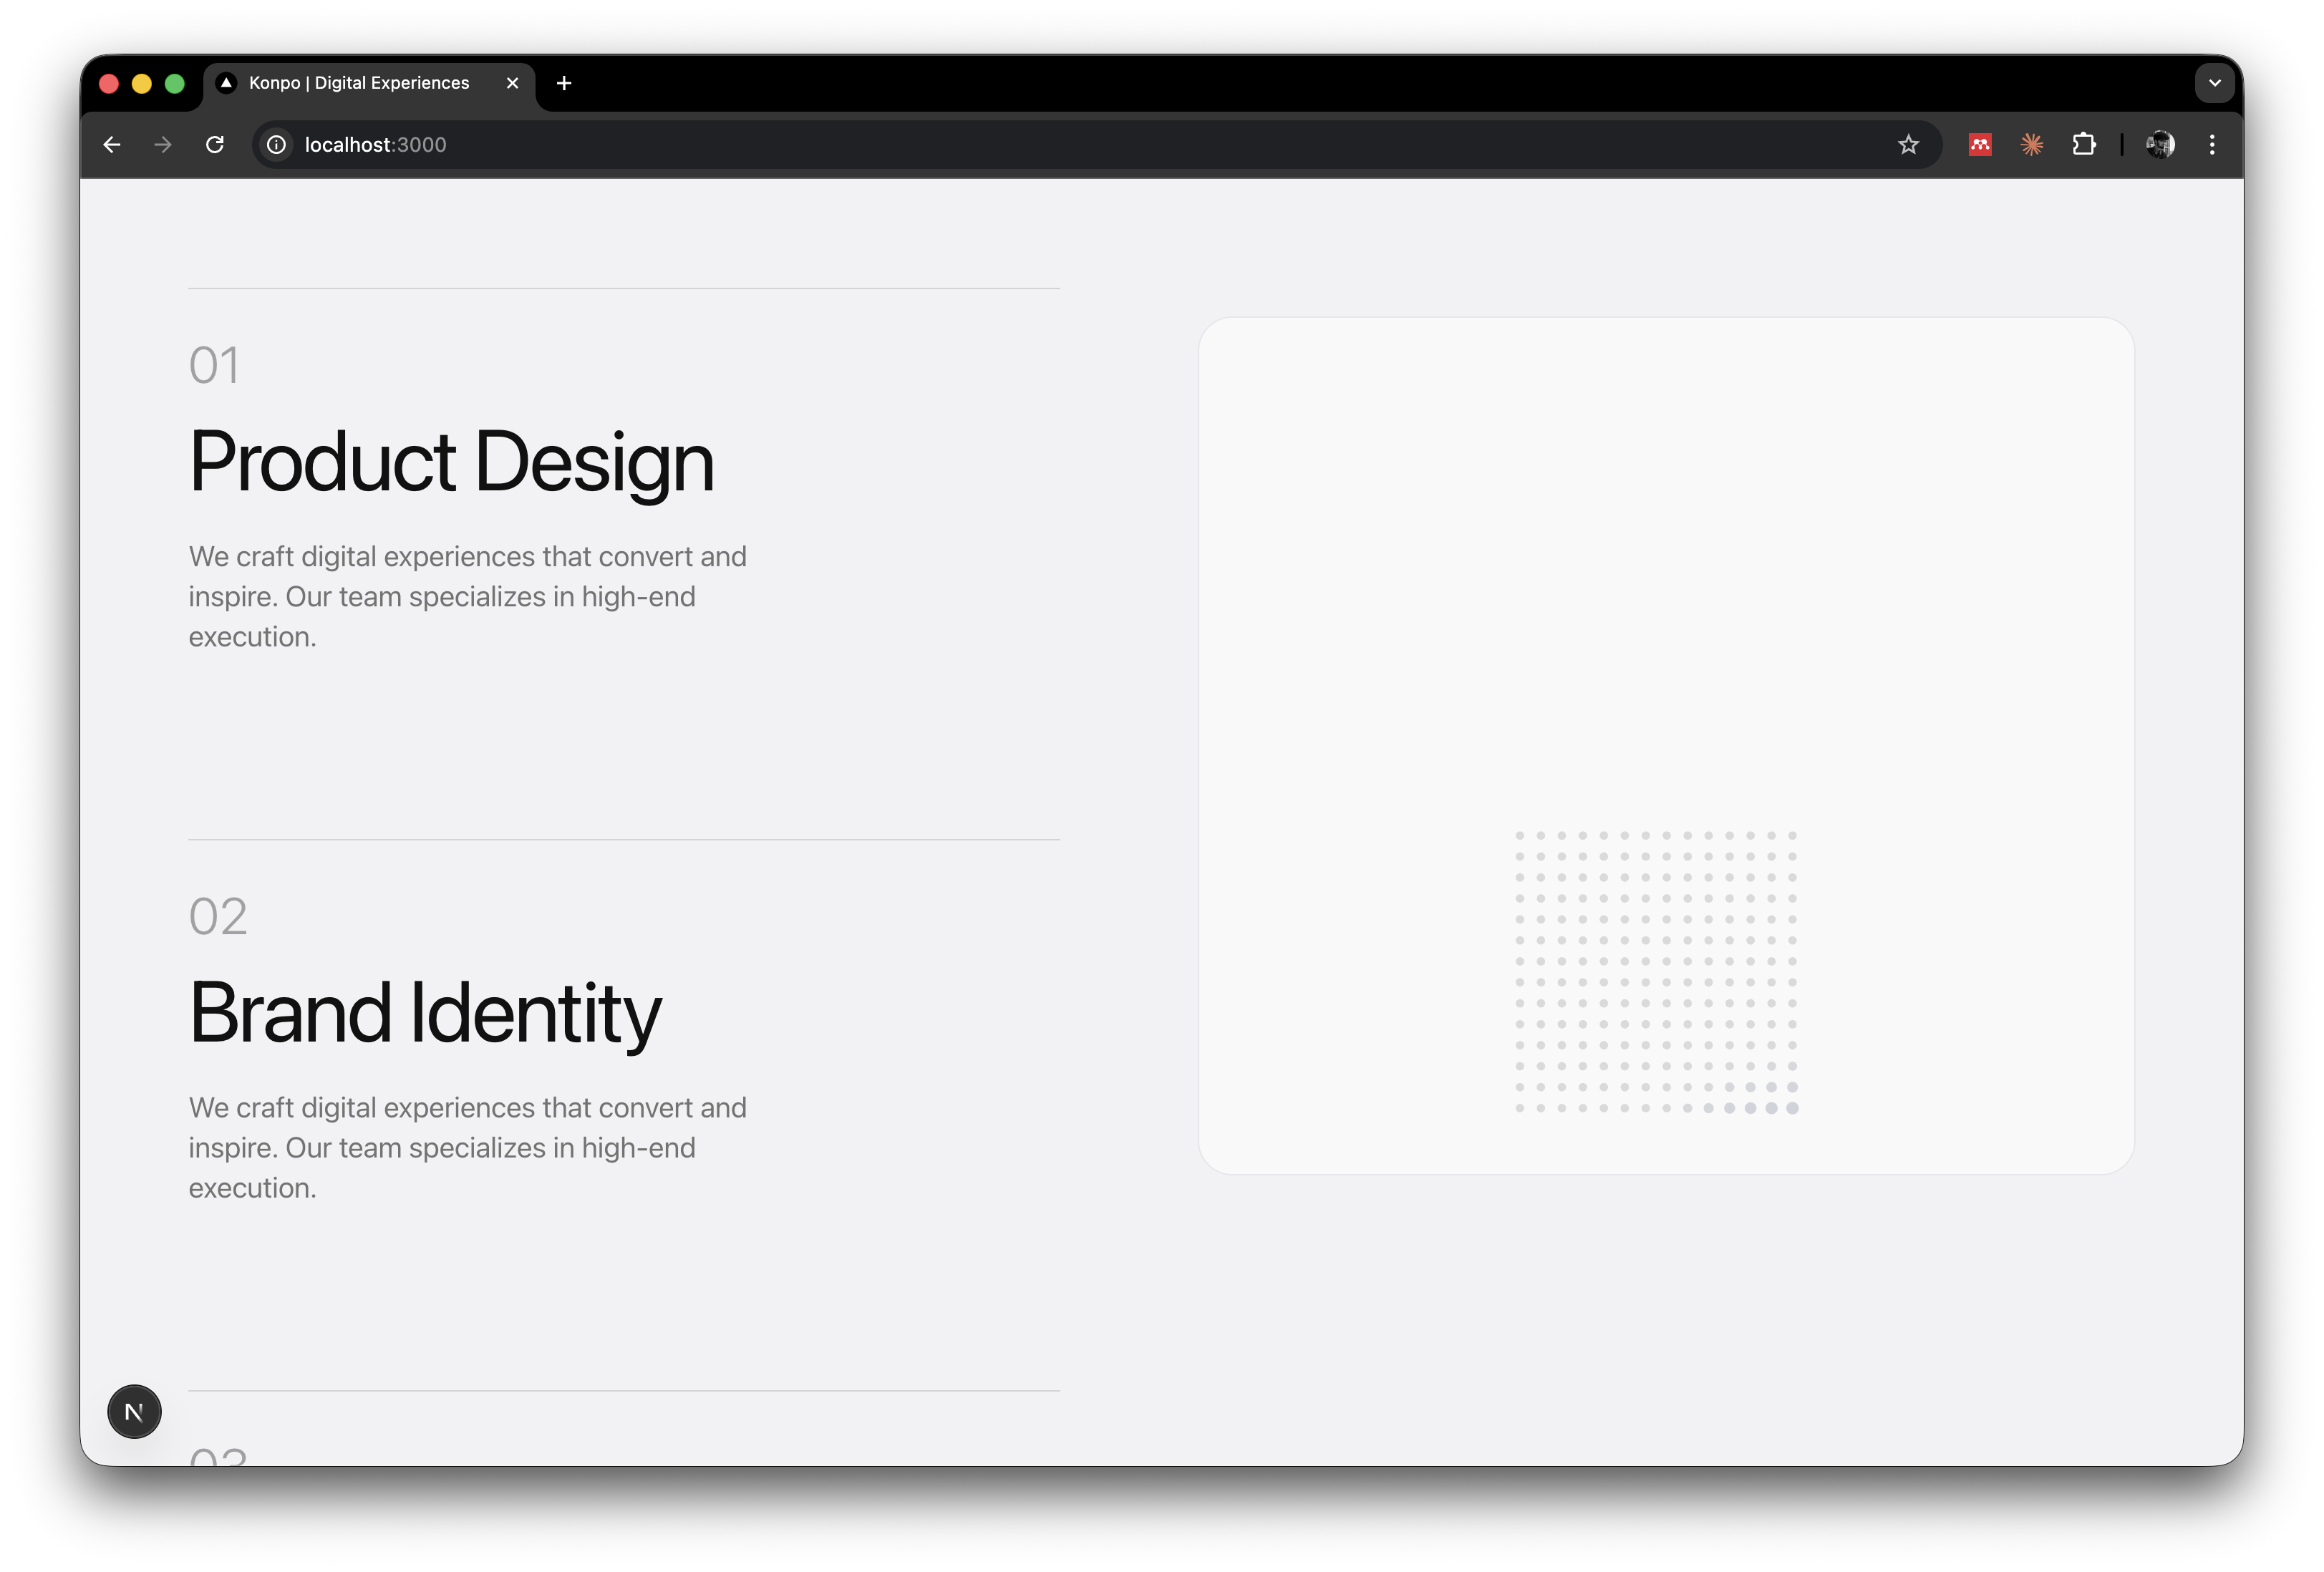
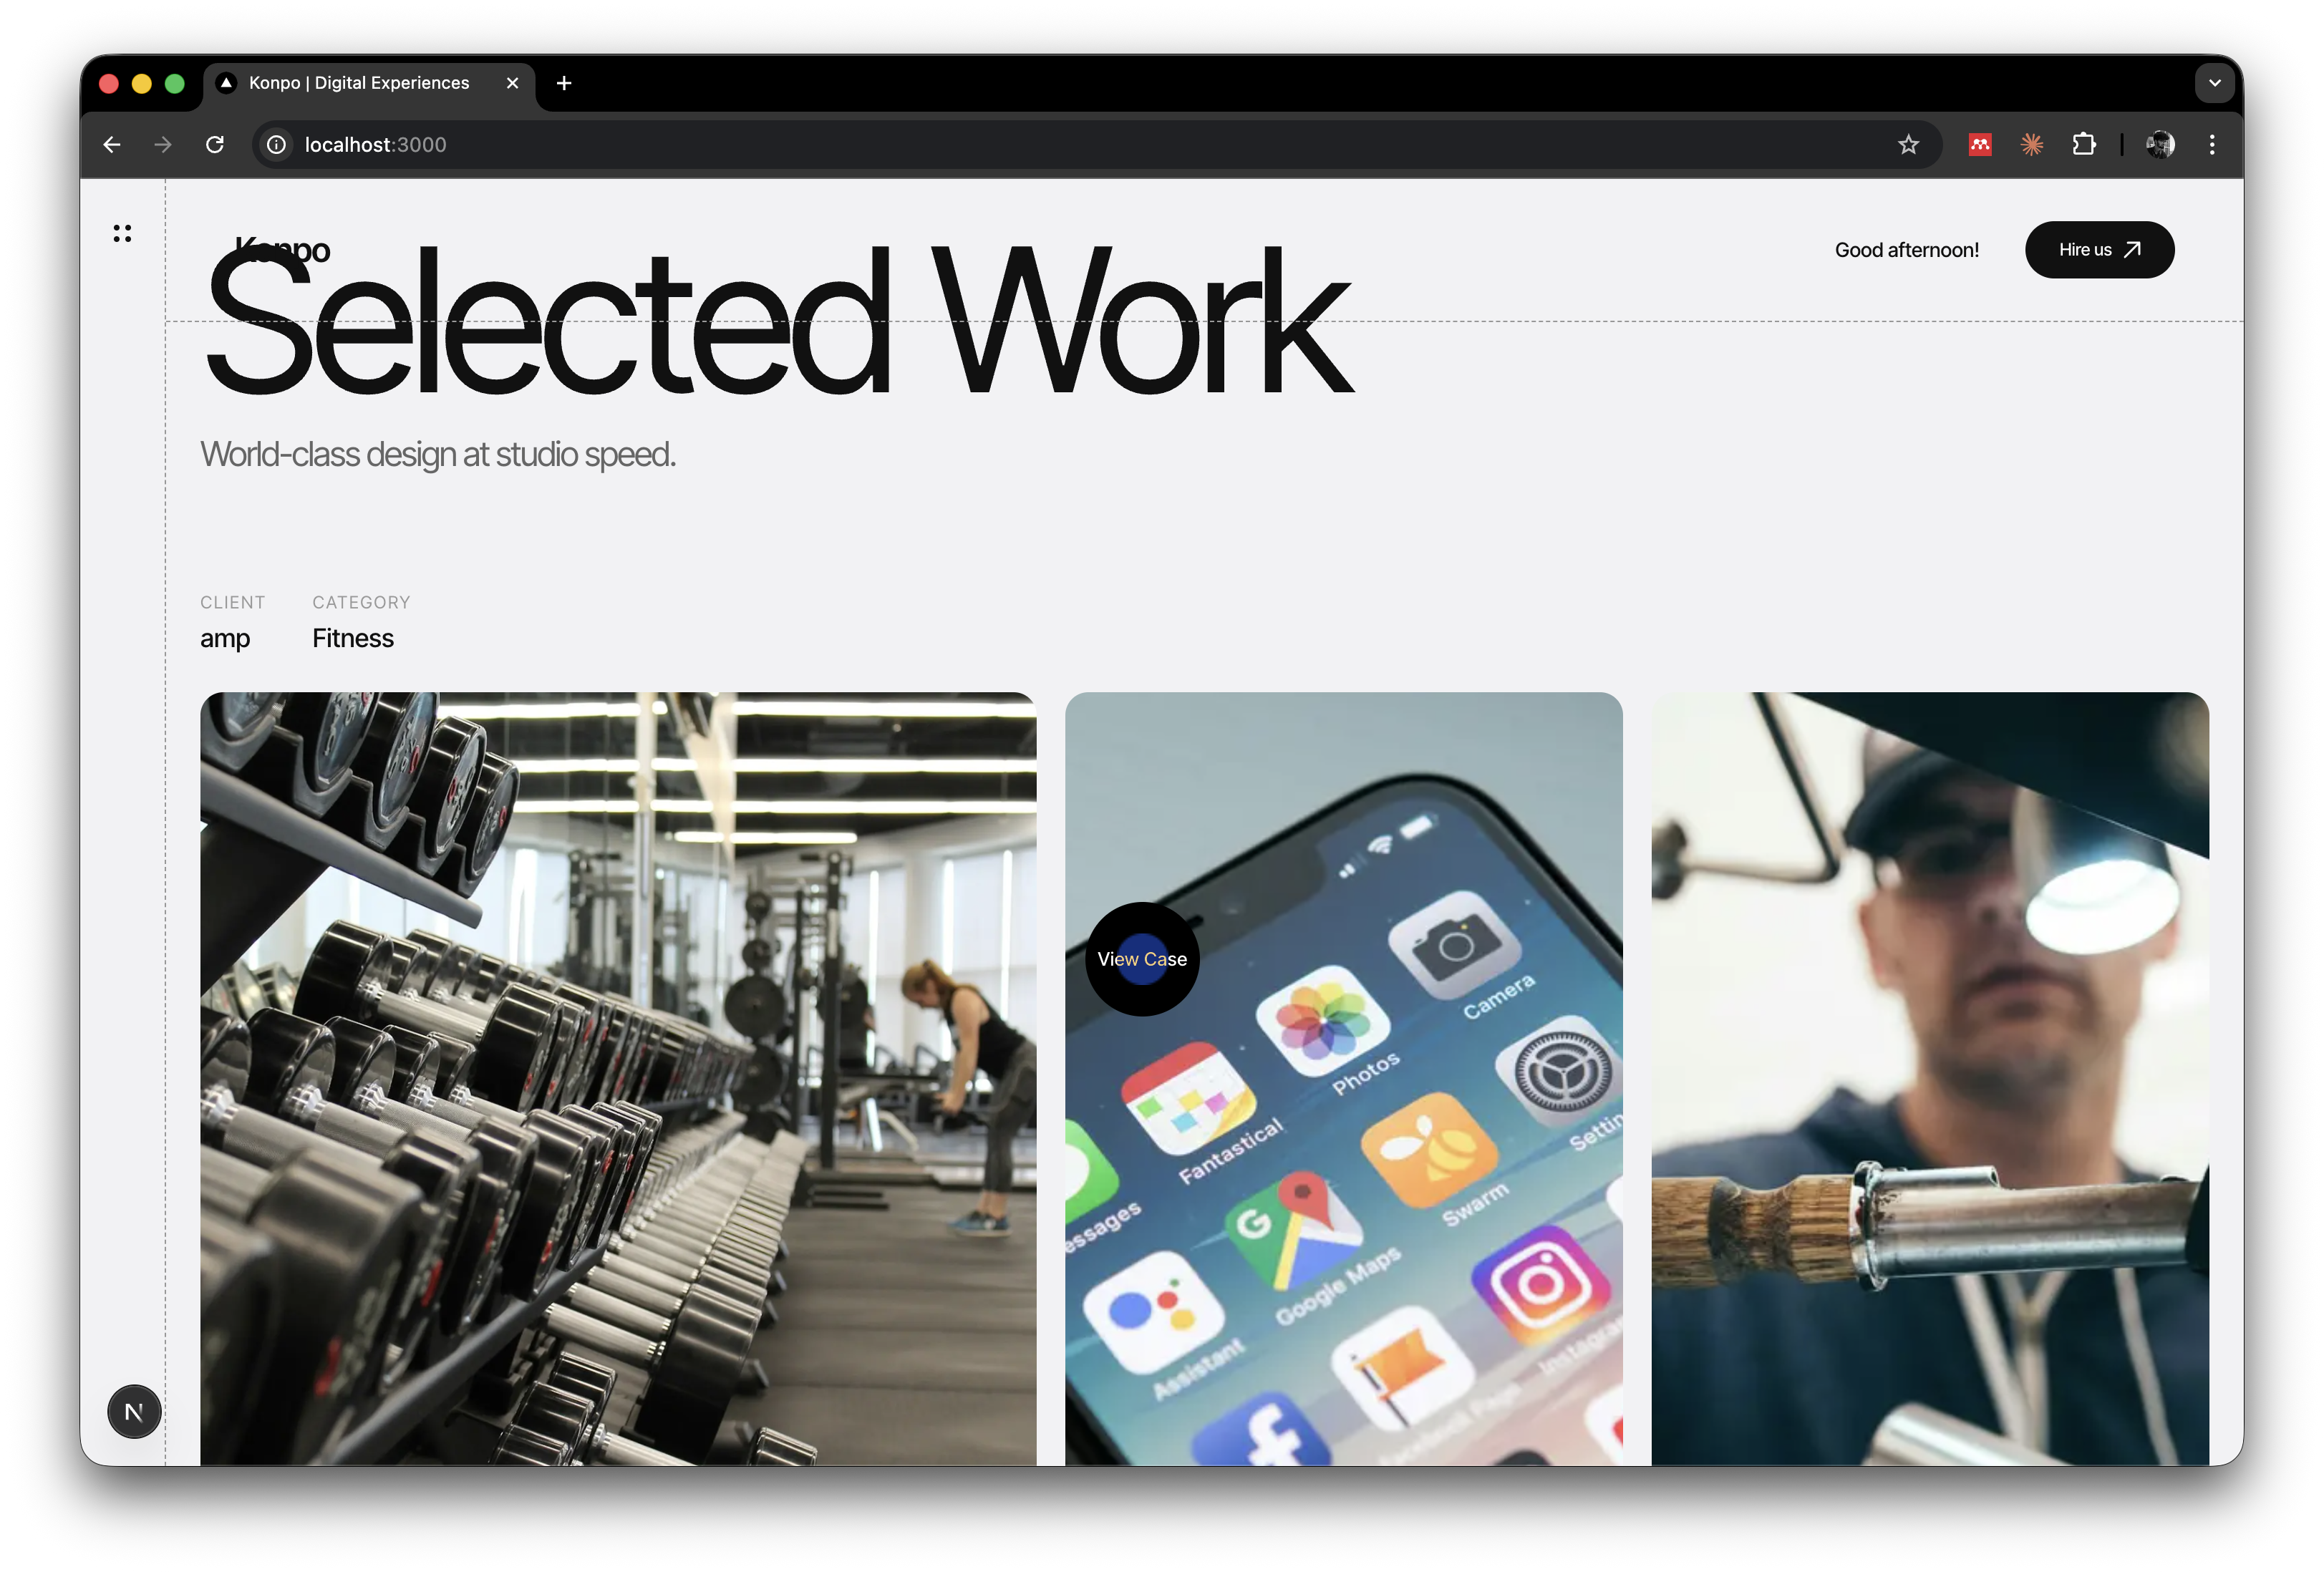
Building Selected Work
This was the most complex section. Each project case study had a different layout. The original site had an art directed bento grid. Unique compositions for each project.
Our first instinct was to describe all three layouts in one prompt. Bad idea. When you ask for three different layouts at once, the agent gets confused. It tries to create abstractions. Shared components. Generic patterns. You end up with three mediocre layouts instead of three great ones.
We recorded each case study separately. Three short videos. Uploaded each to Gemini.
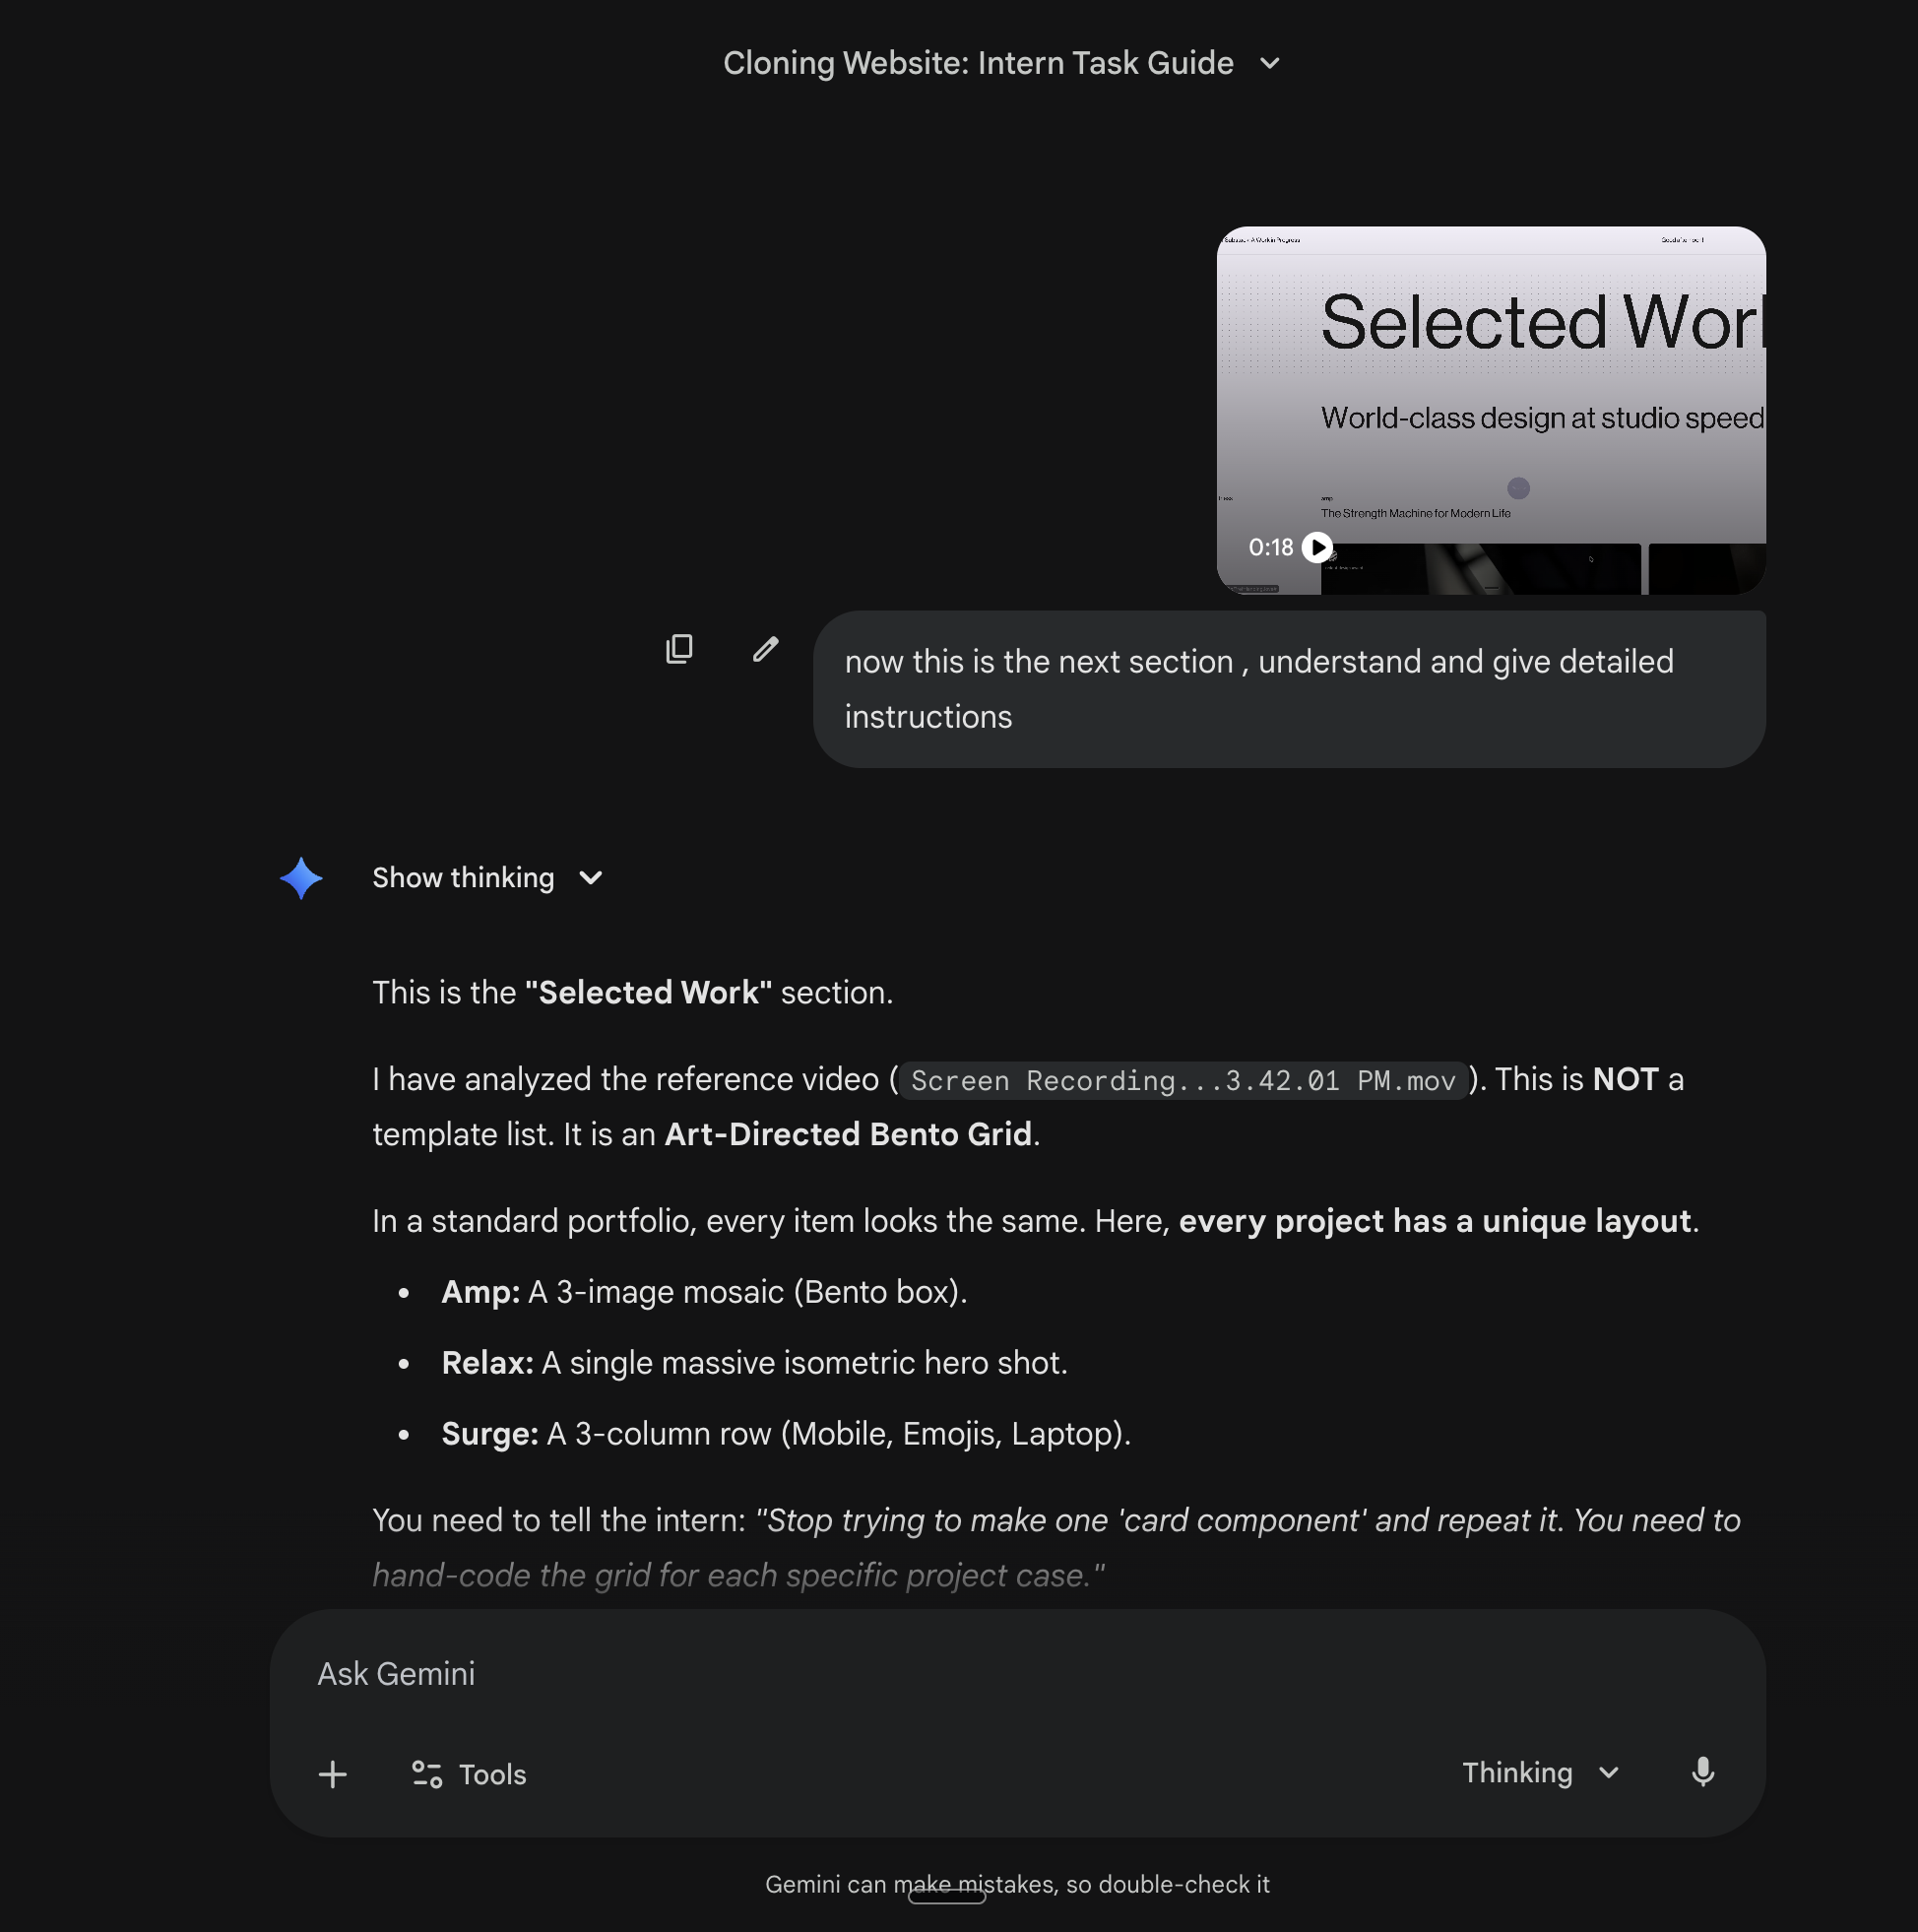
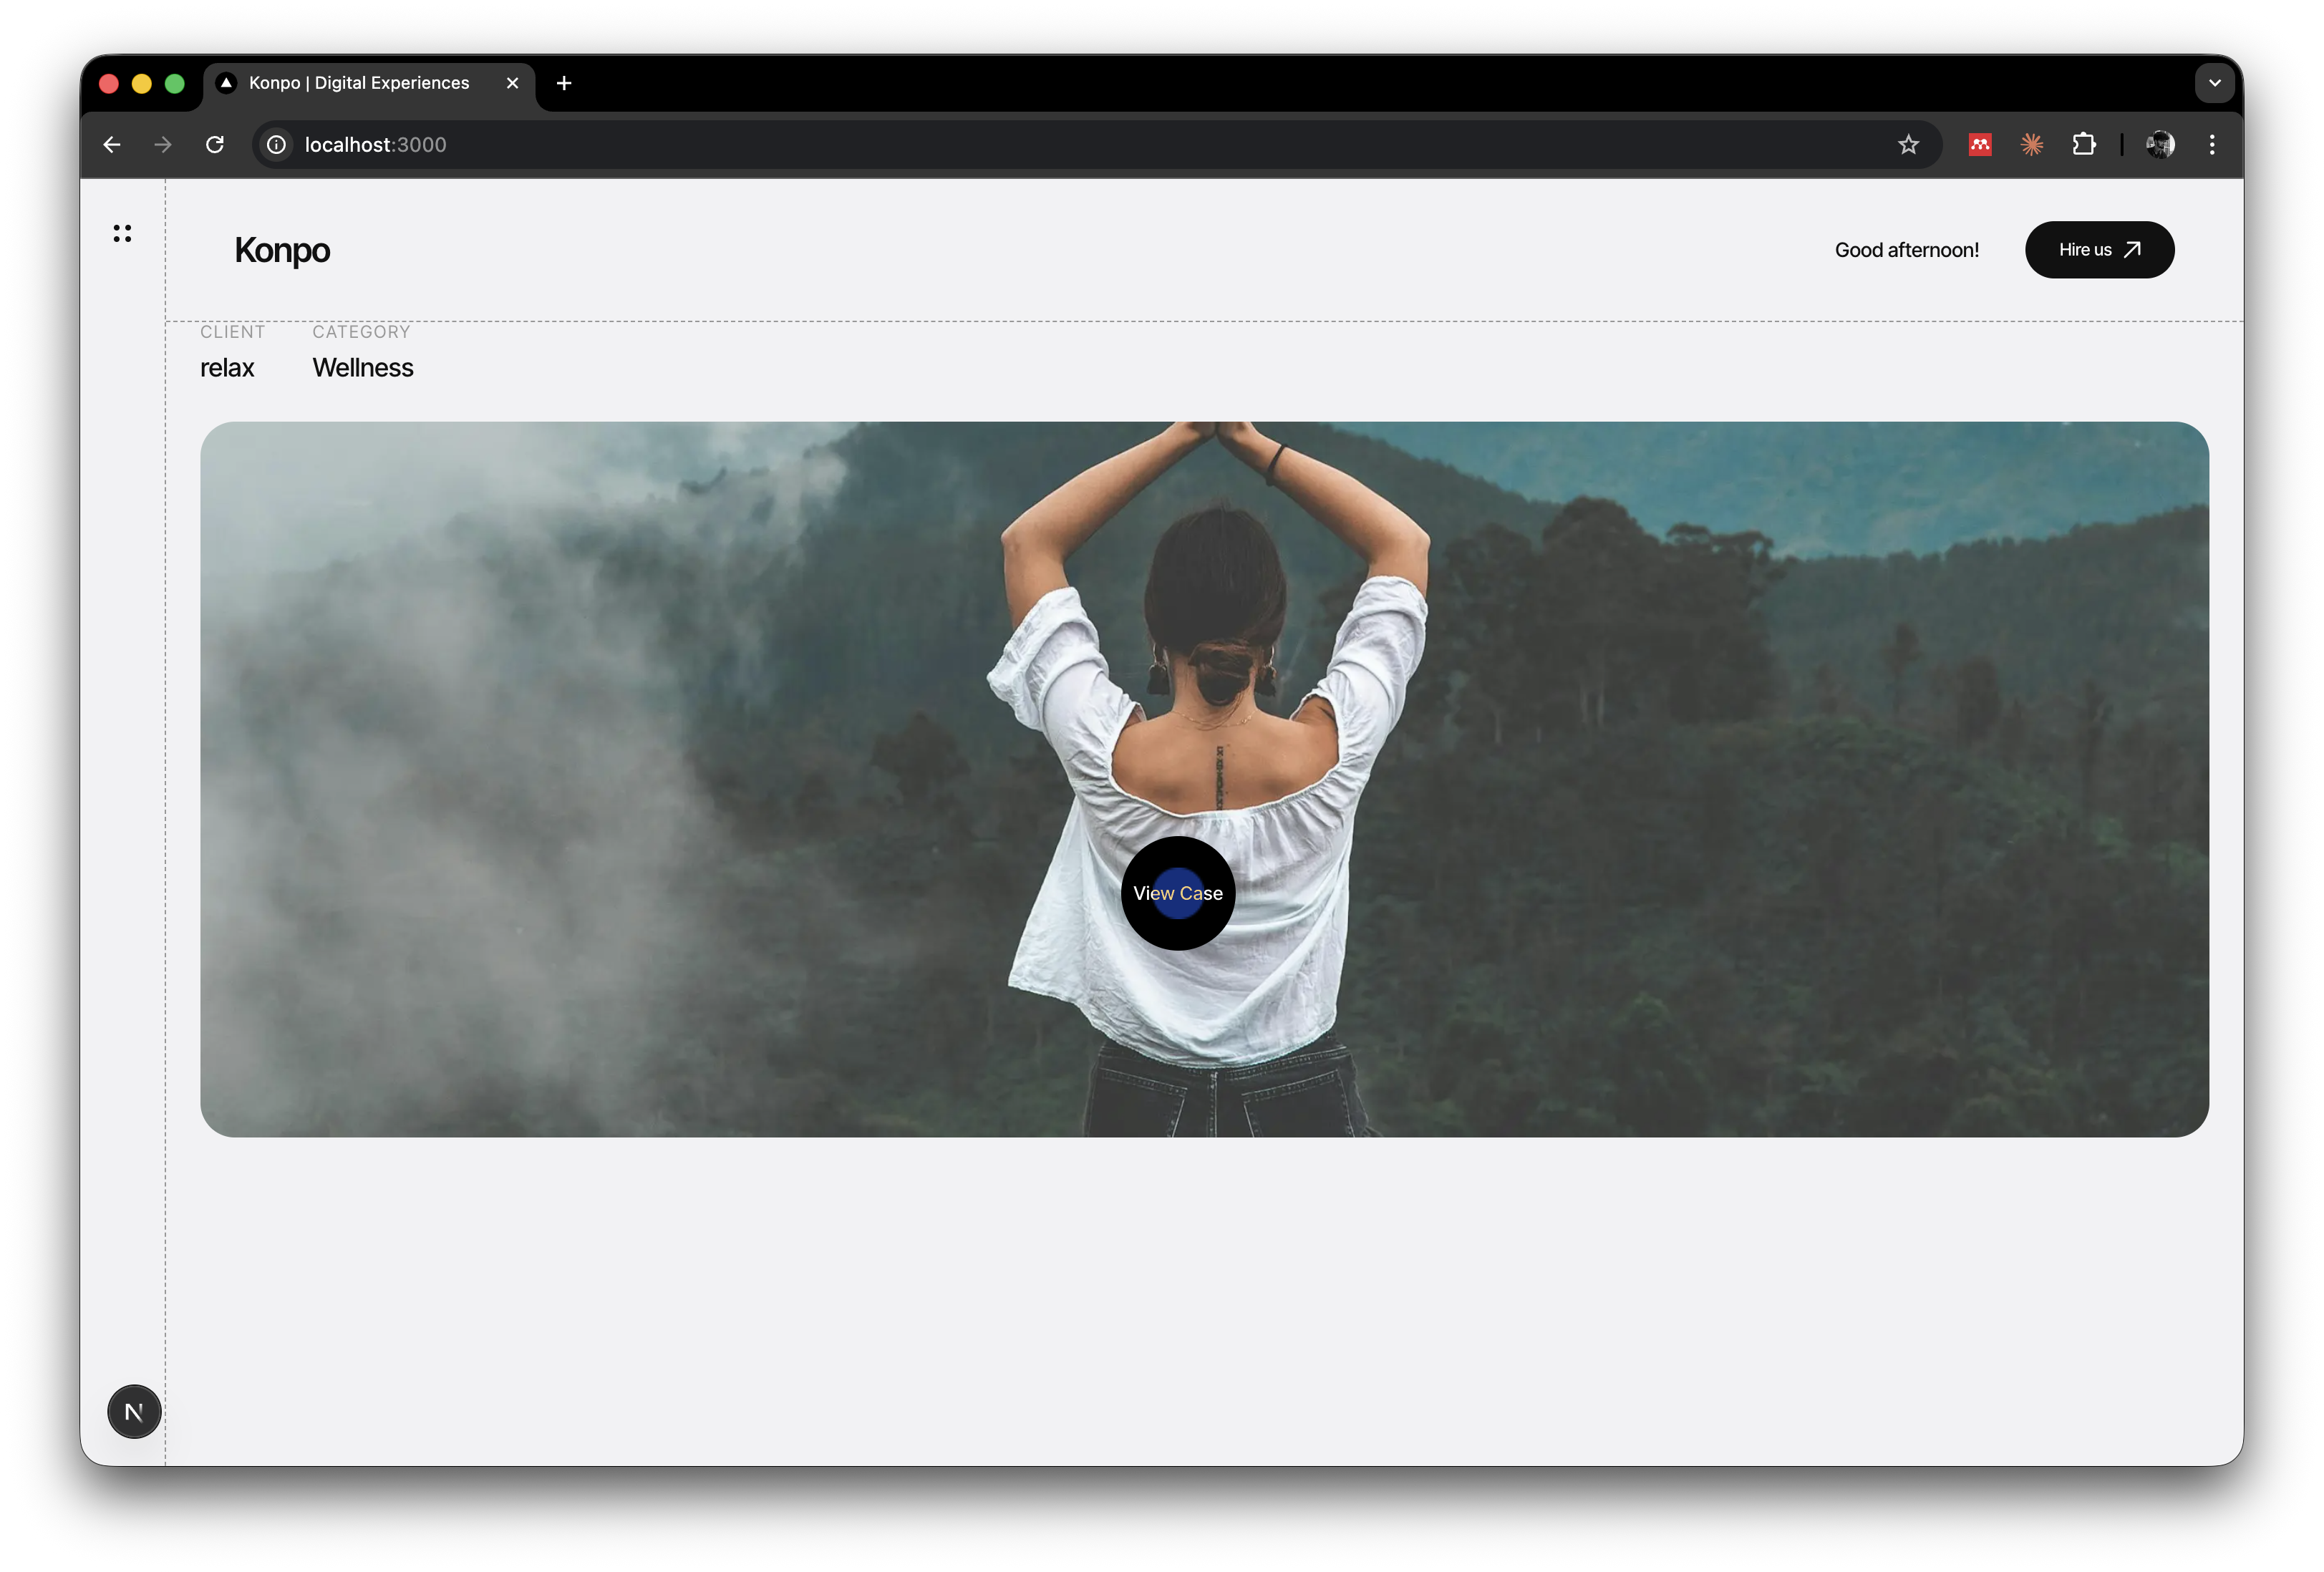
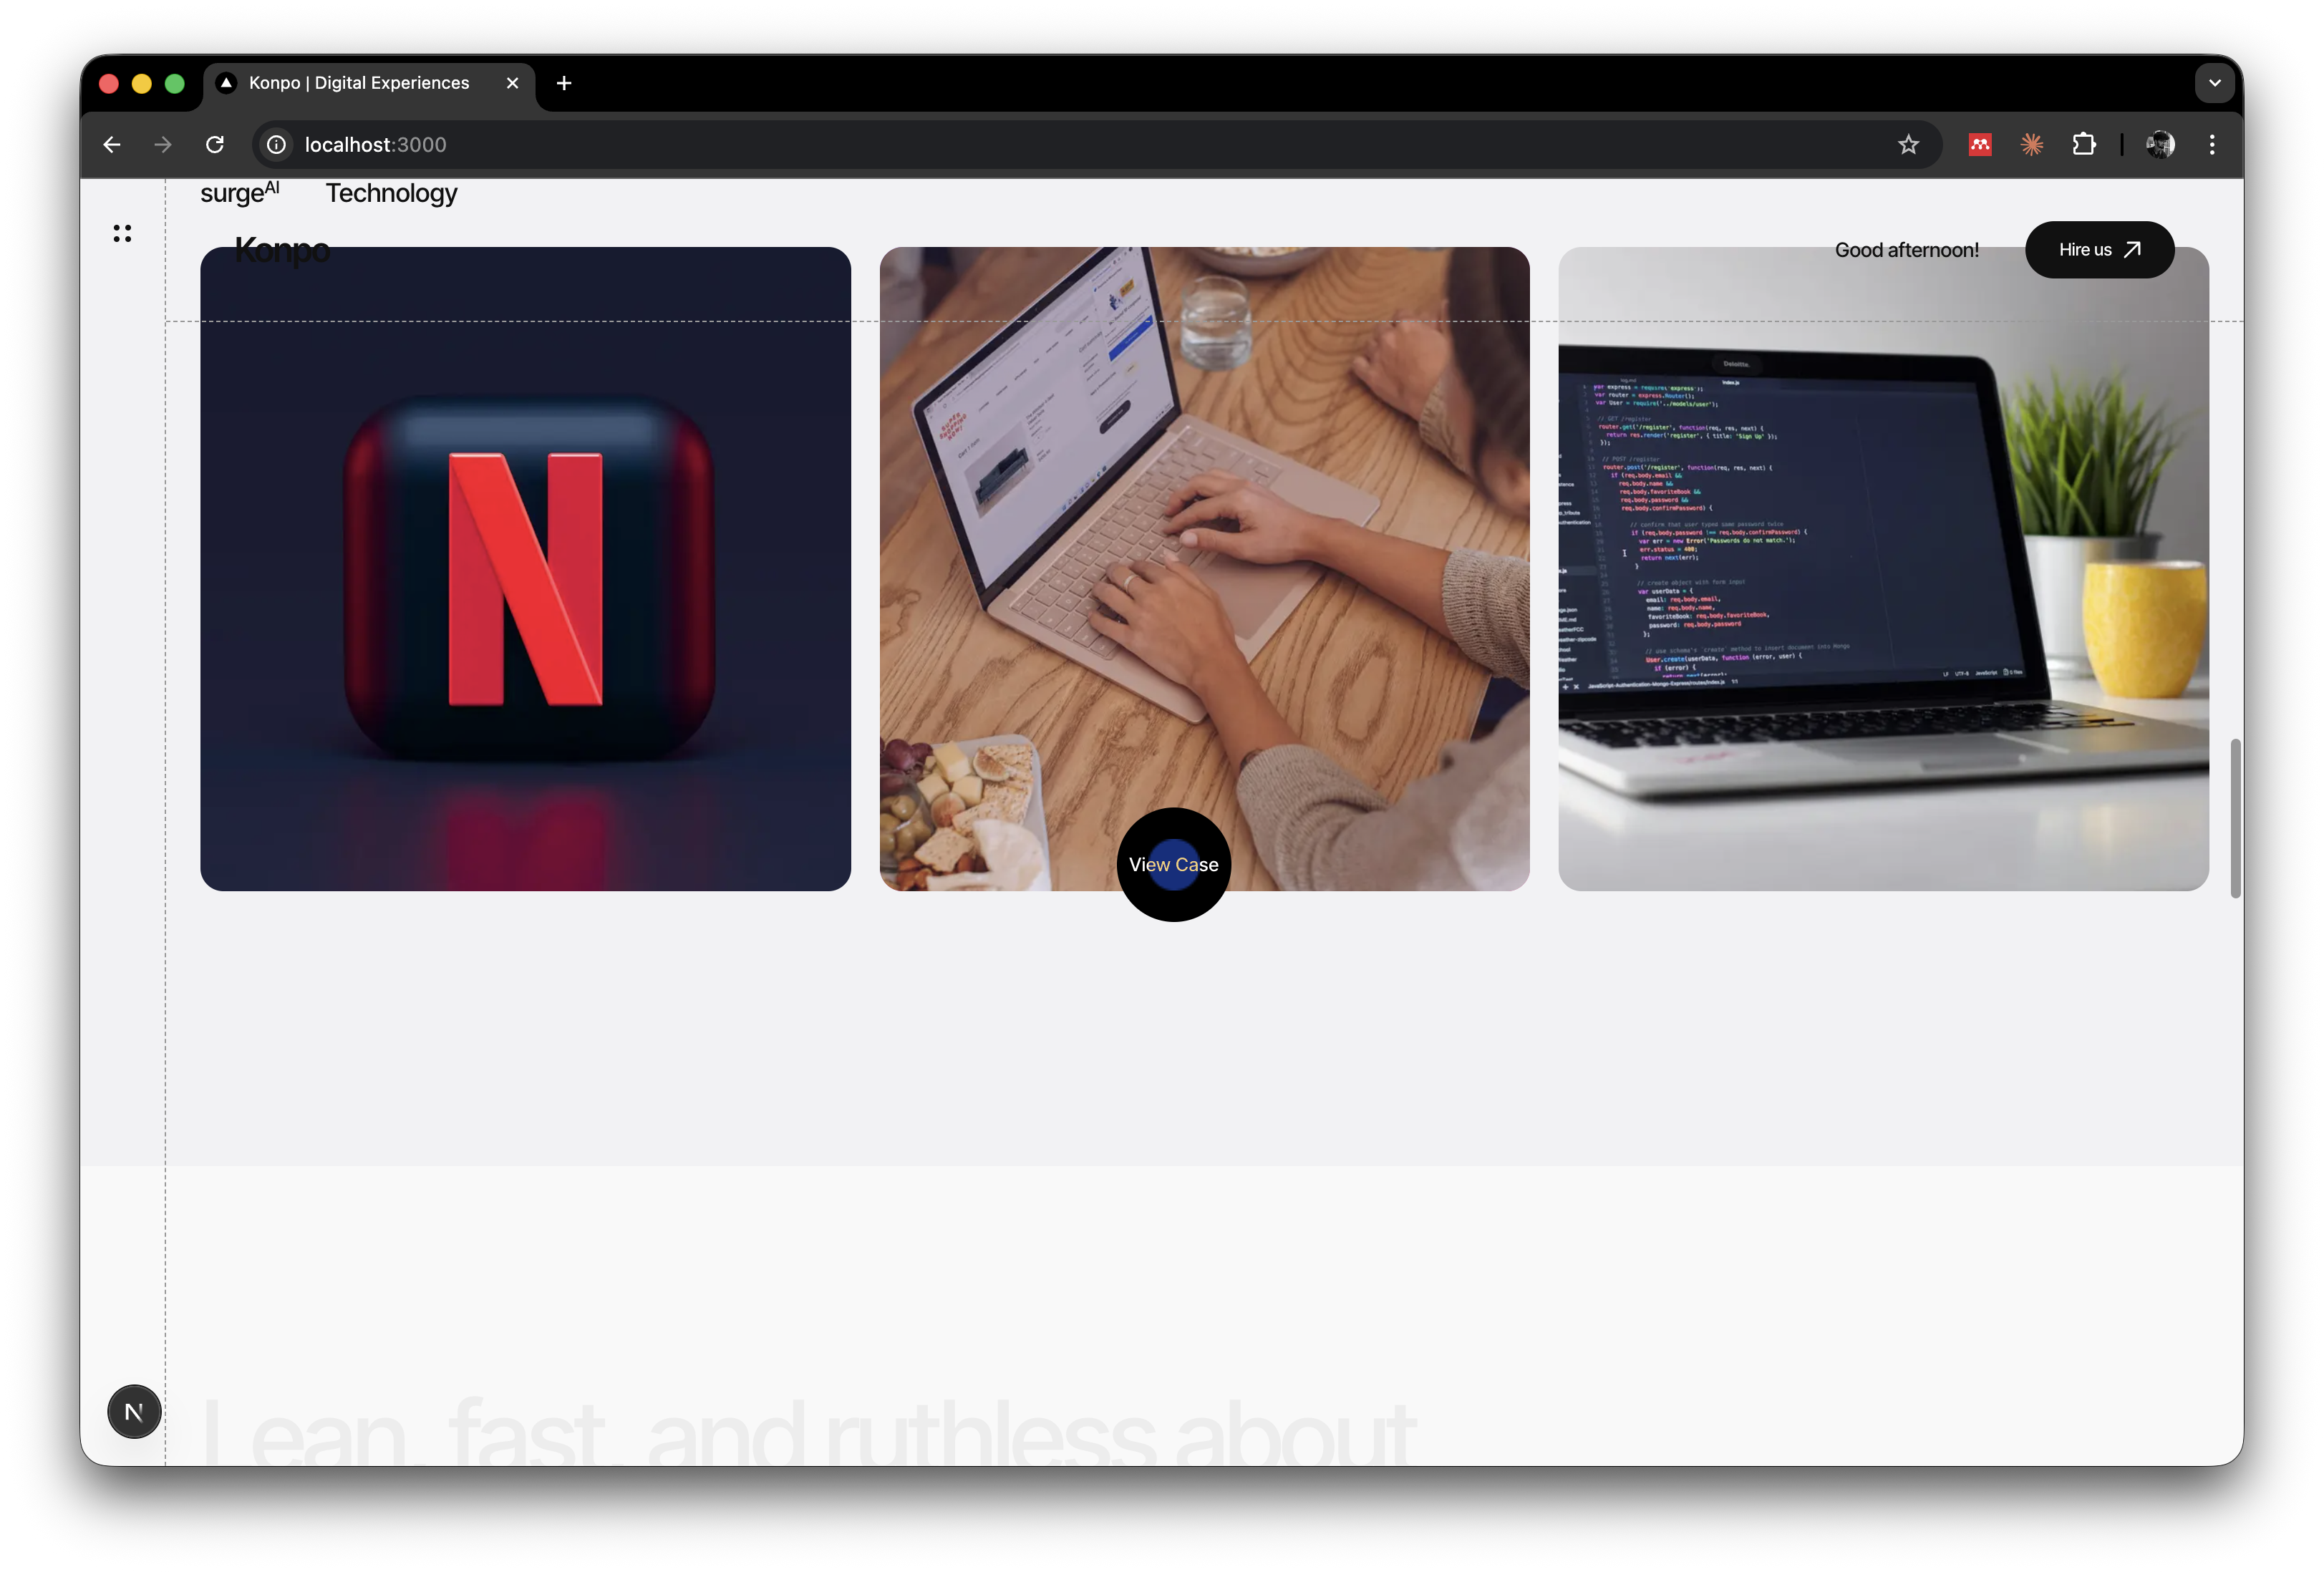
Gemini gave us specific instructions for each. Amp uses a 2x2 mosaic with the hero image spanning the left column. Relax is a full bleed hero with centered text. Surge uses three equal columns. Then we built them one at a time. Finished Amp. Reviewed. Approved. Then Relax. Then Surge.
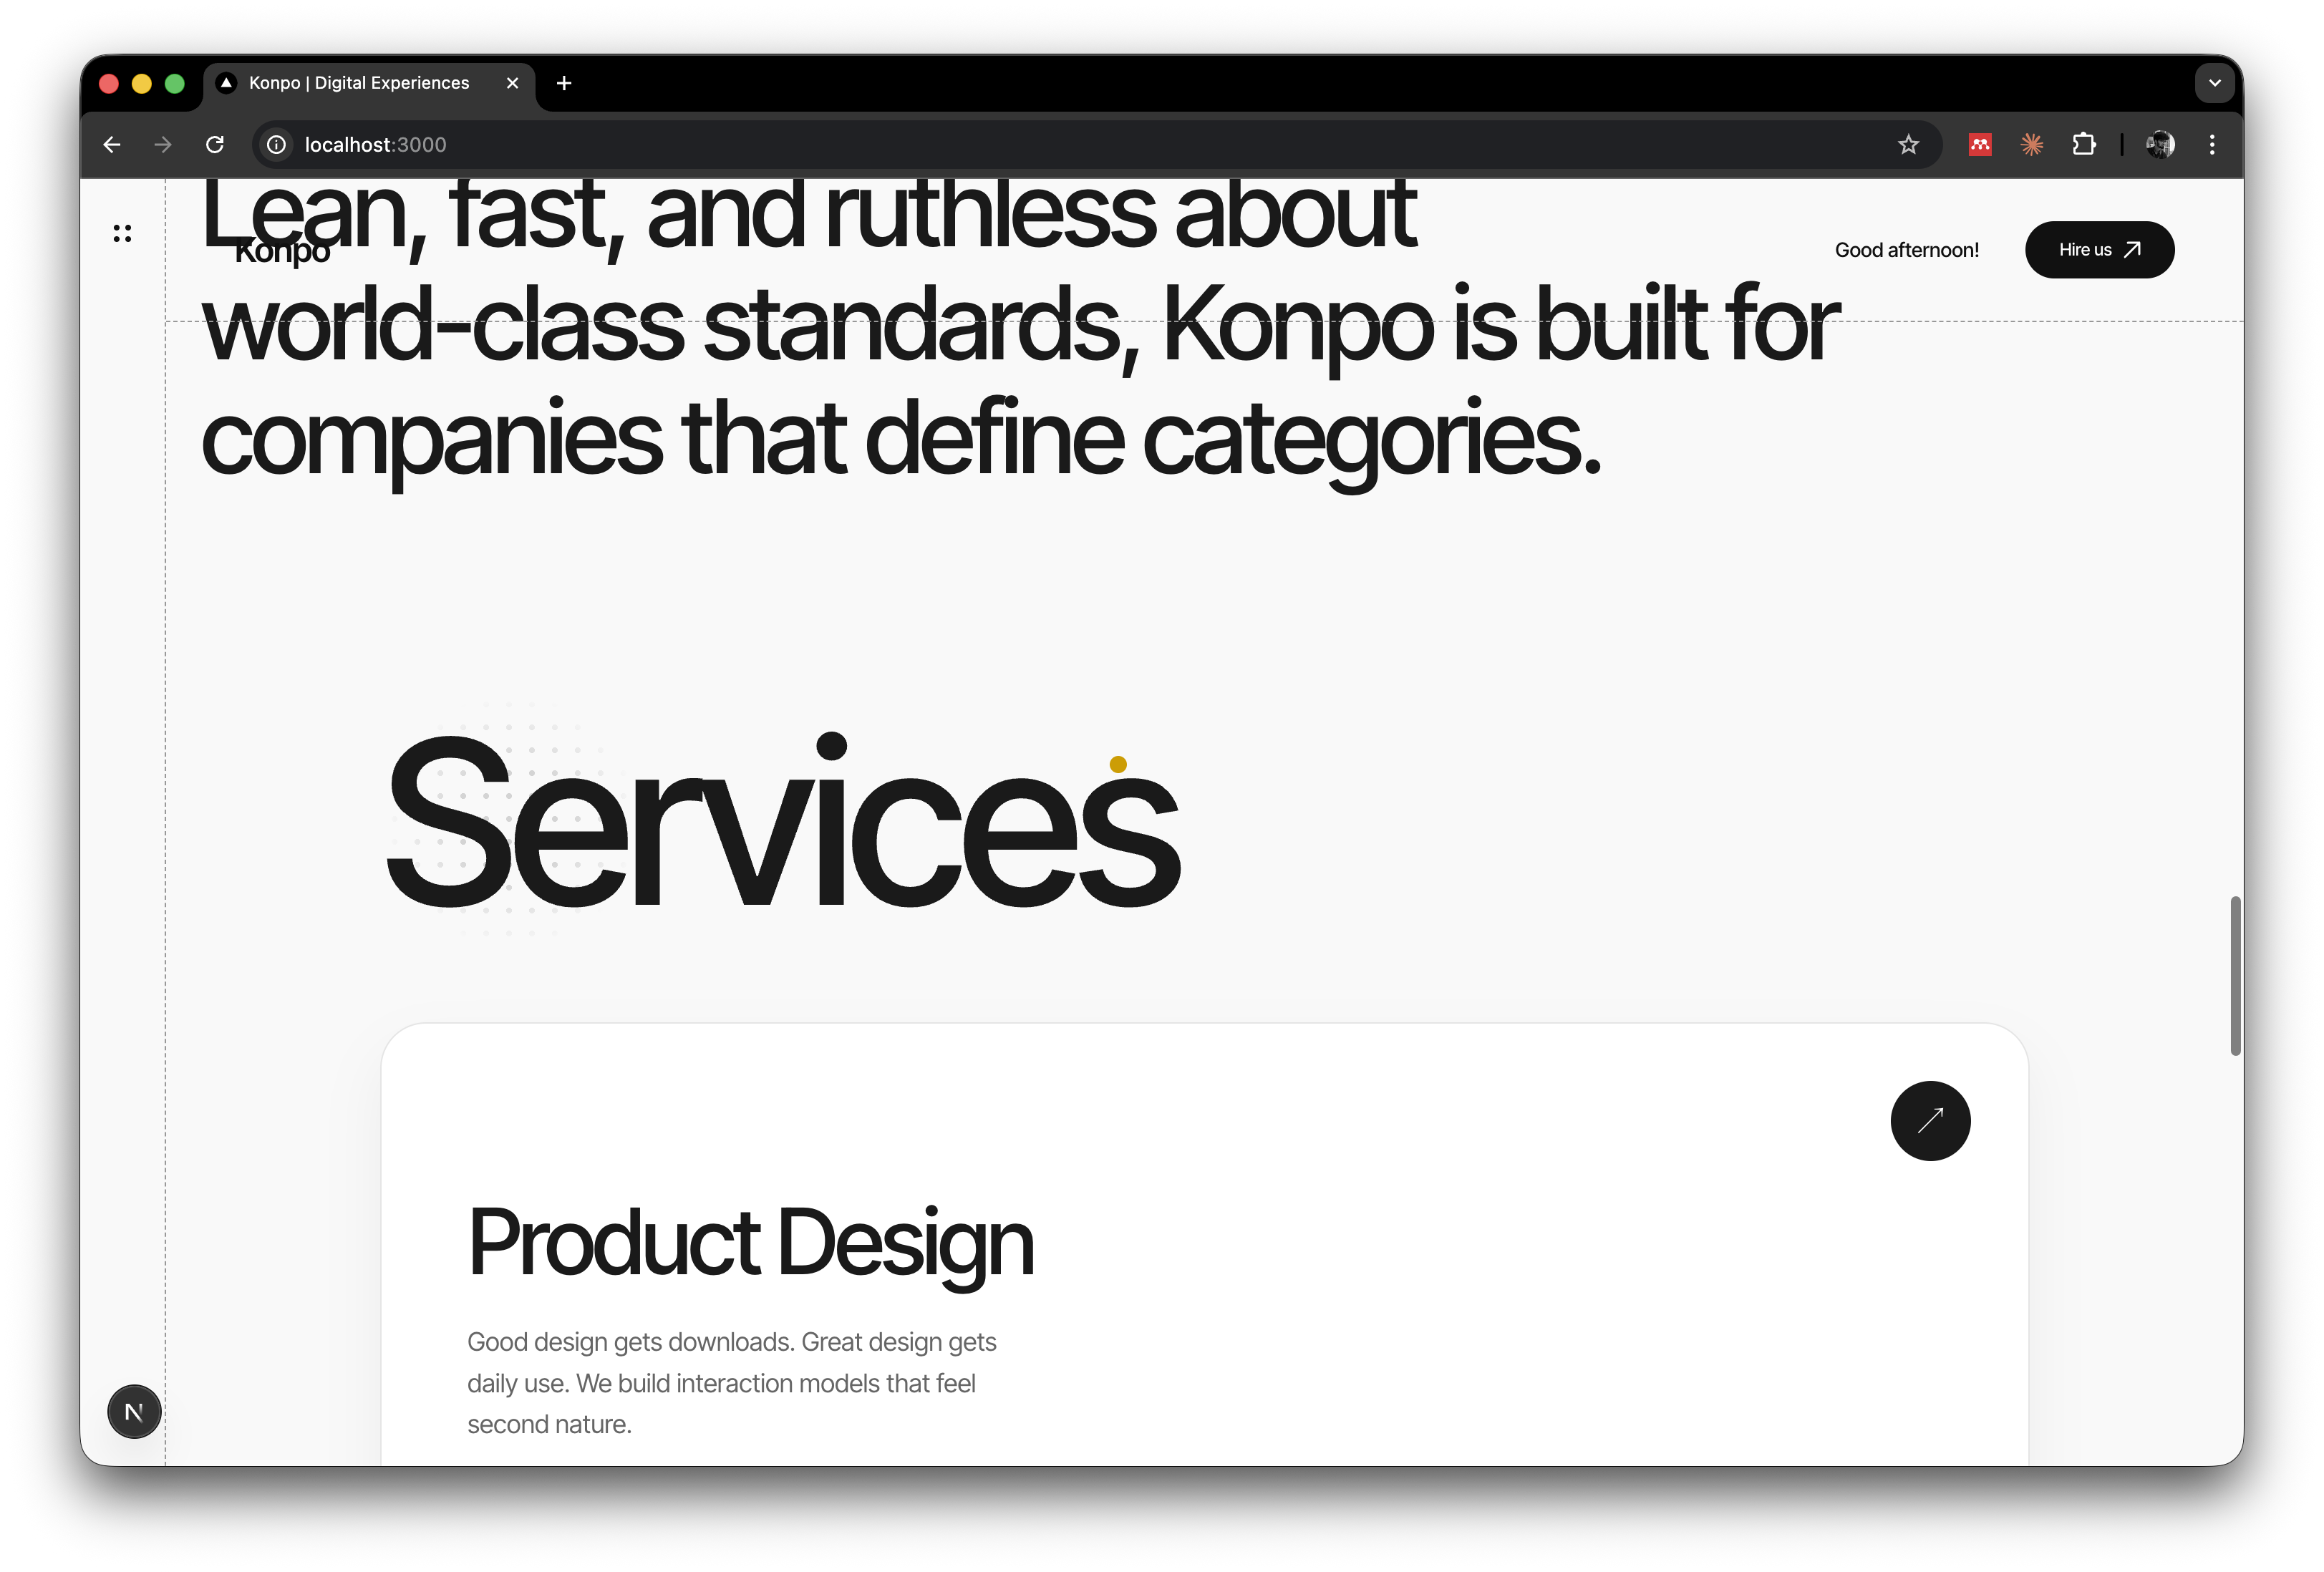
The services section was tricky. Cards that stack on top of each other as you scroll. Scale down as the next one approaches.
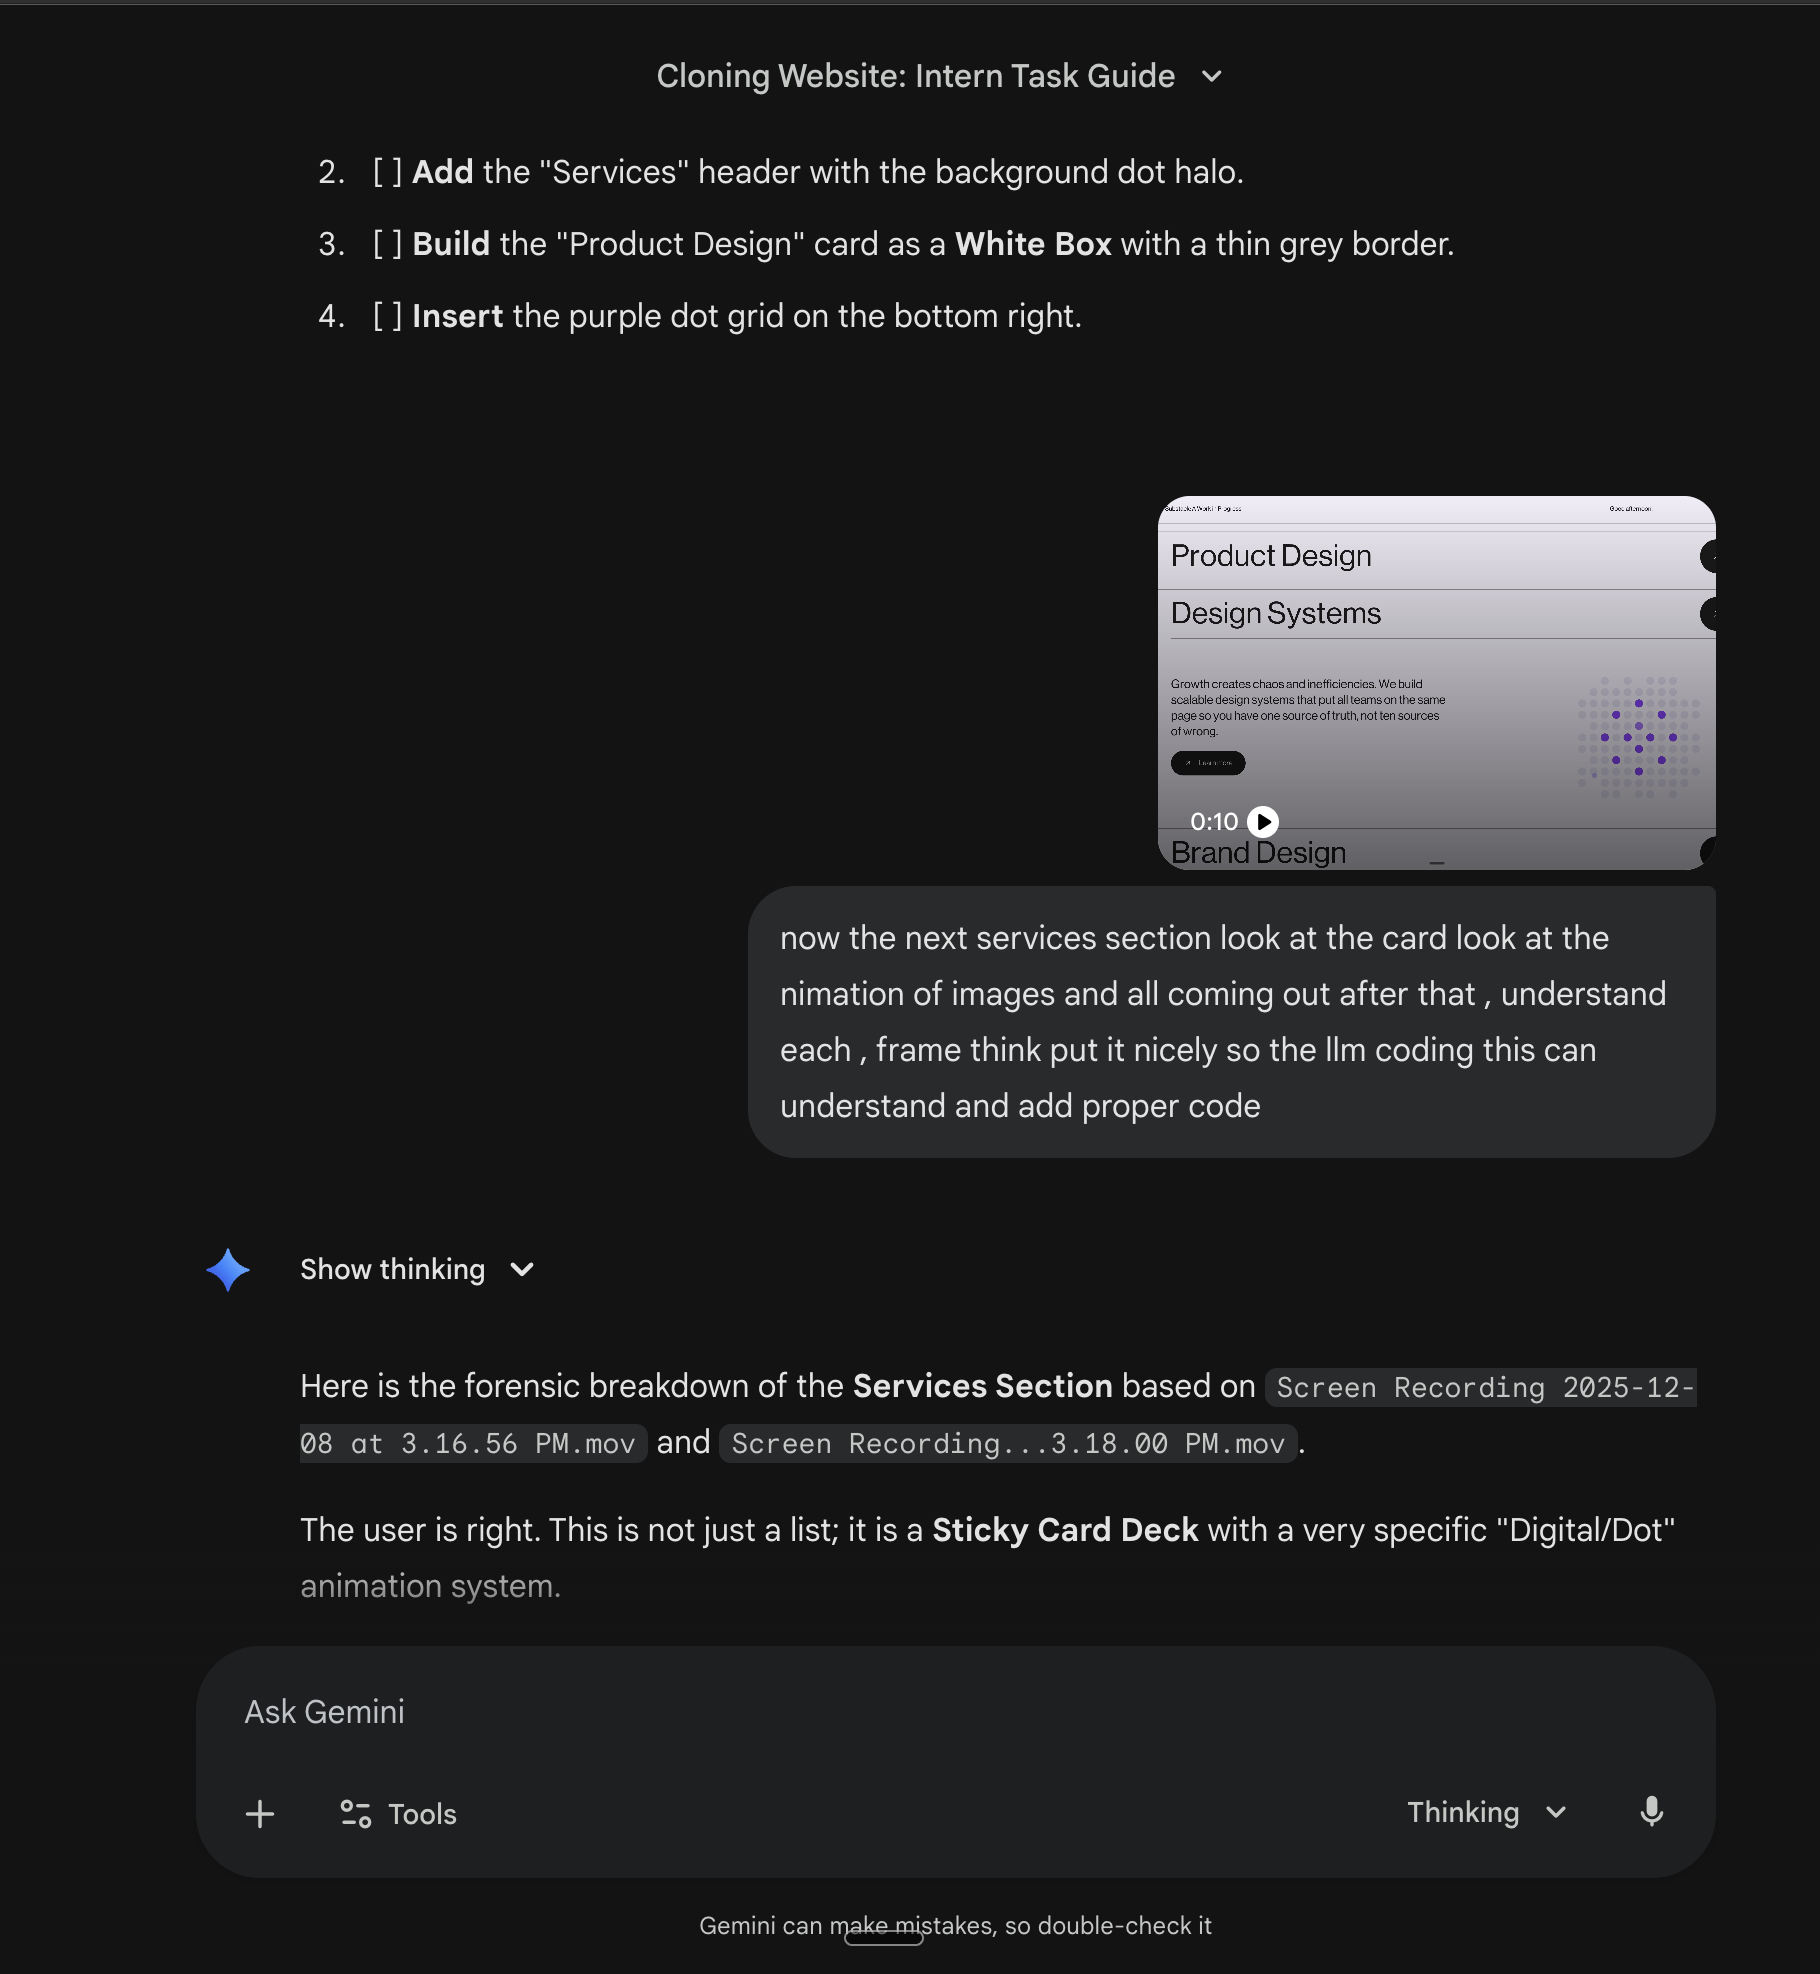
Here's something that saved us hours: name the pattern. When we just said "cards that stack on scroll," the agent tried various approaches. When we said "sticky card deck like Apple's AirPods Pro page" it immediately knew the pattern. Reference well known implementations.
Gemini's gap analysis caught things we missed.
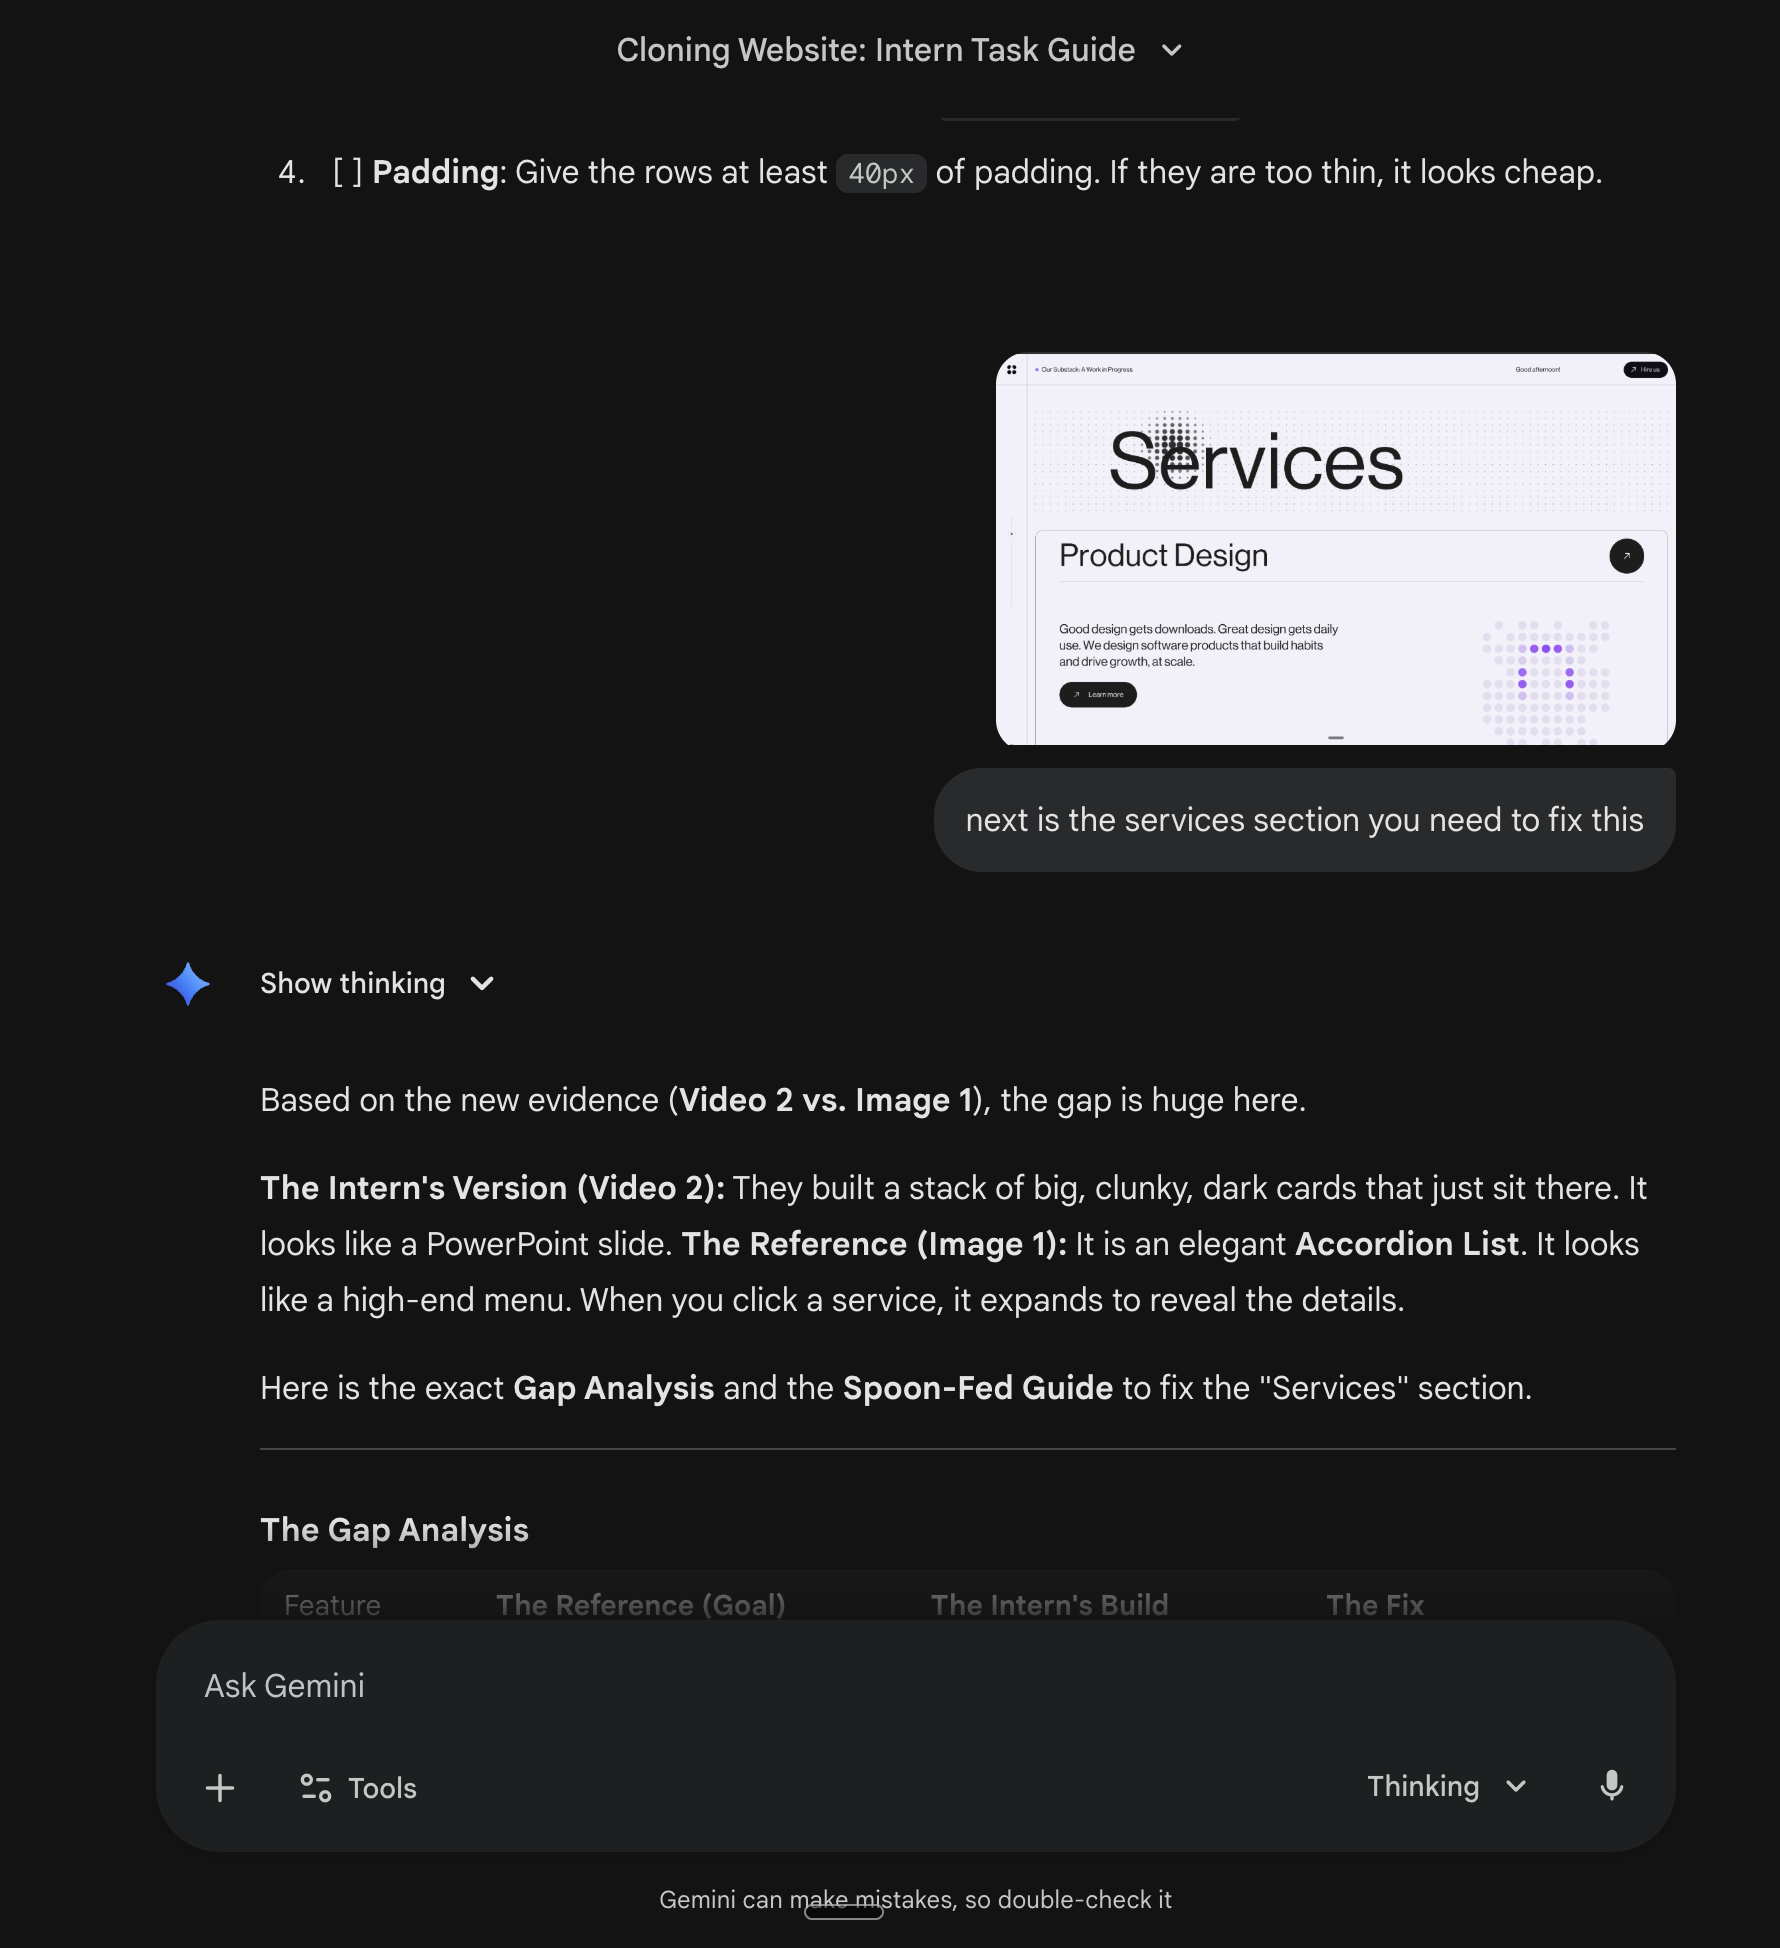
This is the feedback loop in action. Build. Compare to reference. Identify gaps. Fix. Repeat.
Hero with work cards strip:
The Amp case study:
Relax full bleed:
Tech cards grid:
Services with the dot backdrop:
Each section built one at a time. Specific feedback. Named patterns. That's the formula.
The Result
37 minutes. From "I like this site" to "I built this site."
We didn't write most of this code. We didn't know how to implement half of it when we started. We couldn't even name the techniques.
But we could record a video. We could describe problems. We could review code and say "not quite right, the spacing feels off."
That's the new skill. Not writing code. Guiding agents that write code.
Key Code
Here's the interesting parts. Full code is in the repo.
The Dot Grid (The 3D Magic)
The core interaction logic:
// Inside useFrame. Runs every frame.
const mouseX = (state.pointer.x * viewport.width) / 2
const mouseY = (state.pointer.y * viewport.height) / 2

particles.forEach((particle, i) => {
    const { x, y } = particle
    const dist = Math.sqrt(
        Math.pow(x - mouseX, 2) + Math.pow(y - mouseY, 2)
    )

    // Scale: 1.0 to 1.8 based on proximity
    let scale = 1
    const maxDist = 3
    if (dist < maxDist) {
        scale = 1 + Math.pow(1 - dist / maxDist, 2) * 0.8
    }

    dummy.position.set(x, y, 0)
    dummy.scale.set(scale, scale, scale)
    dummy.updateMatrix()
    meshRef.current!.setMatrixAt(i, dummy.matrix)

    // Color: grey to indigo based on proximity
    const color = new THREE.Color()
    if (dist < maxDist) {
        const t = 1 - (dist / maxDist)
        color.setStyle('#E5E5E7')
        color.lerp(new THREE.Color('#6366f1'), t * 0.8)
    } else {
        color.setStyle('#E5E5E7')
    }
    meshRef.current!.setColorAt(i, color)
})
Why InstancedMesh? One draw call for 144 dots instead of 144 separate calls. 60fps.
Sticky Card Stack (The Scroll Effect)
Cards that scale down as you scroll past:
useLayoutEffect(() => {
    const ctx = gsap.context(() => {
        cardsRef.current.forEach((card, index) => {
            if (!card) return
            const nextCard = cardsRef.current[index + 1]

            if (nextCard) {
                gsap.to(card, {
                    scale: 0.95,
                    ease: "none",
                    scrollTrigger: {
                        trigger: nextCard,
                        start: "top bottom",
                        end: "top top",
                        scrub: true,
                    }
                })
            }
        })
    }, container)
    return () => ctx.revert()
}, [])
Each card is sticky top-[15vh]. As the next card approaches, the current one scales to 0.95. Creates the stacking illusion.
Dependencies
npm install three @react-three/fiber @react-three/drei \
    gsap @gsap/react \
    @studio-freight/react-lenis \
    zustand lucide-react clsx tailwind-merge
The Workflow
1. RECORD    Screen capture of reference site (30 to 60 sec)
             ↓
2. ANALYZE   Upload to Gemini 3 Pro
             Get: tech stack, components, animations, colors
             ↓
3. PLAN      Feed analysis to Antigravity
             Agent creates implementation plan
             ↓
4. BUILD     Agent writes code, you review
             ↓
5. ITERATE   Preview. Feedback. Refine. Repeat.
             ↓
6. DEPLOY    One click to Vercel
The Real Cheat Code
Here's what we cracked.
You see a website with cool animations. Dots that react to your mouse. Cards that stack on scroll. Smooth transitions everywhere. You want to build it.
But you're not a frontend developer. You don't know the words. Is that WebGL or Canvas? Is that GSAP or Framer Motion? What's the easing curve? What's the lerp value? You can't Google it because you don't know what to search for. You can't prompt an AI to build it because you can't describe it.
Screenshots don't help. A screenshot shows one frozen moment. It can't show you that the dots scale from 1.0 to 1.8 based on mouse proximity. It can't show you the 3 unit radius of influence. It can't show you the timing.
Video captures all of that. The motion. The timing. The response to interaction.
And Gemini 3 Pro's video mode does something no other tool does. It watches the video like a senior frontend developer would. Then it translates what it sees into exact technical terminology.
You show it dots reacting to a cursor. It tells you: "12x12 grid using InstancedMesh. Scale ranges from 1.0 to 1.8. Color lerps from #E5E5E7 to #6366f1. Radius of influence: 3 units."
You show it cards stacking on scroll. It tells you: "GSAP ScrollTrigger with scrub. Sticky positioning at top: 15vh. Scale animates from 1 to 0.95 as next card approaches."
You show it smooth scrolling. It tells you: "Lenis. Lerp: 0.1, duration: 1.5."
That's the crack. Video gives Gemini the context. Gemini gives you the vocabulary. The vocabulary lets you prompt agents that actually build.
We went from "I like how that moves" to "InstancedMesh with proximity-based scale interpolation" in 45 seconds. That translation is everything.
The Other Cheat Codes
Once you have the vocabulary, these patterns help:
-
Paste everything. Don't summarize Gemini's output. The agent decides what matters.
-
Plan before code. Review the agent's plan first. Cheaper to fix a plan than fix code.
-
Iterate, don't restart. The agent has context. Starting over throws it away.
-
Be specific about values. "#F2F2F4" works. "Make it lighter" doesn't.
-
One change at a time. Colors first. Then layout. Then polish.
-
Describe problems, not solutions. "The dots feel too close to the text" beats "move the div 20px left."
-
When stuck, zoom out. Go back to Gemini. Record more video. Get more context.
-
Lock your design system. Four colors. One font. One animation library. Constraints create cohesion.
-
Name the pattern. "Sticky card deck like Apple's AirPods page" beats "cards that stack on scroll."
-
One complex thing at a time. Three layouts in one prompt gives you three mediocre layouts.
The Insight
We've used a lot of AI coding tools. This workflow is different.
The breakthrough isn't AI writing code. AI has been writing code for years. The breakthrough is AI giving you the words to describe what you're looking at.
Every other workflow assumes you already know what you want. You type a prompt, AI generates code. But what if you can't write the prompt? What if you see something cool and you don't know how to describe it?
Video plus Gemini 3 Pro fixes that. You show it what you want. It tells you what you're looking at. Now you can prompt.
We went from "I don't know what this is" to "I know exactly what this is and how to build it." That's the unlock. That's why this workflow works when others don't. Everything else is iteration.
Resources
Gemini 3 Pro: ai.google.dev
Antigravity IDE: antigravityide.app
React Three Fiber: docs.pmnd.rs/react-three-fiber
GSAP: greensock.com/docs
Frequently Asked Questions
How can I use Gemini 3 Pro's video capabilities in an AI hackathon?
Gemini 3 Pro's video analysis is perfect for AI hackathons because it allows you to quickly understand and replicate complex UI designs, animations, and interactions. You can record a reference website, get technical specifications from Gemini, and build a working prototype in hours instead of days. This workflow is ideal for AI hackathon projects where time is limited and you need to move fast.
Is Gemini 3 Pro video analysis suitable for beginners in AI hackathons?
Yes, this workflow is accessible for beginners participating in AI hackathons for beginners. You don't need to know all the technical terms—Gemini provides them. The process is straightforward: record a video, upload it to Gemini, get the technical breakdown, and feed it to your AI coding assistant. This makes it perfect for hackathon participants who want to build impressive projects without deep technical knowledge upfront.
What are some AI hackathon project ideas using Gemini 3 Pro video analysis?
Some popular AI hackathon project ideas include: cloning innovative UI designs from reference sites, building animated interfaces based on video analysis, creating responsive layouts that match specific design patterns, or developing interactive components that replicate complex animations. These projects showcase your ability to translate visual concepts into code quickly, which is highly valued in AI hackathons.
How long does it take to learn Gemini 3 Pro video analysis for an AI hackathon?
The workflow itself is simple and can be learned in about 30 minutes. The real time investment is in building your project, but Gemini's analysis dramatically speeds this up. For AI hackathons, this means you can go from idea to working prototype much faster than traditional development methods, giving you more time to add unique features and polish your presentation.
Are there any limitations when using Gemini 3 Pro video analysis in time-limited hackathons?
The main consideration is that you'll need access to Gemini 3 Pro (which requires an API key) and a screen recording tool. However, both are readily available, and the workflow is designed for speed. The video analysis provides detailed technical specifications that eliminate guesswork, making this approach ideal for online AI hackathons where you need to build quickly and accurately.
37 minutes. Screen recording to deployed site. This is the workflow.